
Blending layers with faces in Photoshop
This Photoshop tutorial will show you how to combine images together to make a composite. I will show you a tip that helps automatically isolate faces to make posters and things, you can also use this for retouching.
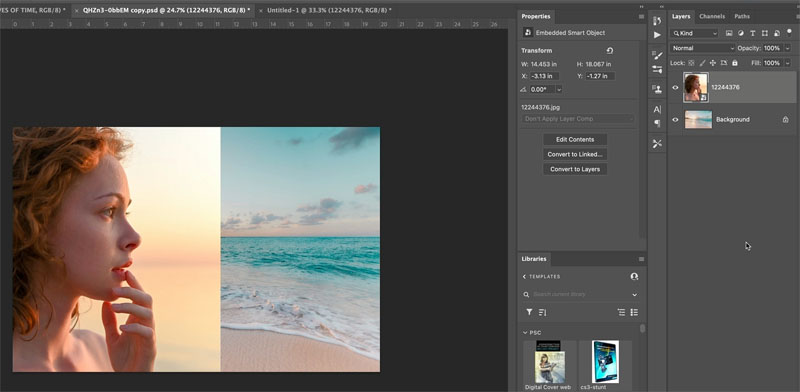
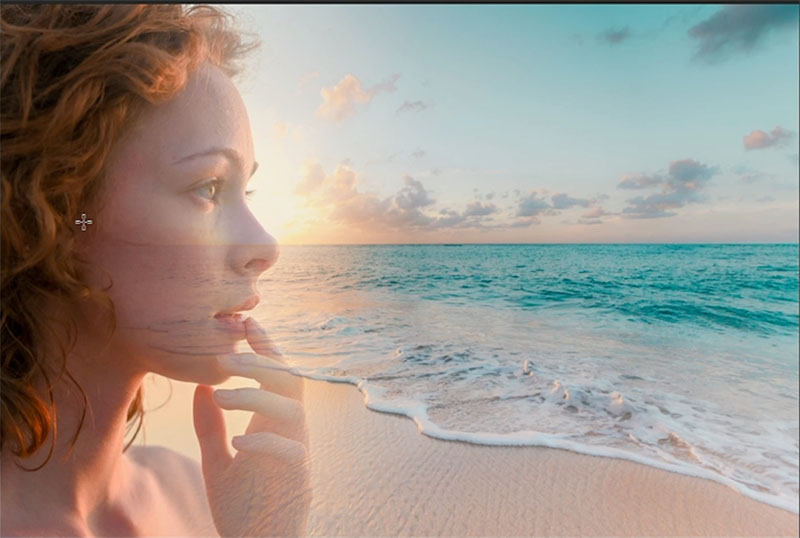
This is how you make images like the one I quickly threw together here.

1. Combine 2 images into one document. Here is a simple tutorial to combine images
See the face on the layer above the background
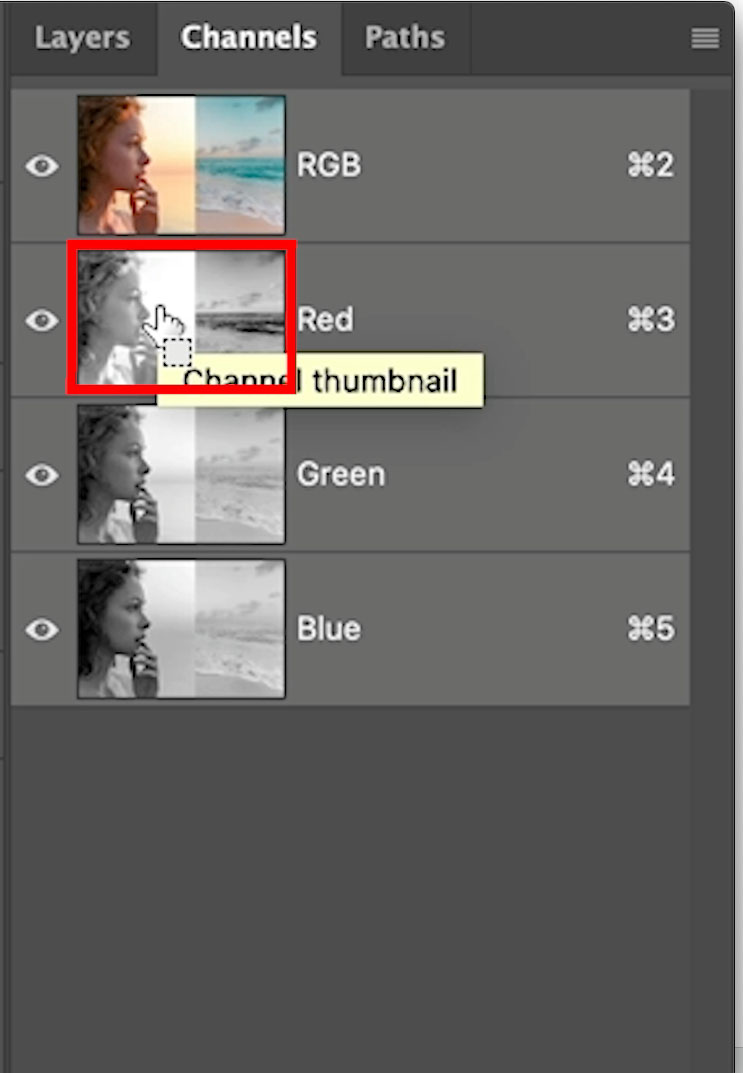
2. Lets isolate the face
Choose the Channels panel
Hold down Ctrl/Cmd and click on the red channel.
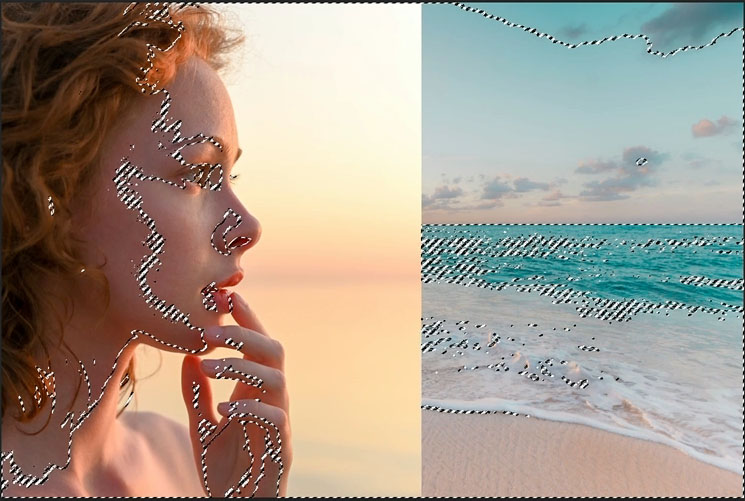
3. This will load a selection of the reds. It will grab all the reds, which exist in some degree in every skin tone.
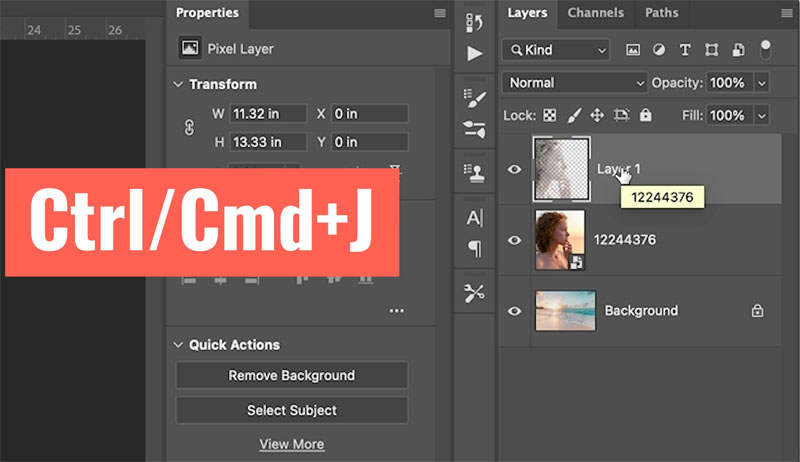
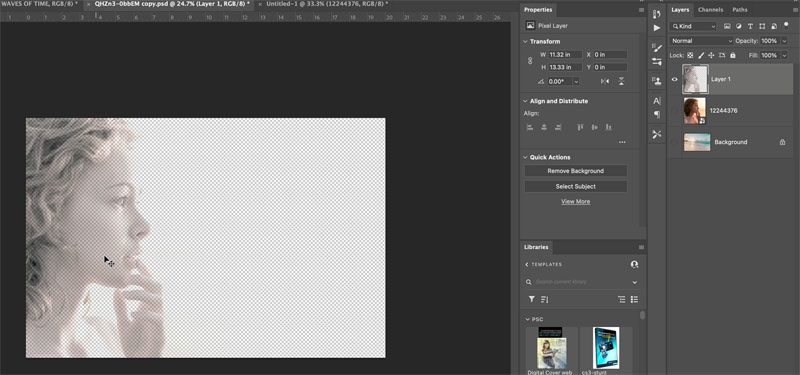
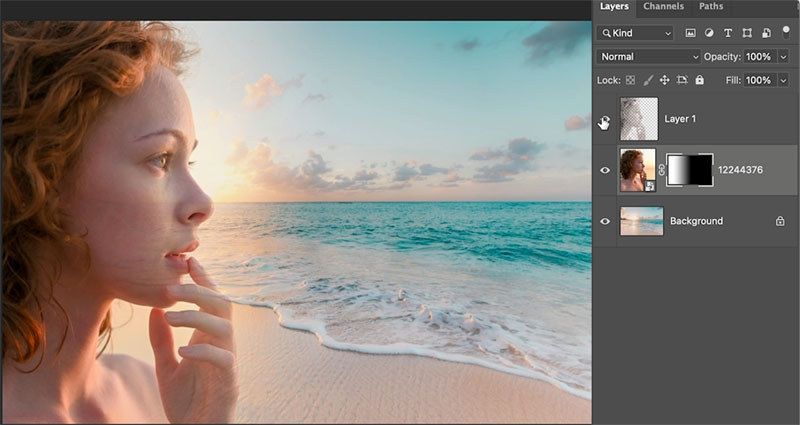
4. In the layers panel
Press Cmd/Ctrl+J to copy the selection to a new layer
step 5
If I hide the other layers, you can see what we copied from the red channel.
In some instances, you will get the opposite result. If this is the case, go back to the selection step 3 and press Ctrl/Cmd+Shift+I to inverse the selection.
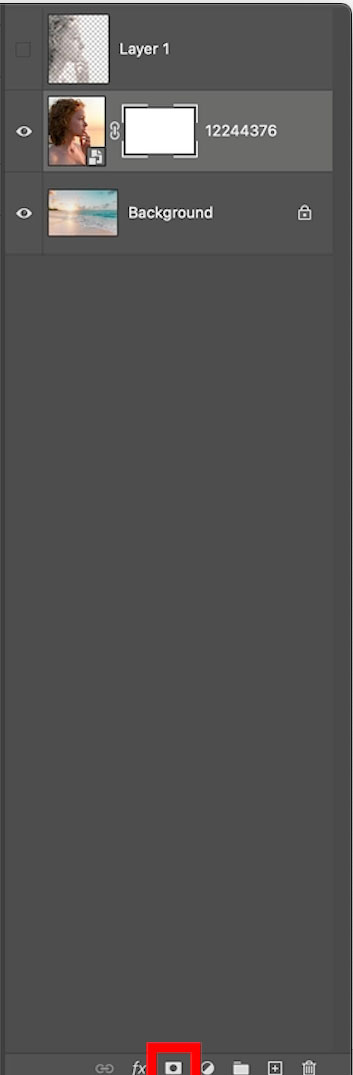
step 6
Turn back on the face layer and background and hide the duplicated face layer (Layer 1)
Click on new layer mask for the original face layerm you will see a nmask.
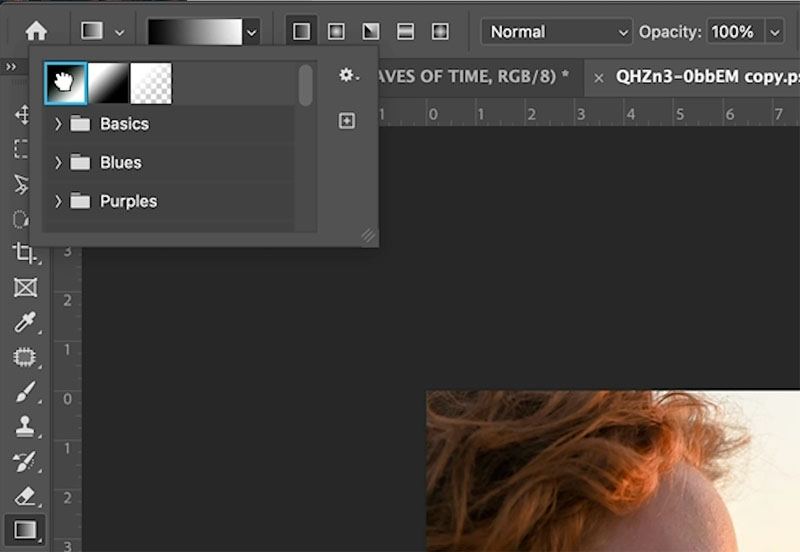
step 7
Choose the gradient tool and black to white as the gradient.
Set it to linear and Normal blending mode
Drag the gradient through the face
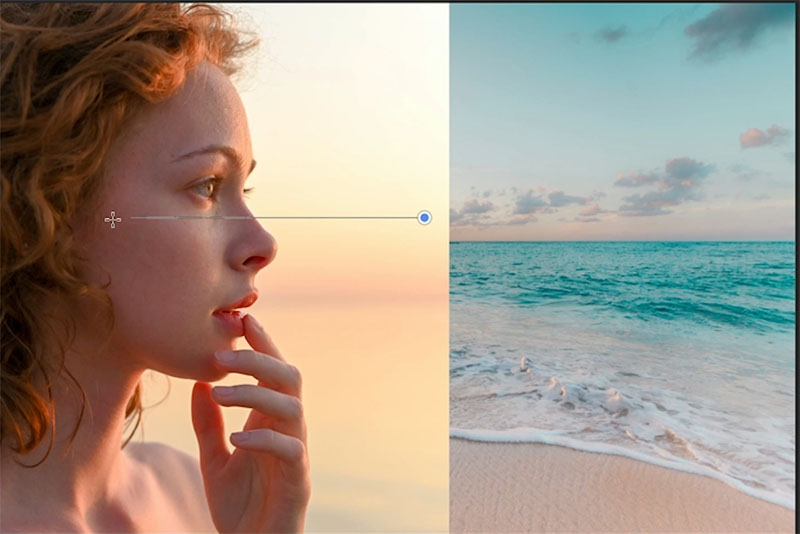
You will see a nice even blend
Turn on the top fac layer and it will add some opacity to the face, whicle keeping the smooth blend on the rest of the image
Using the same technique, I created this fake poster
I hope you found this useful. Check out the quick video at the top for more detail and tips.
Thanks
Colin
The post How to blend Layers in Photoshop and select faces with masks appeared first on PhotoshopCAFE.