
This week we are looking at how to take a black and white photo and turn it into a color photo. The following steps can be used to create a very realistic result, or you can adapt them for a painterly look or even hand tinted. For hand tinted, lower the opacity of the color layer at the end. The video goes in detail through all the steps. I have created the written notes in a style that I use when I write my books. Let me know if you like this ,ore concise style, or prefer basic individual steps.
You can find historic photos that are free to use and public domain from the Library of Congress
The photos Ive used in this tutorial from Adobe Stock
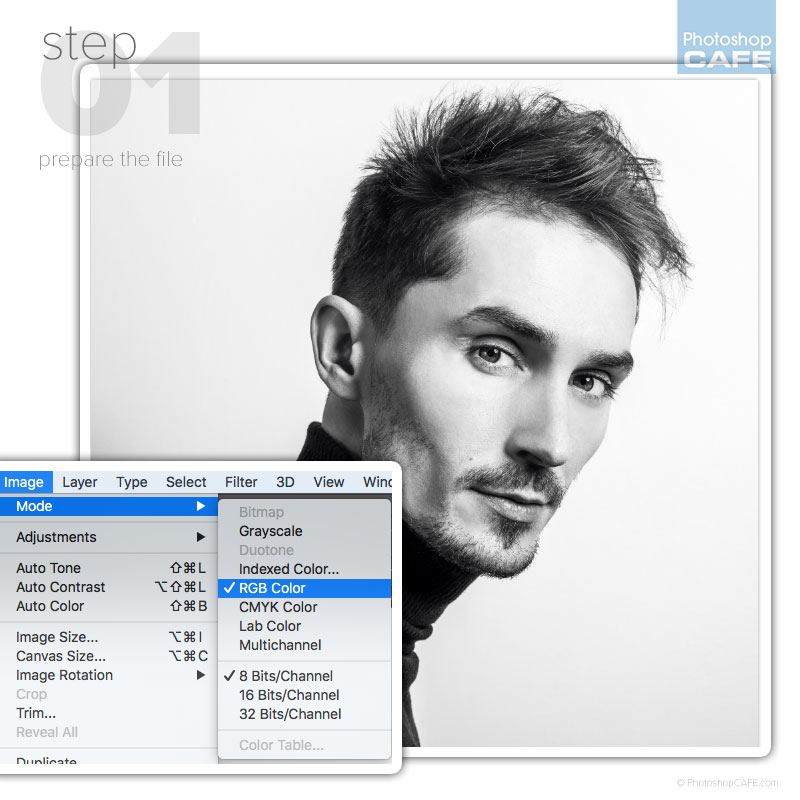
Step 1
If the image is grayscale, choose Image>Mode>RGB, Now you can colorize it.
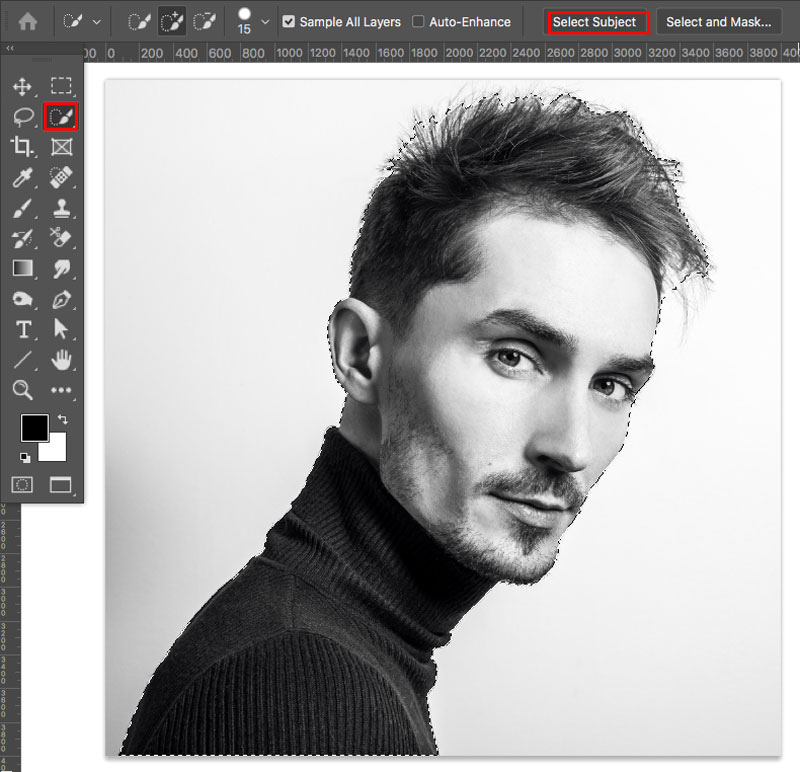
Step 2
Let’s make it easy to paint within the lines (optional)
Choose Quick select and make a selection. If you are on Photoshop CC 2019 or newer, choose Select Subject.
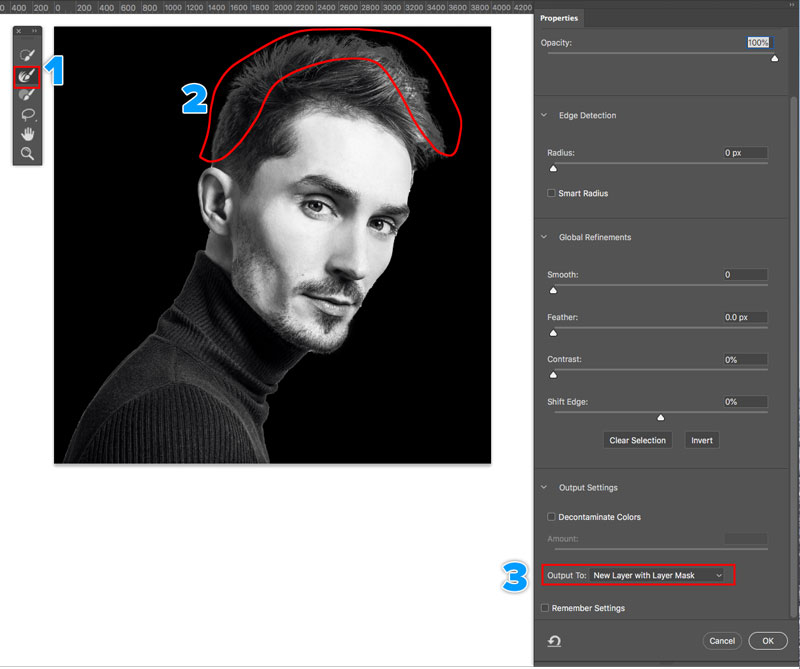
Step 3
Choose Select and mask
(1) Grab the refine selection brush
(2) paint around the hair)
(3) Choose New Layer with Layer mask
Click ok
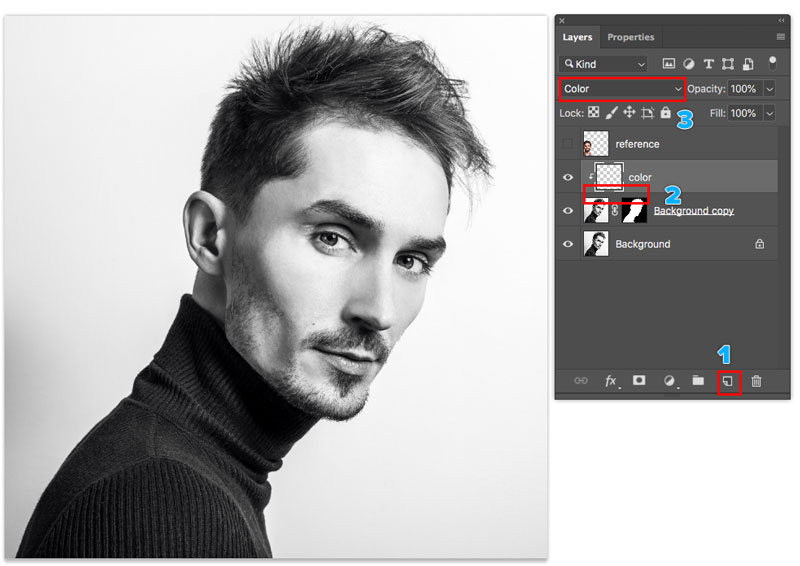
Step 4
(1) Create a new Layer
(2) Hold down the alt/Option key and lick between the new layer and the underlaying layer. This will create a clipping group and keep all painting within the shape of the cutout. You don’t have to worry about painting outside the lines.
(3) Change to color blending mode, so only the color will change when you paint.
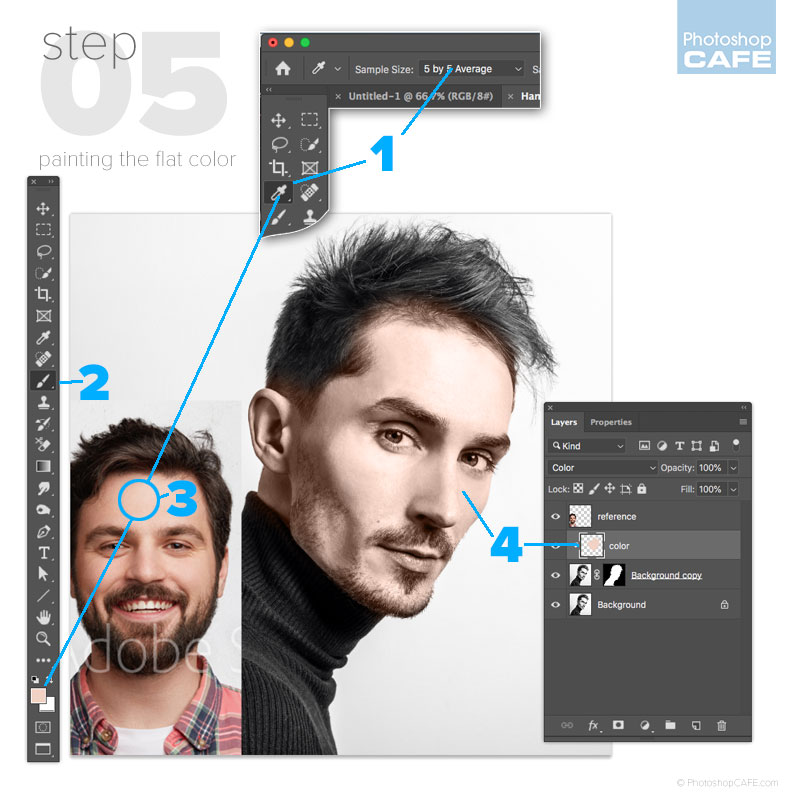
Step 5
The key to getting realistic color is to use a reference photo. I grabbed one from Adobe stock for free, see the video to see how to get it into Photoshop. I downloaded the reference photo and dropped it onto the top layer so we can steal the color from it.
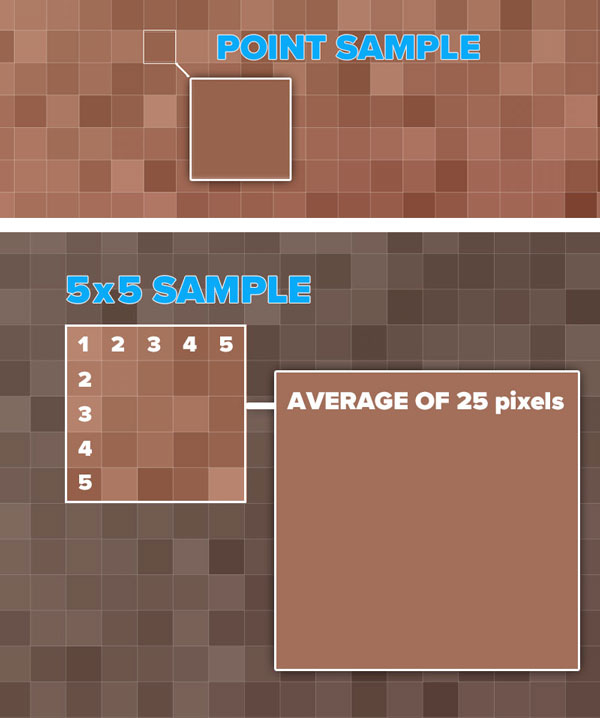
(1) Choose the eyedropper. Change sample size to 5×5 and select all layers from select. This will sample the average value of 35 surrounding pixels and give an more accurate reading.
(2) Choose the paintbrush.
(3) Hold down alt/Option and click on the reference photo to sample the basic skin color.
(4) Paint over the entire face to put down a flat color.
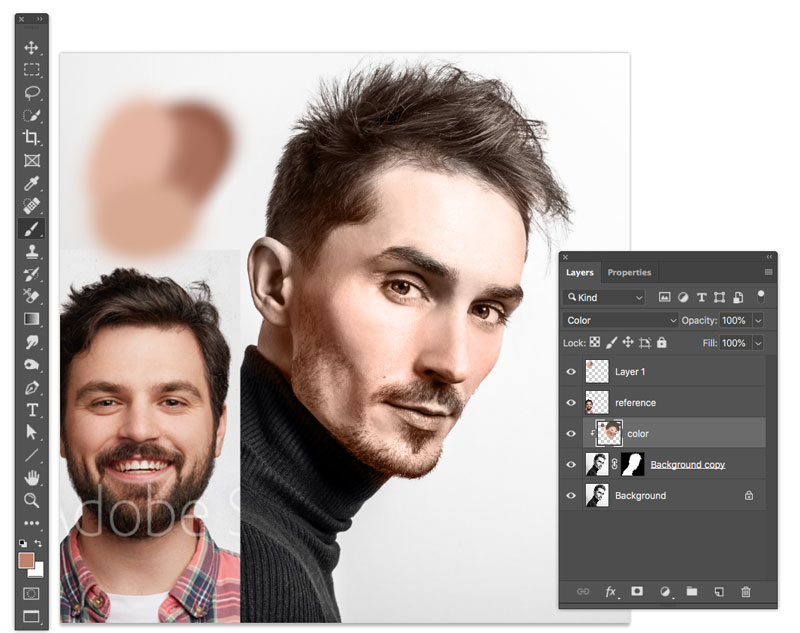
Step 6
Hold down alt/Option and sample the hair color
Paint over the hair, as well as the beard and eyebrows, Make sure to sample the colors often as facial hair can be different tones.

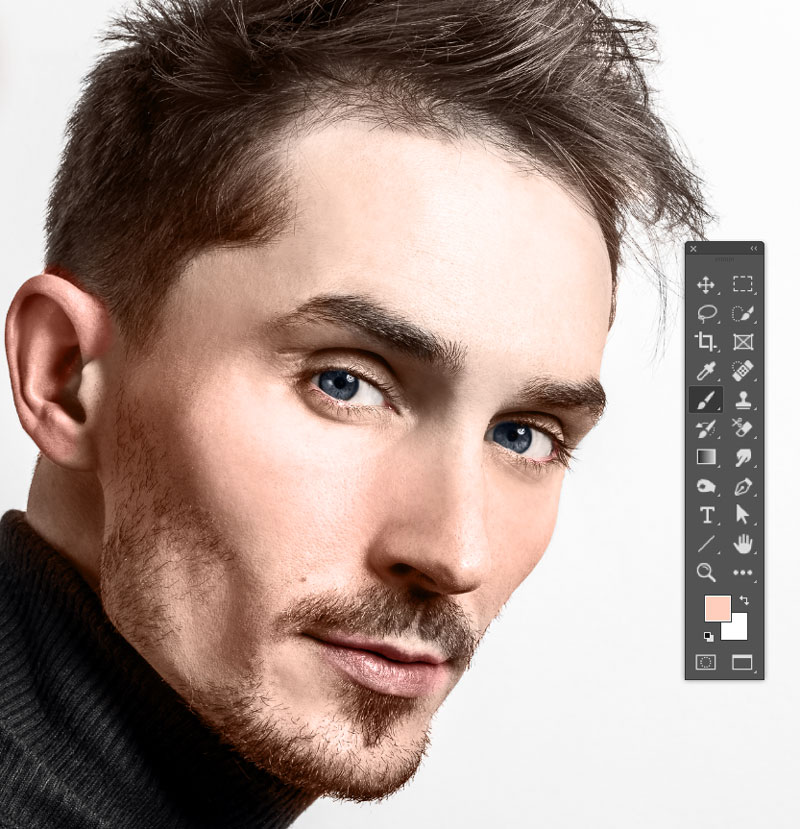
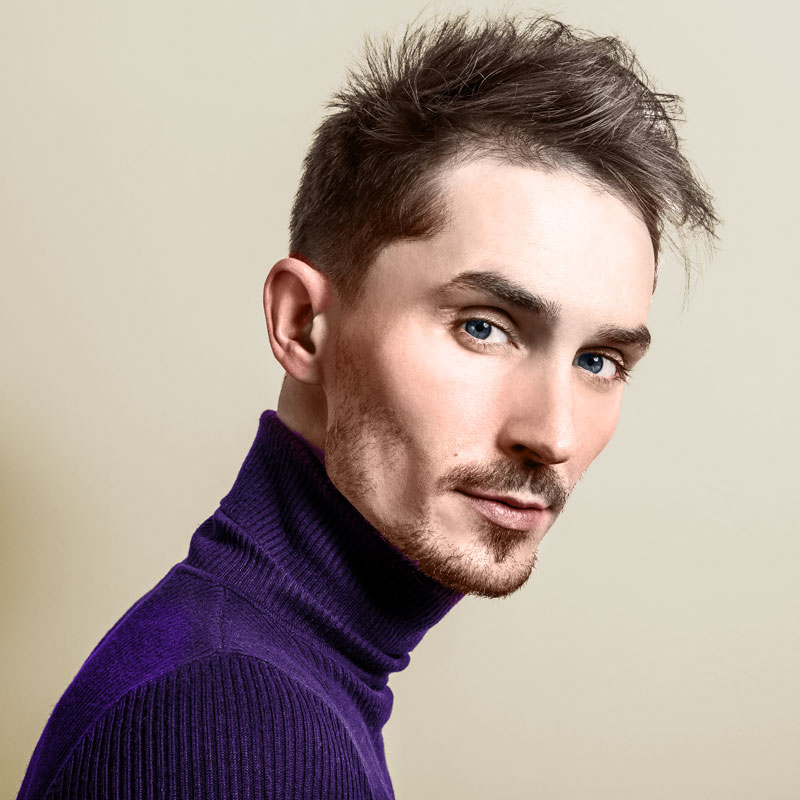
Step 7. Adding additional skin tones.
The face isn’t just one tone of color. The forehead and top of head has thinner skin as thus can appear more yellowish. The cheeks and nose are more fleshy, and have more blood vessels and thus appear more reddish. Under the eyes can also be more red. The chin and jaw reflect the clothing and also can be a little bluish/green because of stubble. Notice I have sampled and painted some of the color onto the background as a paint palette.
Sample from the reference photo and paint the additional skin tones using a low brush opacity. See the video above for a demonstration.
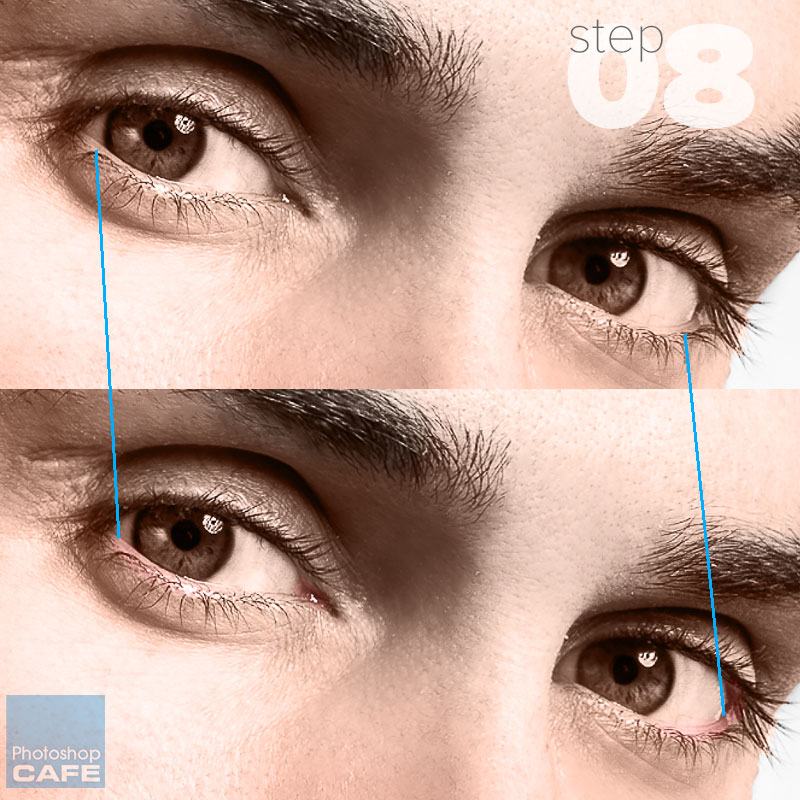
Step 8
Make sure to get the details such as pink on the inside of the eye lids
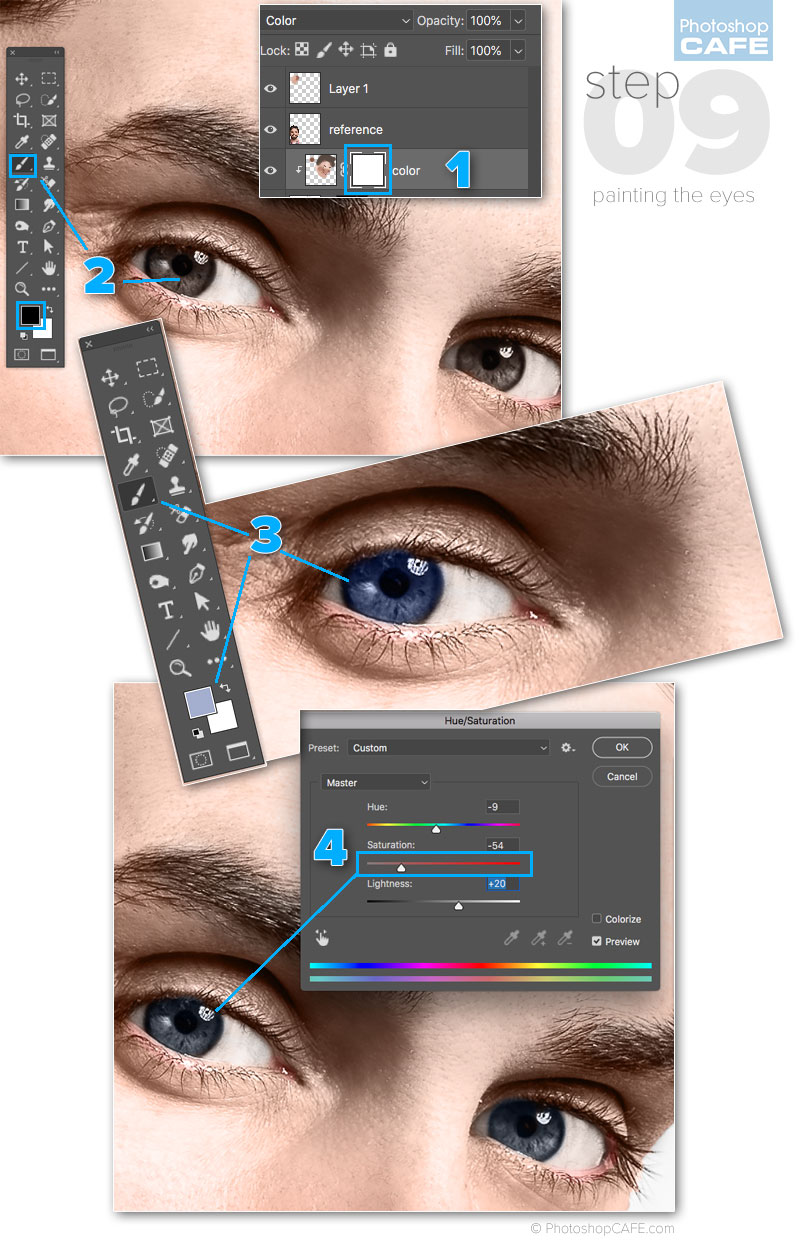
Step 9 painting the eyes.
Its time to fix the eyes.
(1) Create a layer mask on the color layer
(2) With a black brush, carefully paint away the color. Don’t remove all the color, leave about 5% as pure white will look ghoulish.
(3) Create a new layer and change it to color blending mode. Choose a color for the iris. In this case, blue. Remember a little bit of color goes a long way. Paint the color into the eyes.
(4) Press Cmd/Ctrl+U for Hue Saturation (Or even better, use an adjustment layer). Fine tune the color and you will probably have to reduce the saturation.
Related tutorial: How to change eye color in Photoshop
Step 10
Don’t forget the ears, sampling from the reference for the outside and inside.
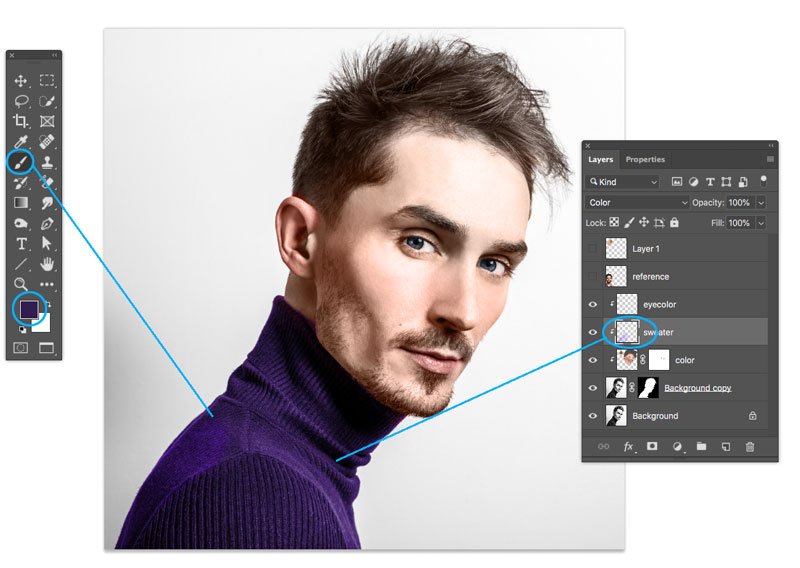
Step 11. Colorize the clothing.
Create a new layer, call it sweater. Change to color blending mode
Make a selection around the Turtleneck sweater with the quick selection brush.
Choose a color. In this case a purple shade. Paint over the clothing.
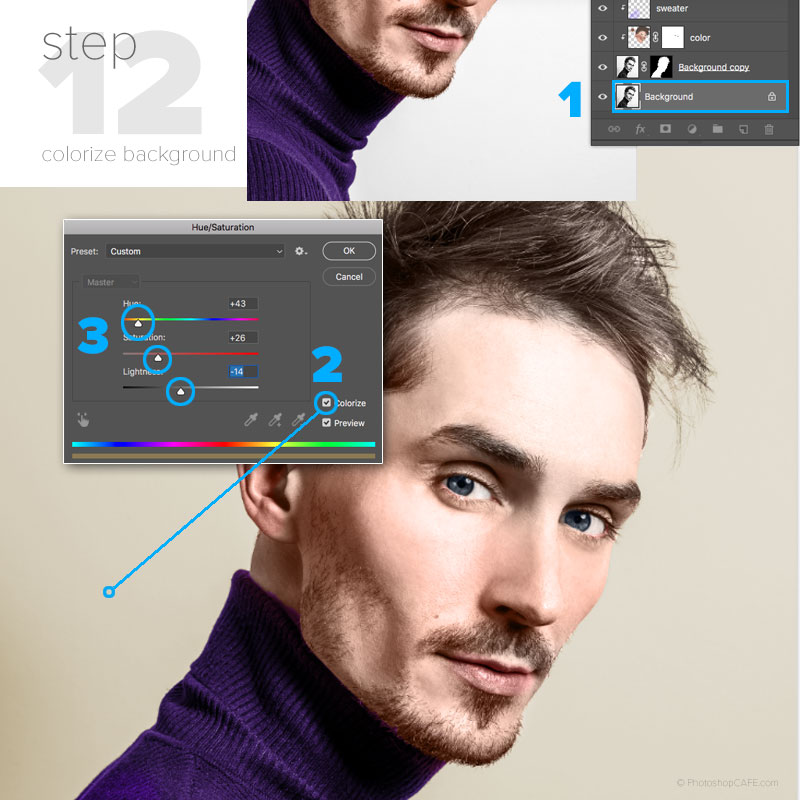
Step 12. Colorize the background.
(1) Click on the background layer. Create a Hue/Saturation adjustment layer,
(2) Click on colorize.
(3) Lightness enables you to add color to white, by slightly lowering the lightness, or add color to black by increasing it. Move the hue to choose a color, Saturation to vary the amount of color.
And we are done. You can use this tutorial to colorize any black and white photo. This also works when you are colorizing a painting or sketch. You will get different results by using different reference photos. You can also save the colors as color swatches for use later.
Thanks for using this tutorial and I hope you enjoyed it.
Colin
PS Don’t forget to join our mailing list and follow me on Social Media>
(Ive been posting some fun Instagram and Facebook Stories lately)
You can get my free Layer Blending modes ebook here
PHOTOSHOP CC SELECTION SECRETS
NEW COURSE BY COLIN SMITH
Stop struggling with selections. Learn how to select and cut out anything from people, hair, trees, complex shapes and even transparency.
Discover how to get perfect edges, without halos and jaggies. Colin shows you exactly how in 18 lessons.
All the images are included for you to follow along.
You will be able to select and cut out anything: faster and cleaner.
MORE INFO HERE
The post How to Colorize a black and white photo in Photoshop – portrait appeared first on PhotoshopCAFE.