
So, for those other photos, here is a tutorial to get the most out of them. Fortunately if you shoot RAW and use either Lightroom or the Camera Raw filter in Photoshop (they have identical settings) you will be able to recover more detail than initially meets the eye.
We break it into 3 phases:
- Luminosity. Let’s get the shadows, highlights and midtones right first.
- Color: Remove color cast and stylize if required.
- Texture and detail. Dialing in the perfect amount of surface detail and sharpening.
In this tutorial I am using Lightroom Classic. You can use Lightroom or Camera Raw in the same way, just use the same settings.
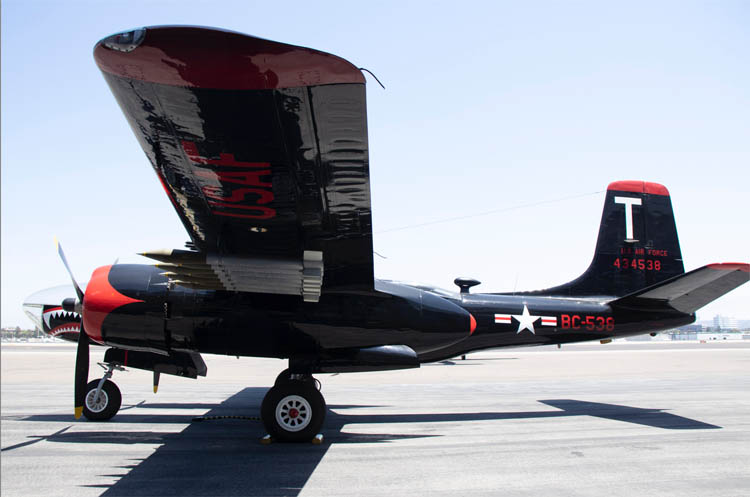
Here is the starting image, do the dark tones and blown out sky look familiar?
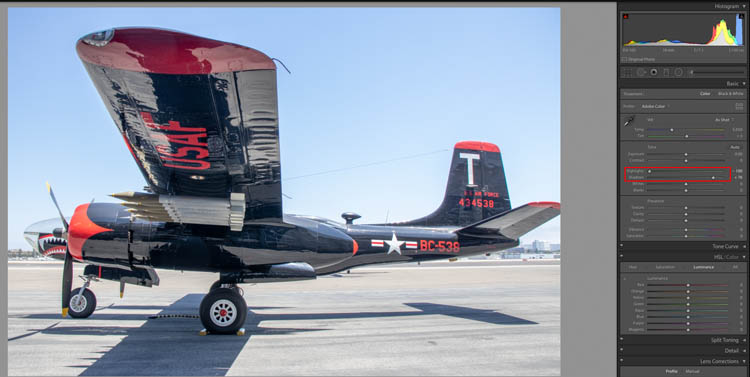
Step 1.Luminosity
A lot can be done by moving the highlight and shadow sliders to recover the details in the darks and light areas.
Step 2. Blue Skies
Go to the HSL section
Choose Luminance and darken the blues to make the skies colorful.

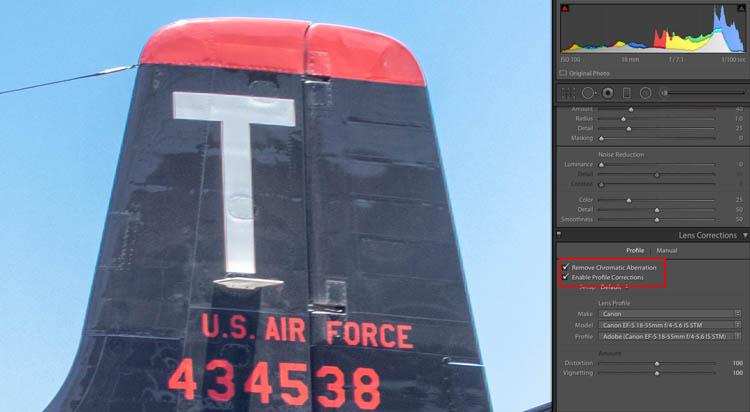
Step 3. Color Fringing
Sometimes these extreme adjustments can bring out Chromatic Aberration (The red and Cyan fringing around the edges)

Under Lens Correction, Turn on Profile correction and Remove Chromatic Aberration. This fixes it.
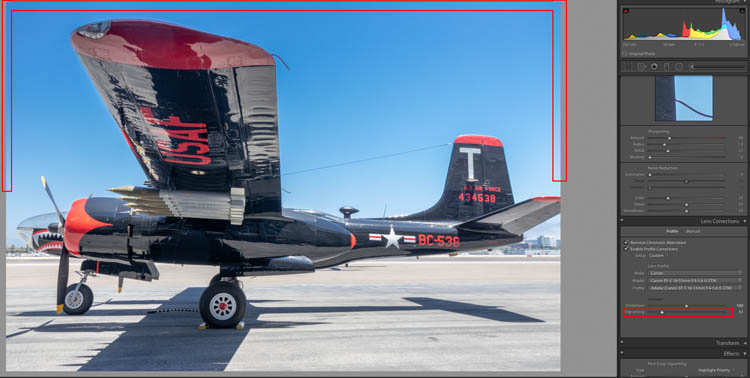
Step 4. Fix Vignette.
Notice that the blue sky is lighter around the edges now. This is a vignette.

Slide the vignette slider in the Lens Correction panel to even out the sky.
Step 5. Contrast.
If you want to add contrast, use the White and black sliders, this gives the images punch.
 \
\
Step 6.
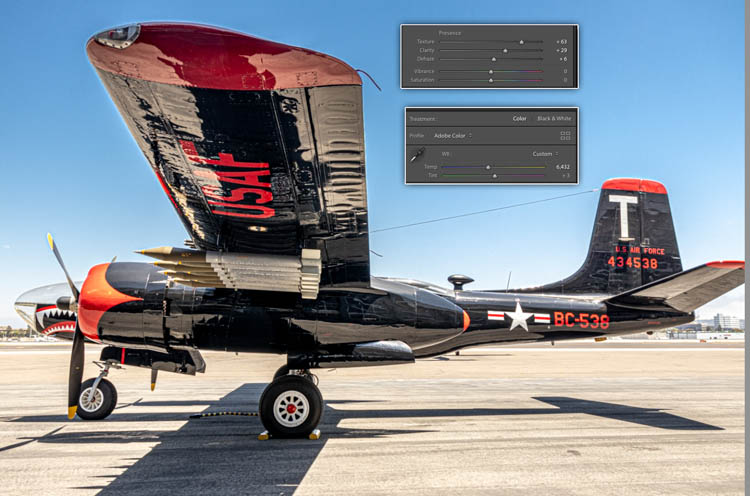
Sometimes I slightly warm an image by moving the Temp slightly to the right for a warmer look.
You can bring out more detail and surface texture by adding some texture clarity and dehaze (the video at the top explains the difference)
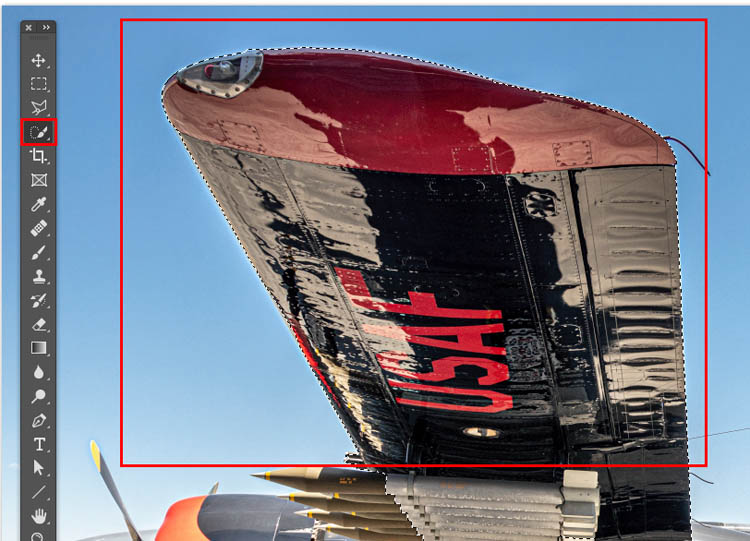
Step 7. Fixing the halo (not on the video)
All this exaggerated adjustment action has caused a halo around the wing of the aircraft.
Lets move to Photoshop to fix this.
Make a selection around the wing with the quick selection tool.
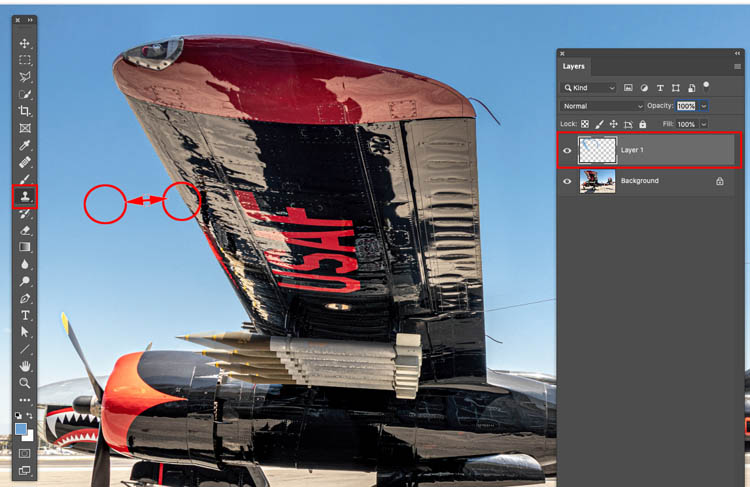
Step 8
Press Cmd/Ctrl+Shift+I to invert the selection. Now the wing is protected and you can paint in the sky.
Create a new Layer
You would think a brush would work, but there is a gradient in the sky and it would be very difficult to brush.
Instead choose the Clone Stamp tool. Sample off to the side (Hold alt/Option and click to sample) of the wing and then drag down the edge of the wing.

Notice how easy it is to fix the halo around the edges.
I hope you enjoyed this week’s tutorial and you are now able to make those harsh photos look nice. Look around, there are a lot of useful tutorials here at the CAFE and I make a new one every week.
Great to see you here at the CAFE
Colin
PS Don’t forget to join our mailing list and follow me on Social Media>
(Ive been posting some fun Instagram and Facebook Stories lately)
You can get my free Layer Blending modes ebook here
If you like these techniques and you would like to dive deeper into Photoshop, I have just launched an in-depth Photoshop Course. Its called Photoshop Secrets: Photoshop 2020 for Digital Photographers, Check it out here
The post How to edit a photo taken in direct sunlight in Lightroom or Photoshop ACR appeared first on PhotoshopCAFE.