
How to make a Sticker in Photoshop
In this tutorial, I’ll show you how to turn a photo into a sticker in Photoshop. First of all, we will make a sticker effect.
I will also show you how to export a digital sticker with a transparent background. I’ll also tell you how to make it a print sticker..

Start with a photo, or an illustration.

Separate the image from the background.
Choose the Object selection tool
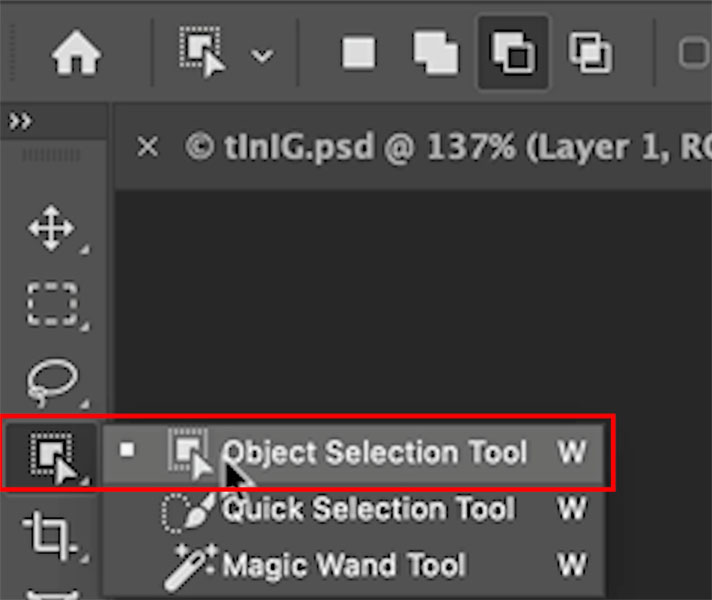
Click Select subject.
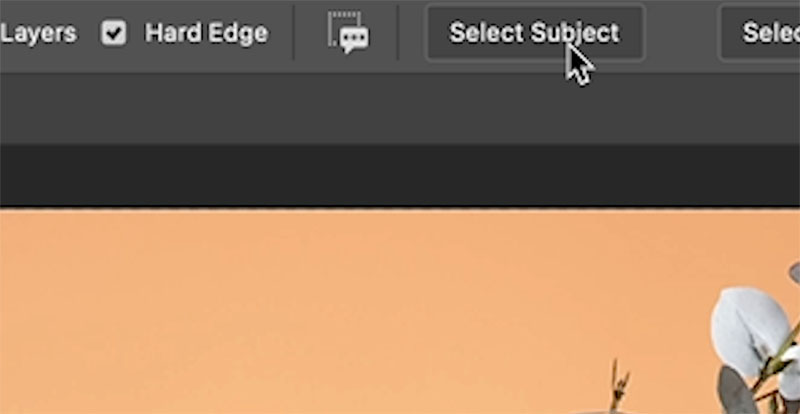
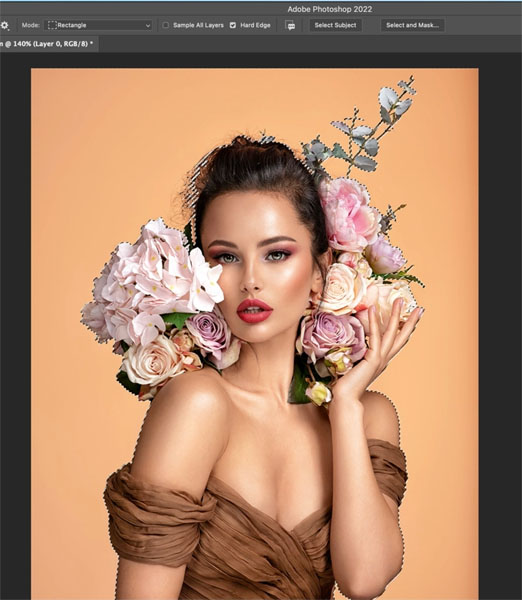
Use the selection tools to refine the selection, hold shift to add to the selection and Alt/Option to remove from selection.
This isn’t a selection tutorial, but I have plenty here. More tutorials on removing an image from the background here.
You should see your marching ants selection.
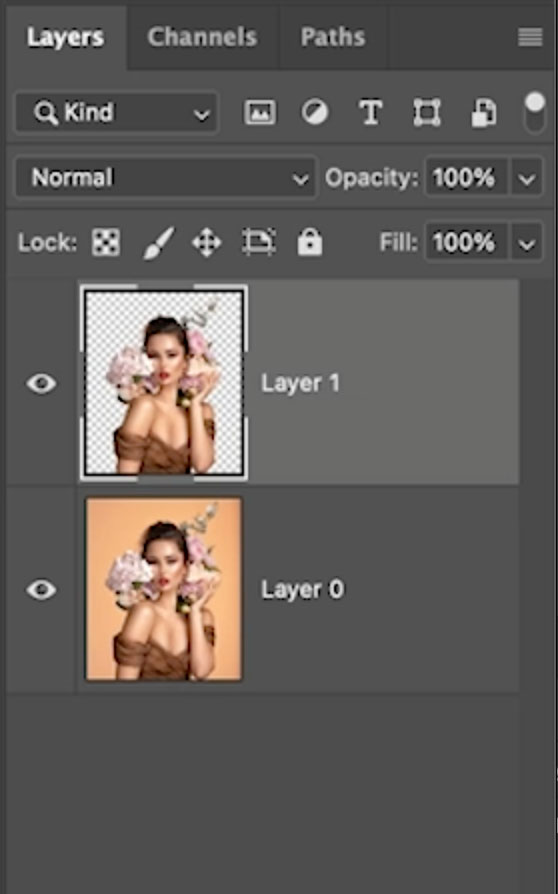
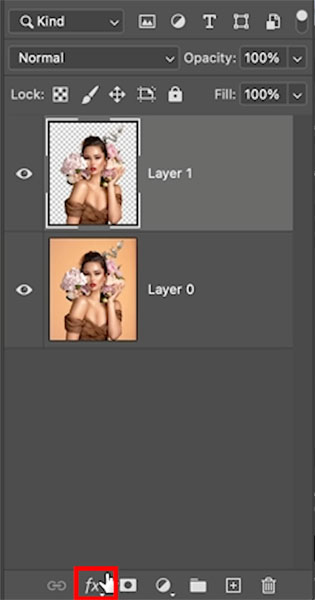
Press Cmd/Ctrl+J to copy the selection to a new layer.
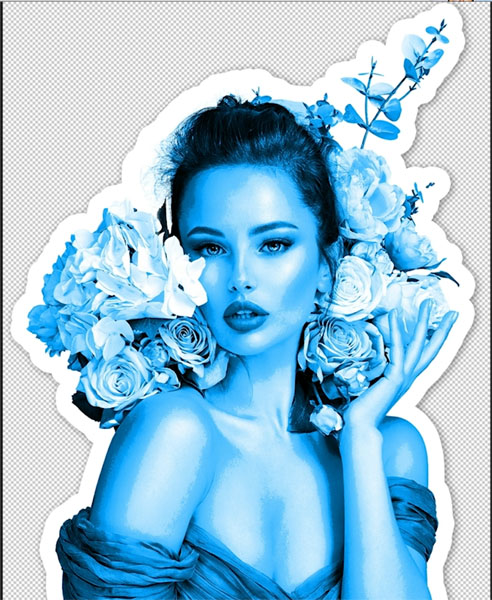
Click FX to add layer styles.
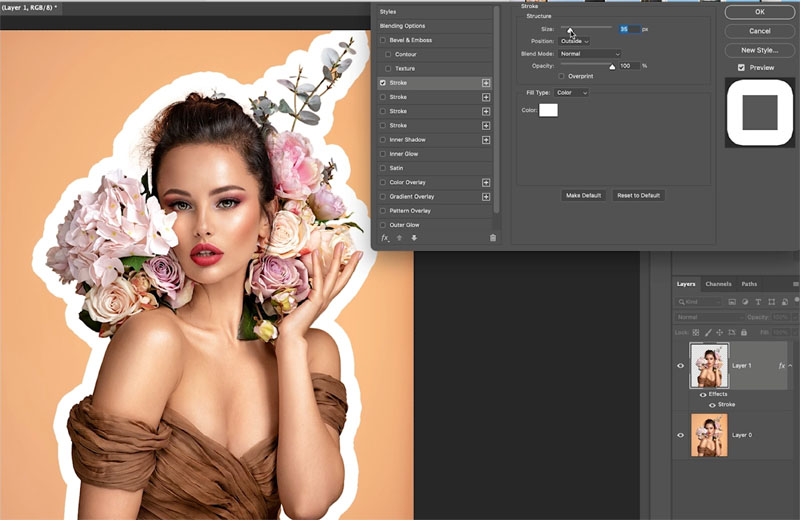
Choose stroke
Give it a nice thick white outer stroke.
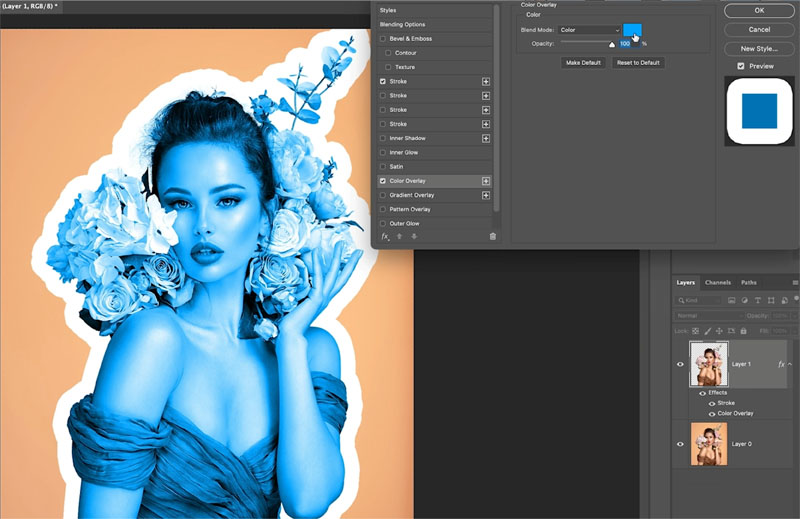
Optional: Click on Color overlay and give it a solid color. This is just an option of you want that.
Add a drop shadow to lift it off the background.
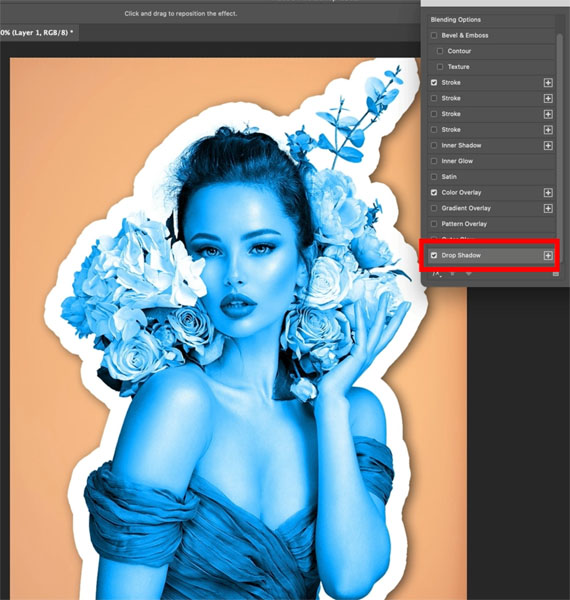
Click ok.
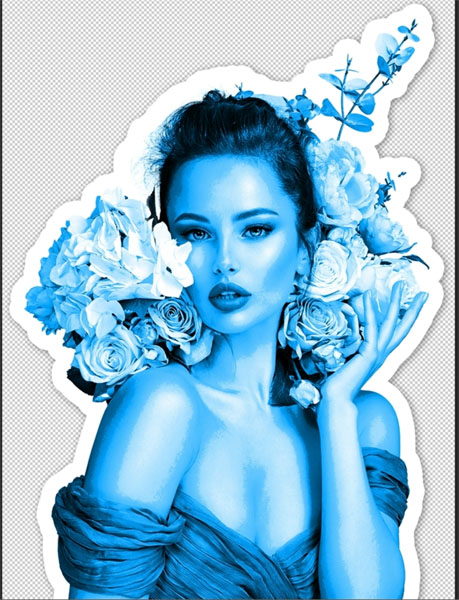
Lets make it look a little bit more like a poster effect.
Click on new adjustment layer and Posterize.
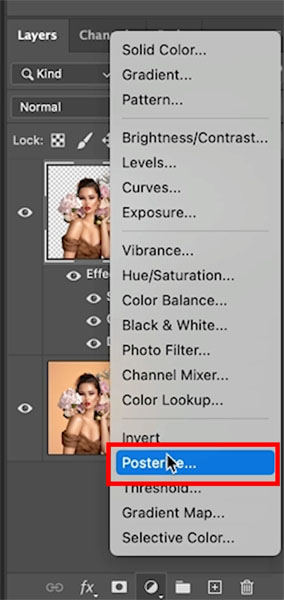
Set levels to 3.
Click the icon to clip the effect to just the layer we are working on. (See the red box).
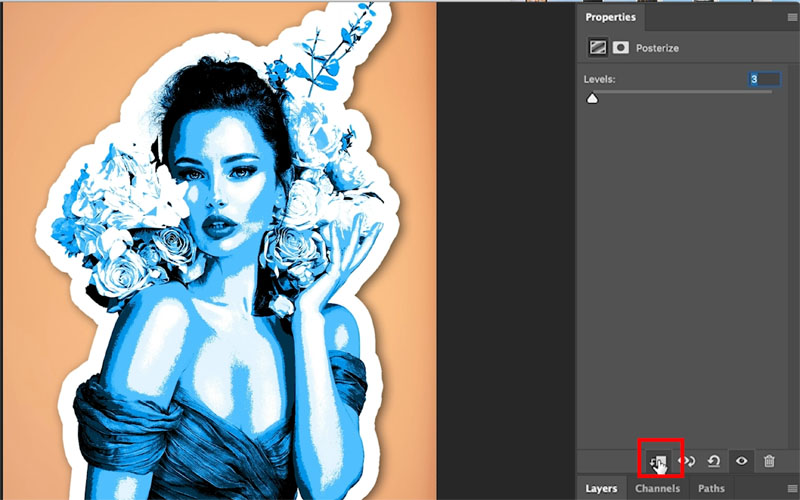
If you want to reduce the posterization effect, lower the opacity of the Posterize adjustment layer.

How to save an image with a transparent background from Photoshop
Lets look at creating a digital sticker with transparency.
Hide the background layer.
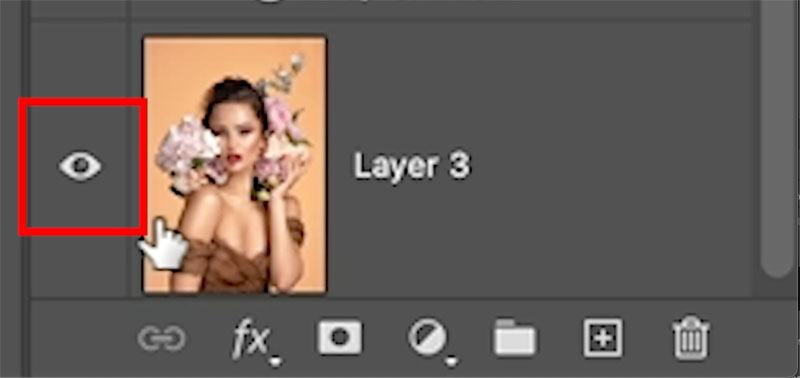
You should see a checkerboard pattern. This is transparency in Photoshop.
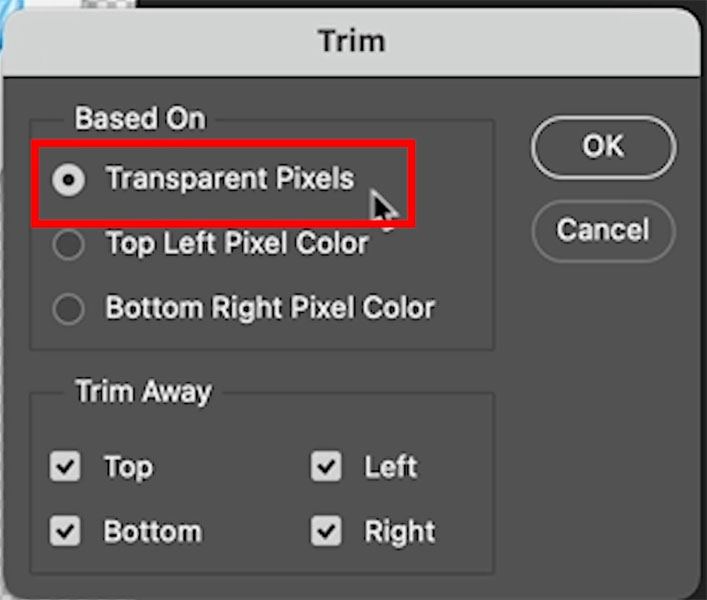
Let’s trim off the extra canvas around the transparent shape. You don’t need to crop, because Photoshop has a nice tool.
Choose Image>Trim
Select Transparent Pixels and click ok.
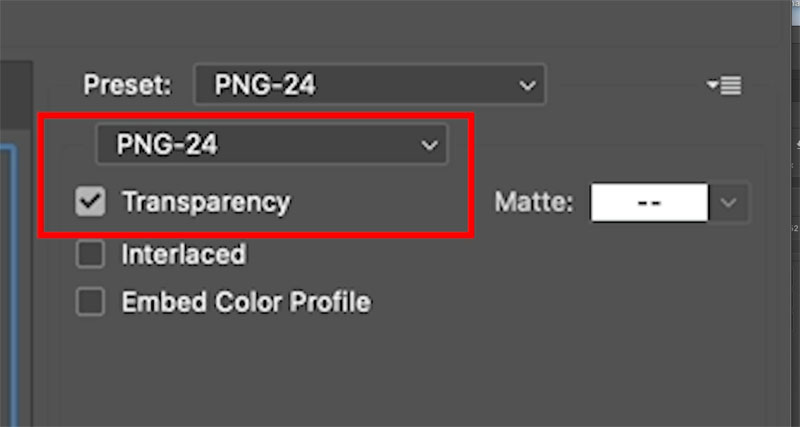
Let’s export it.
Choose File>Export>Save For Web
Choose PNG-24 and make sure transparency is checked.
Click ok
Save your file.
Now you can use it on documents and the transparency will show.
Making a printed sticker.
The important thing here is making sure you are at print resolution.
Set the resolution Image>Image size to 300ppi (dpi). Resolution explained here
When you have finished designing your sticker, convert to CMYK mode. Image>Mode CMYK.
Some things to bear in mind. If you are using an irregular edge, the printer will have to create a die and die-cut the shape. This is more expensive than making a rectangular/square/circular sticker.
More info on prepping a file for commercial printing.
I hope you found this tutorial helpful!
Colin
The post How to make a sticker in Photoshop appeared first on PhotoshopCAFE.