
Time to move on from removing stuff (from the last few weeks), and now we’ll start adding stuff. Starting with this installment, we’re going to start to unlock the power of Photoshop’s Layers, which is another of the main reasons we take an image over to Photoshop in the first place.
Layers let you stack images on top of each other so you can create collages, montages, composition, fine art. It’s also about adding type to your image (pro-level type), and it’s about adding special effects to your images. If this doesn’t make sense yet, don’t worry — it will, and you’ll fall in love with using layers because they are pretty awesome.
In this issue, we’re just going to focus on understanding the basics of what layers are and a bit about how they work. So don’t worry — we will dig in deeper, but today, we’ll start with the essentials.
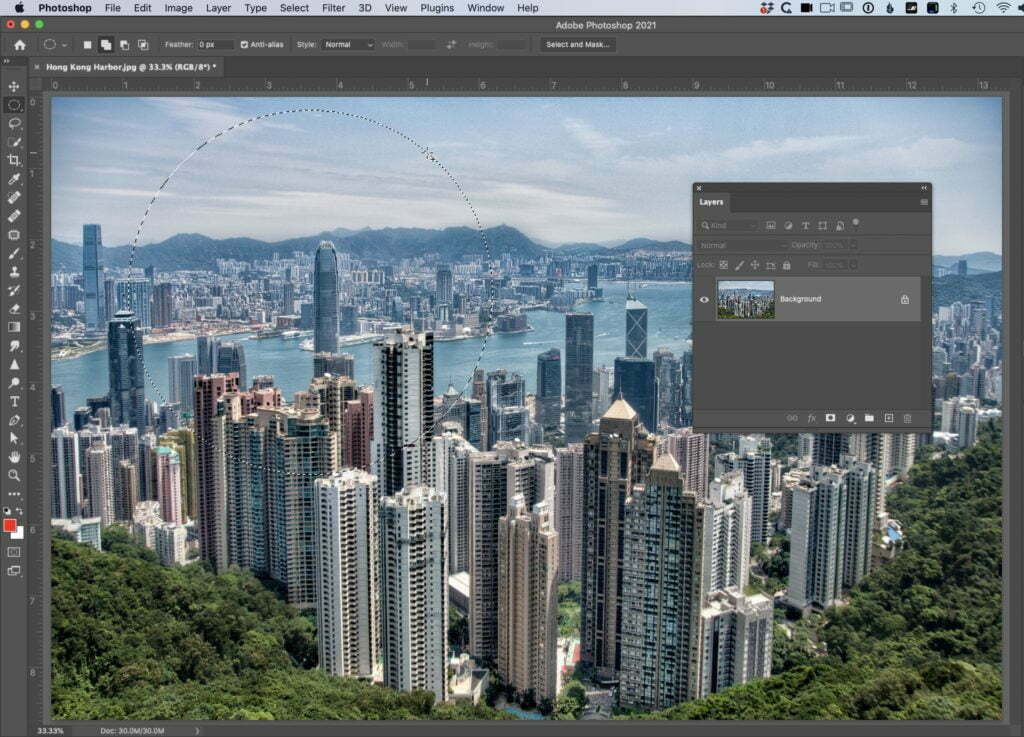
Here’s our background image of Hong Kong. Go to Photoshop’s Toolbar; click and hold on to the Rectangular Marquee tool. From the pop-out tool menu that appears, choose the Elliptical (round) marque tool and drag out a large circular selection over your image (as seen here). Next, just click and drag the tool in your image, and an oval selection will appear. Hold the Shift key if you want a perfect circle as I made here. Once your circle is in place, press F-7 on your keyboard (or go under the Window menu up top and choose Layers) to make your Layers panel visible. At this point, you only have one layer — the Background layer and that layer is the image of Hong Kong. When you open an image in Photoshop, by default, that image’s name in the Layers panel is “Background Layer,” so when you bring an image over from Lightroom, that is what you’ll see in the Layers panel.

At the bottom of Photoshop’s Toolbar, there are two squares: the frontmost one is where you choose your Foreground Color; the one behind it is for choosing your background color. Click on the front square, and from the color picker that appears, choose red as your foreground color and click OK. (By the way — it doesn’t really matter which color you pick, so just choose any color you’d like). Now, we’re going to fill that circular selection with red by pressing Option-Delete on a Mac or Alt-Backspace if you’re on a Windows PC. You can Deselect the circle now by pressing Command-D on Mac or Ctrl-D on a PC. What you’ve done here so far is covered up part of your image with a red circle. That red circle is stuck there. You can’t move it. You can delete it. It’s now part of your Hong Kong photo.
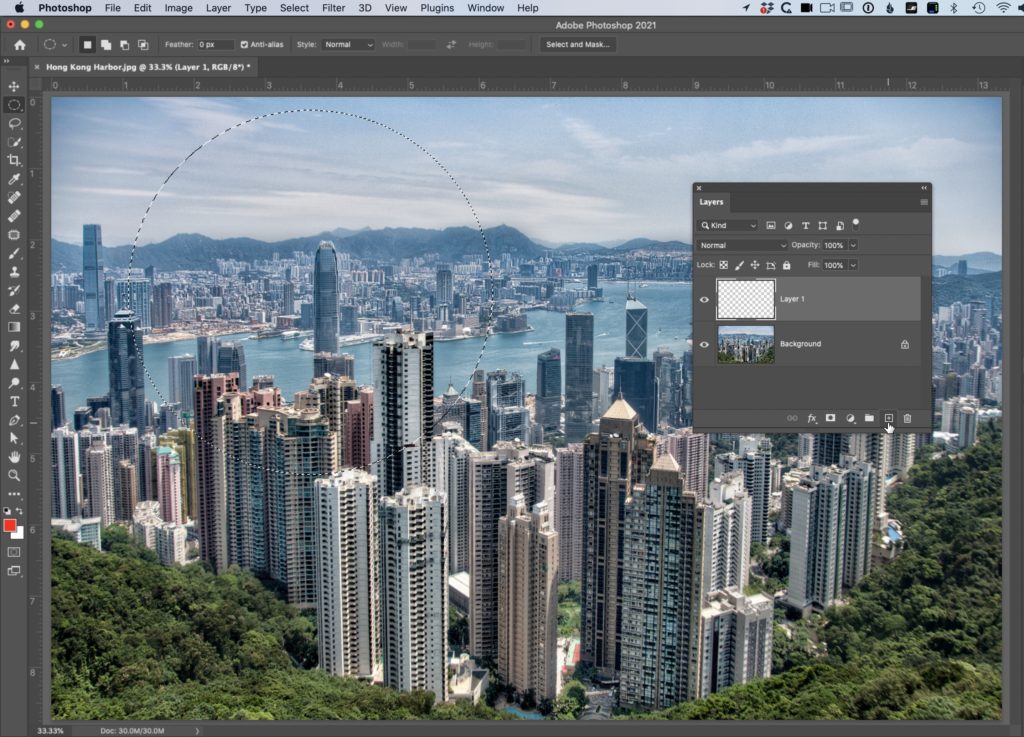
This is why Layers are so awesome. Instead of just covering up part of your image, like you painted a big red circle over it. With Layers, that red circle would float above your image, so you can reposition it, change its size, shape, opacity, and you can even delete it altogether if you change your mind. So, let’s go ahead and undo what we’ve done. Press Command-Z (PC: Ctrl-Z) a few times until the red fill is gone, but you still see the circular selection you made (as seen here). So, instead of just filling it with red and painting permanently over our image, go to the bottom of the Layers panel and click the New Layer icon at the bottom of the panel (its icon looks like a square with a + sign inside it. It’s just to the left of the trash can. This creates a new blank layer for you to work on, and if you look in the Layers panel, you’ll now see Layer 1, which appears above your background layer.
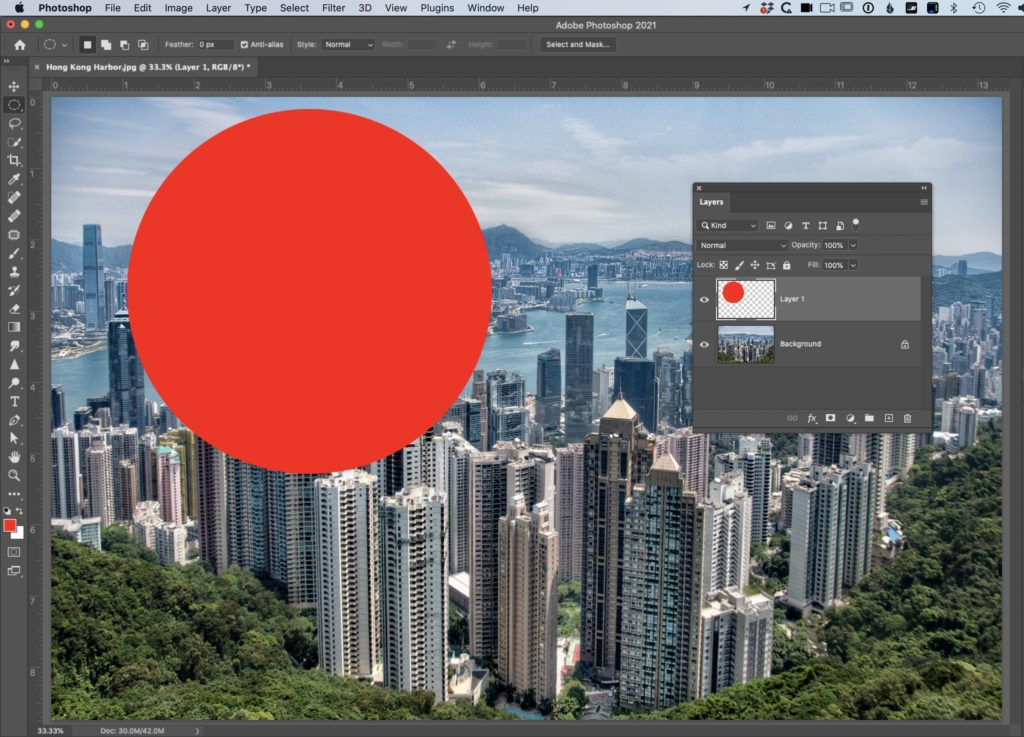
Now press Option-Delete (PC: Alt-Background) to fill this circle with red, then Deselect by pressing Command-D on Mac or Ctrl-D on PC. We still have a red circle, and it’s still in the same place, but since you created this on a layer, it’s now movable because it’s floating on a layer above the background.
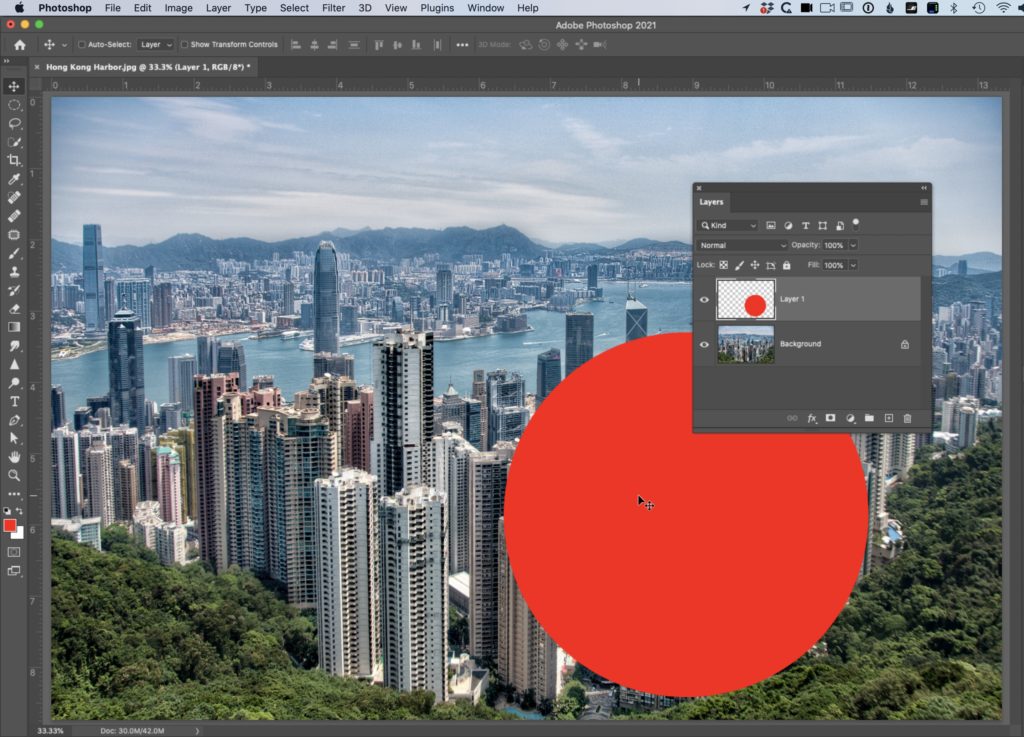
We move stuff on layers around using the Move tool. It’s the top tool in the Toolbar (it looks like a four-headed arrow), and this is a particularly handy one to know the keyboard shortcut for because you’ll be using this tool a lot. The shortcut is the letter ‘v.’ So, press ‘v’ to get the Move tool — click anywhere within that red circle and drag it over to the right to move the circle. If for any reason, the circle didn’t move — you probably forget to make that layer before you filled it with red. You have to make that blank layer first, or it’ll be stuck on the background layer like before.
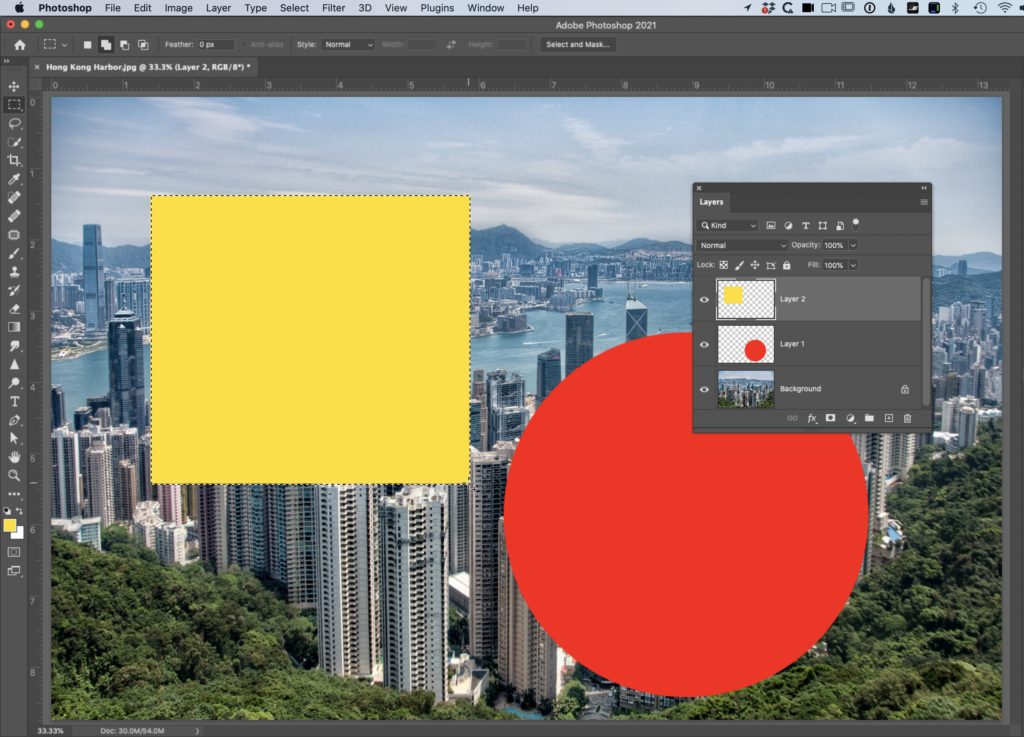
Let’s go ahead and make another blank layer. Head over to the Layers panel; add a new blank layer by clicking on that new layer icon (like you did before), but this time let’s get the Rectangular Marquee tool (just to visually change things up), and draw out a rectangular marquee. Set your Foreground color to yellow (or really, any color you want) and fill that layer with that color by pressing Option-Delete (PC: Alt-Backspace). When it’s filled with color, press Command-D (PC: Ctrl-D) to Deselect the rectangle. So, take a look in your Layers panel where you now have three layers: you have a background layer with the Hong Kong image; then Layer 1 with a red circle above it, and then layer 2 above it with a yellow rectangle.
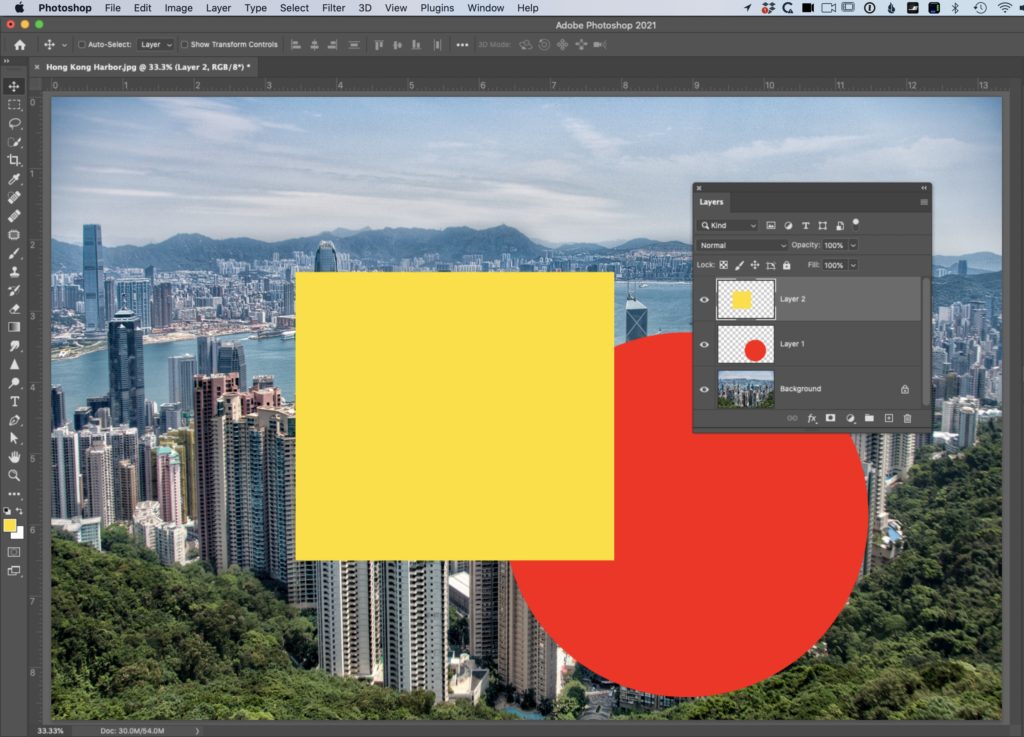
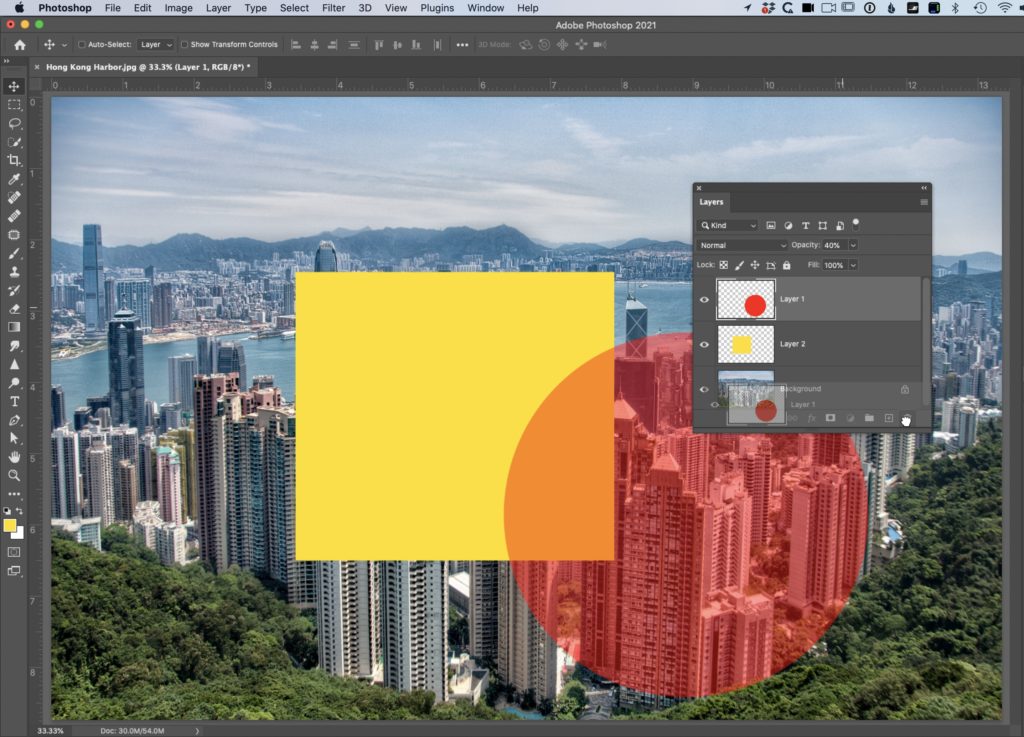
OK, now let’s do “some layers stuff.” Press “v” to get the Move tool (in case you don’t already have it) and drag the yellow rectangle over to the right until it overlaps the red circle (as seen here). Now you can really see the ‘layers.” The image in the background, then above that the red circle and above that, the yellow square.
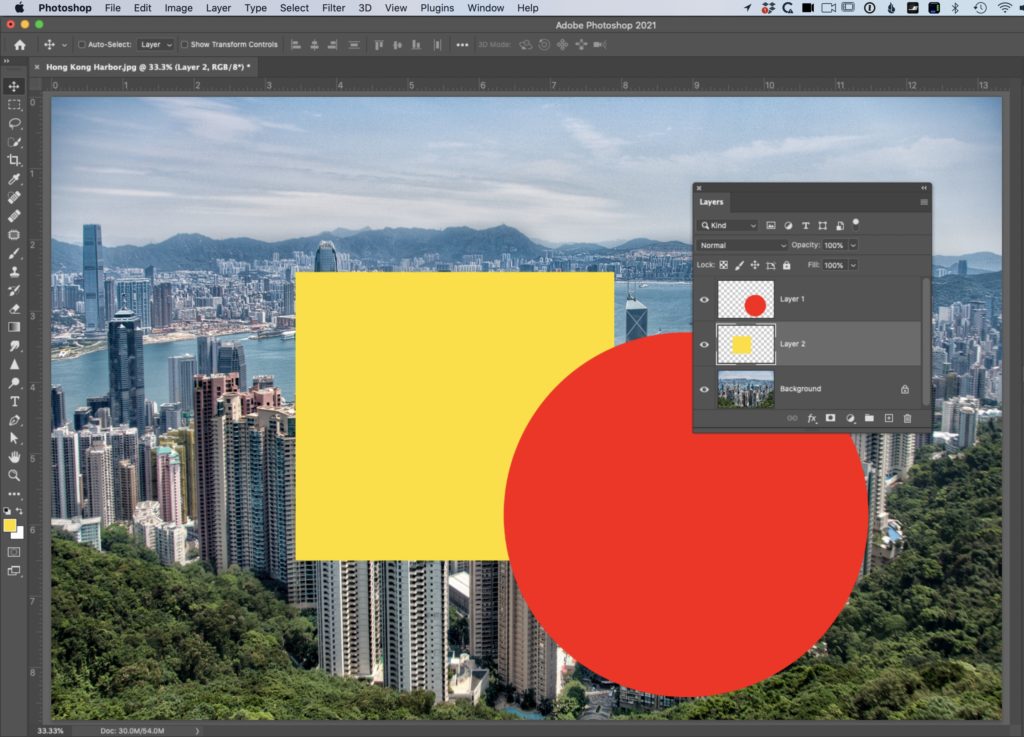
To change this stacking order, you simply change the order of the layers in the Layers panel. For example, to move the Yellow Rectangle behind the Red Circle, just go to the Layers panel, click on Layer 2 (the yellow rectangle layer) and drag that layer down below Layer 1. This changes the order of the stack of layers, so now it’s your Hong Kong image on the background (that hasn’t changed), then Layer 2 (your yellow rectangle), and then your red circle is now on top. That’s all there is to changing the order of your layers, dragging them up and down what’s called “the layer stack.” Of course, as you’ve seen, they stack from the bottom up, so whichever layer is at the top of the stack, that is the topmost layer (which is why your red circle layer appears on top of the other layers).
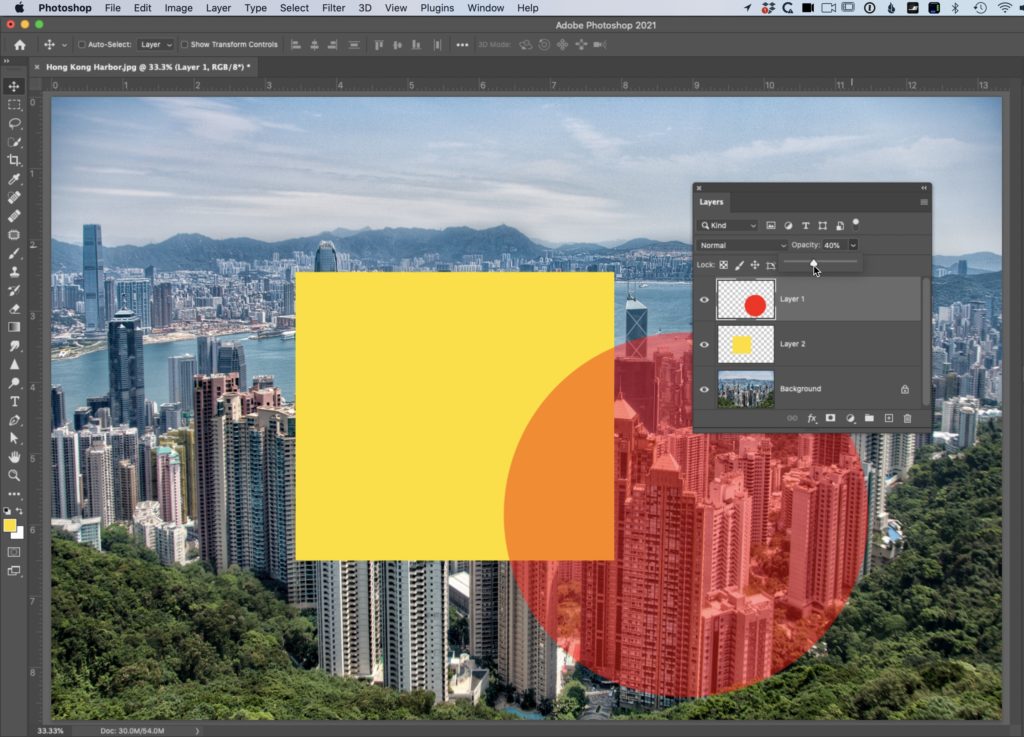
To work on a particular layer, just click on it in the Layers panel. Go ahead and click on Layer 1 (the red circle layer) in the layers panel. To lower the opacity of this layer (so it’s somewhat or a lot see-thru), go to the Opacity setting; click on the little down-facing arrow to the right of 100%, and a slider pops down. Drag the slider to the left to lower the opacity (as seen here where I dragged it over to 40%), and now you can see through the red circle to the yellow rectangle and the Hong Kong photo on the layers below it.
To delete a layer, you can either click and drag it down to the trash can at the bottom of the Layers panel, or you can click on the layer (in the Layers panel) and then hit the Delete key (PC: Backspace key) to delete it.
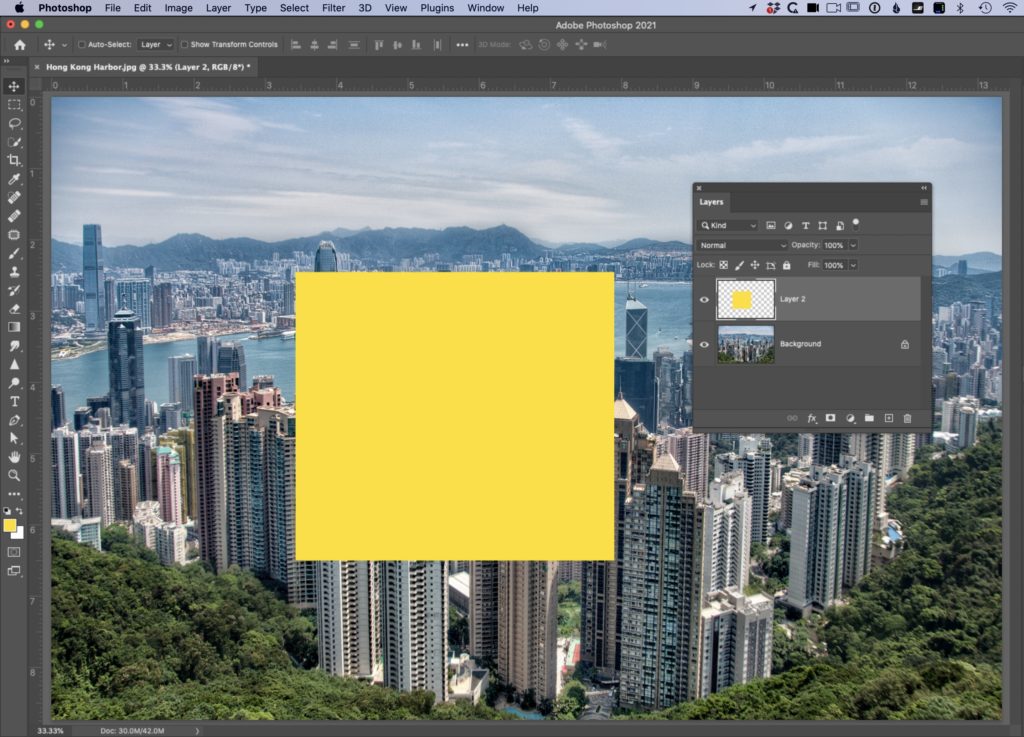
Here’s the image without the red circle layer; now, when you look at the Layers panel, you can see the Layers panel only shows your original Background Layer (Hong Kong) and Layer 2 (the yellow rectangle). Now, imagine that instead of those layers being a red circle or a yellow rectangle, they were photos. It works the exact same way. This is just a start — the tip of the iceberg of layers, but it’s important that you understand the basics of how layers work before we dig in deeper, which we will, starting next week. See you next Tuesday. 
Have a great day, ya’ll.
-Scott
P.S. Don’t forget – the Visual Storytelling Conference kicks off on Thursday – I’m doing a keynote and a session on creating killer slide decks (for the business side of things). It’s FREE, and you can sign up right here. Lots of great Photoshop and Lightroom speaker’s there, too!
The post Photoshop for Lightroom Users: Intro To Using Layers appeared first on Lightroom Killer Tips.