
By Richard Harrington
We’ve all faced the same problem: photographs that lack contrast; images where the shadows and highlights look flat and the details are muddy. While the problem is common, the solutions are many. In this article, I want to show you several easy fixes (using built-in tools) — including some uncommon ones — that you should explore. We’ll also take a look at Aurora HDR, which works as a plugin to both Lightroom Classic and Photoshop.
The Problem
You open up an image and it just feels flat. Your mind doesn’t remember the scene this way, but your camera sure does. What’s the problem? It’s all about dynamic range.
Dynamic Range Explained
The dynamic range of your photo is the difference between the maximum and minimum values. In simpler terms, are the black points rich and the white points bright? Here’s a simple example where you can see which gradient has a true black and white point.


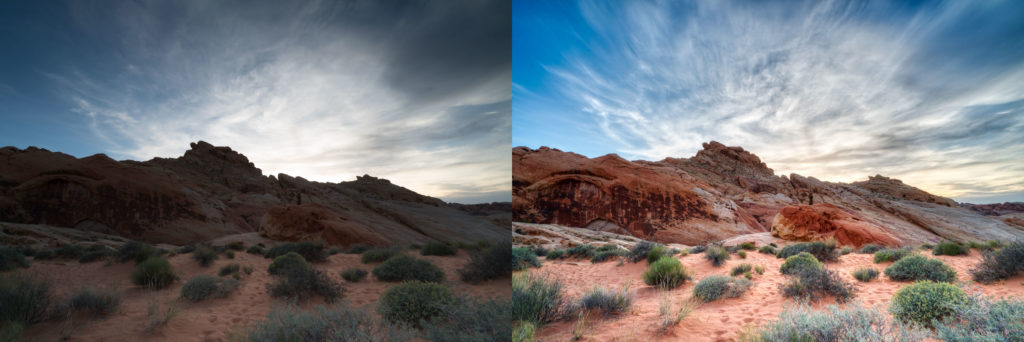
In most situations, a photo with a wide dynamic range feels rich and deep. Once adjusted, this low-depth image takes on a richer feel. Note that this isn’t just about moving the Contrast slider. It’s about extending the histogram to ensure a full balance.
 The photo as captured by the camera


There are several ways to improve the dynamic range of your images: You can change how you capture your images, change how you process them, or both. There’s no right answer, as it really comes down to how much effort you’re willing to put in and the results you want to get. Toss in the limiting factors of your camera and shooting style and you’ll quickly discover that one size does not fit all.
Why HDR Isn’t a Bad Word
For many photographers, the term HDR (high dynamic range) causes
their blood pressure to rise. I encounter photographers all the time who tell
me how HDR is awful. A fad. A gimmick. Absolute garbage. They cite garish examples
where the colors and details have been pushed to cartoonish extremes.
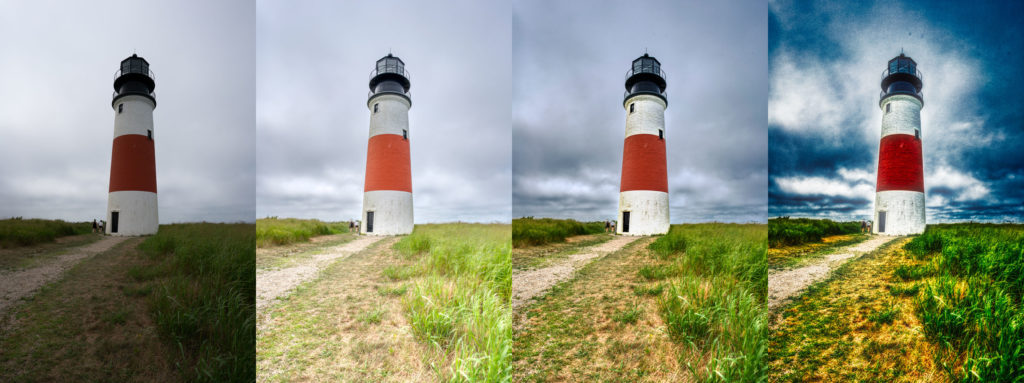
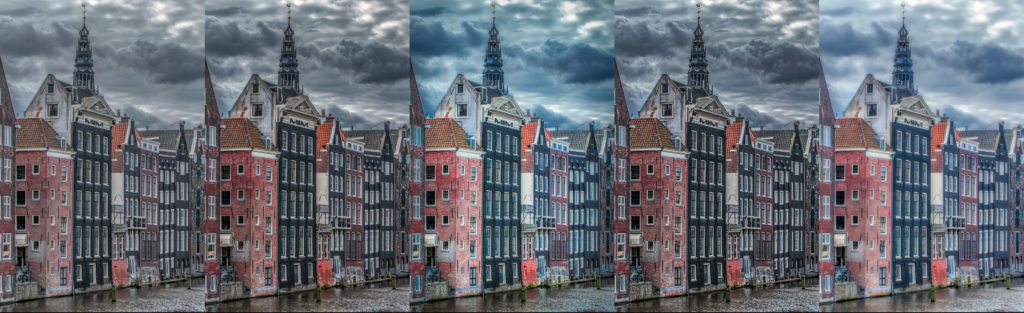
Sure, if we judge HDR by its worst examples, that’s totally valid. But it’s akin to assuming that Photoshop is only capable of examples like this or this. Don’t blame the tool for a lack of good judgement by the user. For the record, I strongly prefer the third image below.
HDR has been around for a long time. Photoshop CS5 introduced Merge to HDR Pro back in 2010 to create
32-bit files. Lightroom and Adobe Camera Raw more recently (version 6 in 2015)
added an advanced option to create floating 16-bit DNG files from several raw
images. This feature has received additional updates in Lightroom and now can
even be used to create panoramic HDR images.
Using HDR imaging techniques really makes a difference in your
photos. If you use the Shadows and Highlights sliders, you’re effectively using
a less powerful version of HDR. Why not take these controls further and get
even better results? When done correctly, HDR is naturally beautiful!
Let’s explore the options you have built into Lightroom.
 The unprocessed image


Built-In Methods
Getting proper dynamic range in Lightroom has gotten easier as the application matures. Let’s take a quick look at the built-in options. These all work best with a raw file, so be sure to capture raw in-camera. These days, even smartphones and drones can capture DNG files, which result in superior quality.
Tone Controls: Shadows & Highlights, Whites & Blacks
These four sliders are the key to getting your dynamic range
correct. Typically, it’s a give and take. For example, if you pull the
highlights to the left to recover, you should pull the shadows to the right to
lift.
- Highlights –This adjusts the brighter areas of the photo. Dragging to the left is typically ideal.
- Shadows –This slider works well in both directions. Dragging to the left darkens shadows and to the right lightens them. Typically, I’ll drag the Blacks slider in the direction opposite the Shadows.
- Whites –Use this slider to increase or decrease clipping in the highlights. If the image lacks dynamic range, drag this slider slowly to the right.
- Blacks –This slider behaves similarly to the Whites slider, except it affects the shadows. Drag to the left slowly if the image lacks dynamic range.
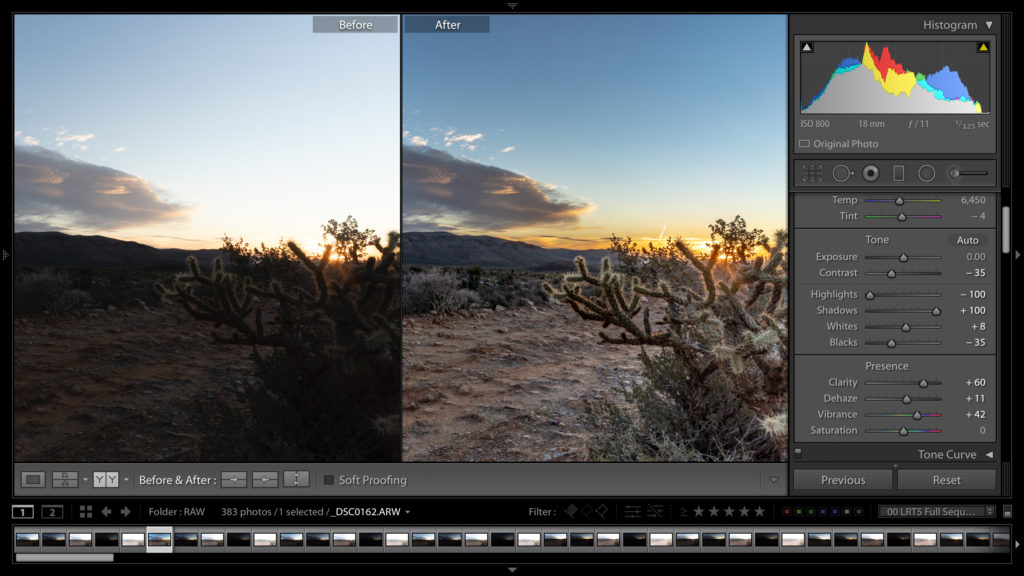
Presence Controls + Contrast
The Presence controls generally affect the depth and color
saturation of the image. I typically combine these controls with the Contrast
slider.
- Contrast –While it may seem illogical, I tend to
reduce contrast in an image to keep the midtones from getting bunched up. Try
dragging the Contrast slider to the left and then using the Presence controls
to add back depth. - Clarity –The Clarity adjustment can be thought
of as Contrast 2.0. It essentially adds depth to an image. Be sure to zoom to
100% magnification when using this slider and watch for halos around the edges. - Dehaze –This is another method for affecting
contrast and is useful to remove haze in an image.
Merging Exposures
If you’re using a newer version of Lightroom (or the Creative Cloud version), you’ll find the ability to merge exposures. The approach here is simple: To increase the dynamic range of a photograph, simply capture more information in the field.

the same. Here are the controls on a Canon EOS 5D Mark IV.
In the field: Look for a setting on your camera called Automatic Exposure Bracketing (AEB). This option allows your camera to quickly switch through several exposures while shooting in a burst mode. Most cameras have this feature, but the number of shots and the exposure difference between each shot can vary between models.

In Lightroom: The process to create a basic HDR image is pretty easy.
Step One: Select the images you want to merge. You can use Cmd/Ctrl-click to choose multiple photos.
Step Two: Choose Photo > Photo Merge > HDR, or press Ctrl+H. A new dialog box will open. After a few seconds, a preview image should appear.
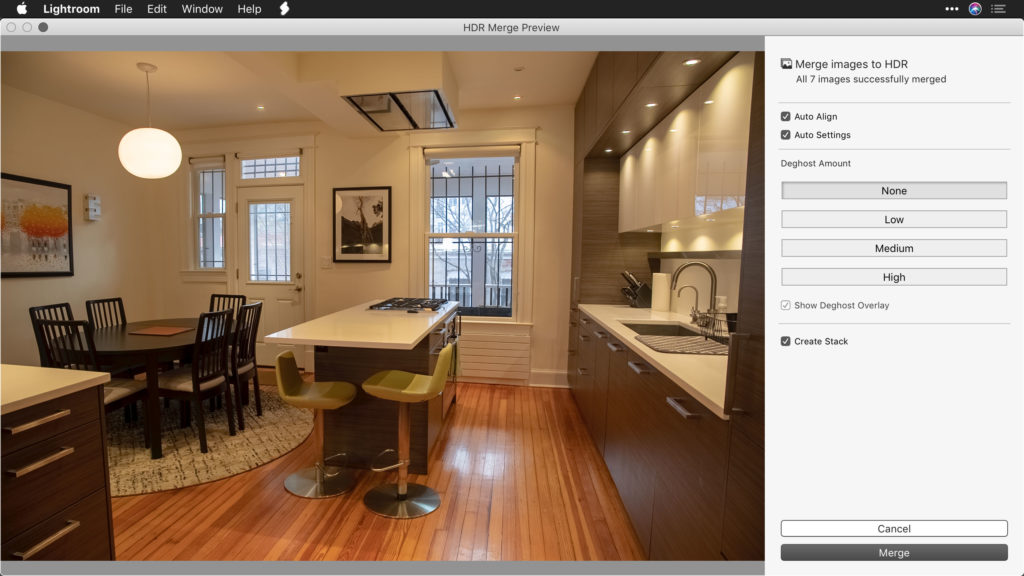
Step Three: Choose the Auto Tone option if you want Lightroom to create an evenly toned merged image.
Step Four: Choose the Auto Align option if you were shooting handheld. Otherwise, you can leave it unchecked.
Step Five: If there were moving objects in the scene (like a tree blowing in the wind or people walking), try one of the Deghosting options.
Step Six: Click the Merge button to generate a new DNG file and add it to your Lightroom catalog.
Step Seven: Adjust this new image like a regular raw file. You should see more flexibility in the dynamic range, however.
Using Aurora to Push Dynamic Range Further
While I’m a huge fan of Lightroom’s HDR toolset, I often want to take things further. For this, I turn to Aurora HDR from Skylum. It’s a plugin that works seamlessly with Lightroom.
You can use Aurora’s Quantum HDR engine to:
- develop individual photos
- merge brackets to a 32-bit file
- enhance panoramic DNGs made in Lightroom.
While Aurora has been around for many years, the latest version
changes everything. The Quantum HDR engine is a technological breakthrough. Not
only are the best parts of each photo used when merging, details that are
harmful are left out. This means no halos and less noise. In fact, the software
use artificial intelligence to recognize key parts of the image and
automatically create the best photo. If you haven’t seen it, you just have to
give it a try.
Alternative Raw Developer
If you’re facing a tough exposure, there’s an alternative to fighting it in Lightroom. Sure, you could use Tone and Curves and localized adjustments, but that takes time and doesn’t always work. Instead, I just kick the raw file over to Aurora and let it solve things. This approach is really Expanded Dynamic Range photography; the image is maximized from a single raw photo.
Step One: Select the image in Lightroom.
Step Two: Choose File > Plug-in Extras > Transfer to Aurora HDR 2019. The raw image will be opened in Aurora HDR.
Step Three: In Aurora, choose the Color Denoise and Chromatic Aberration Reduction options from the gear menu.
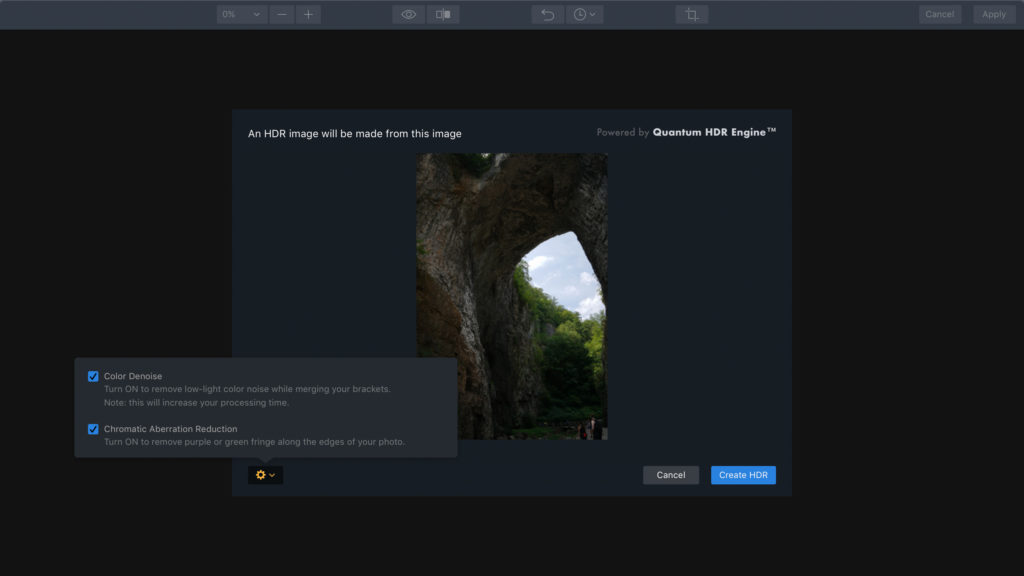
Step Four: Click Create HDR. The full range of details in the raw file will be analyzed and recomposed into a proper exposure.
Step Five: Feel free to use an Aurora HDR Look to quickly enhance the image, or use the manual controls to dial in the perfect exposure.
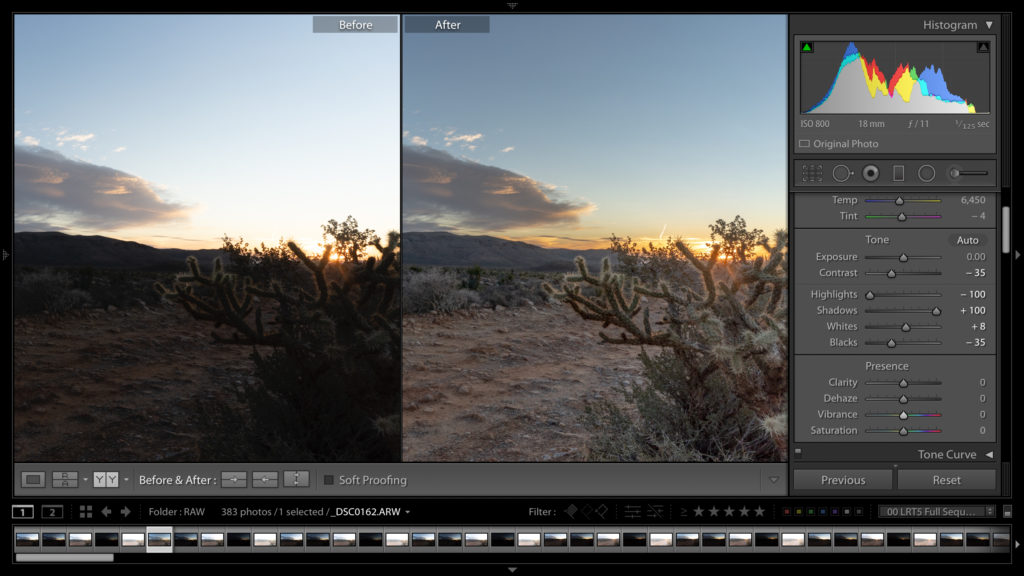
 The original image lacks major detail due to the backlit sky


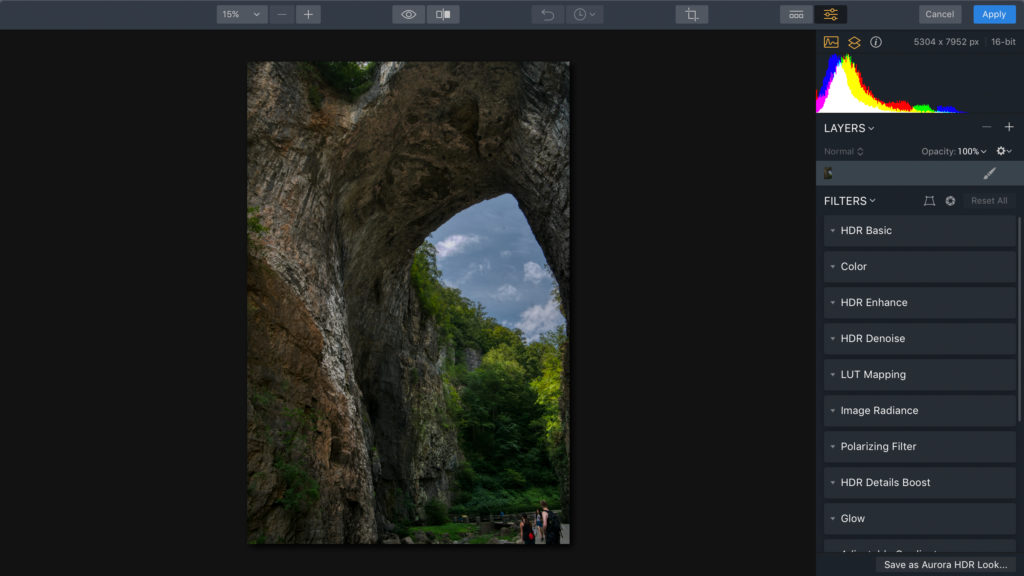
Running as a Plugin
Sometimes I get to the end of my workflow in Lightroom and I just want some more pop. The Artistic and Dramatic Looks in Aurora are great for creativity. I also love black and white photography, and Aurora’s support for Lookup Tables (LUTs) makes for compelling black and white conversions.
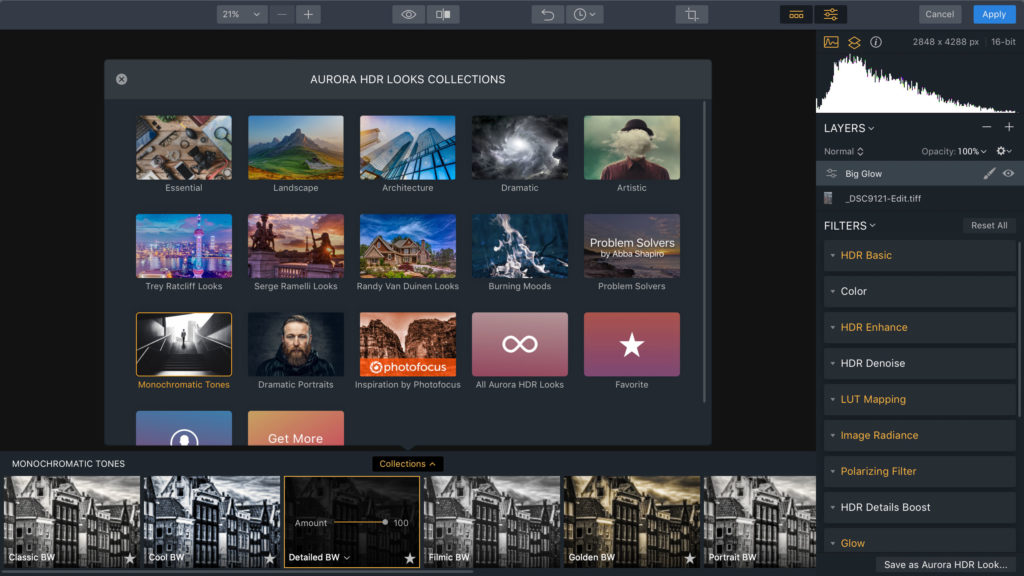
To apply a Look in Aurora:
Step One: Select an
image in your Lightroom catalog that you’d like to enhance.
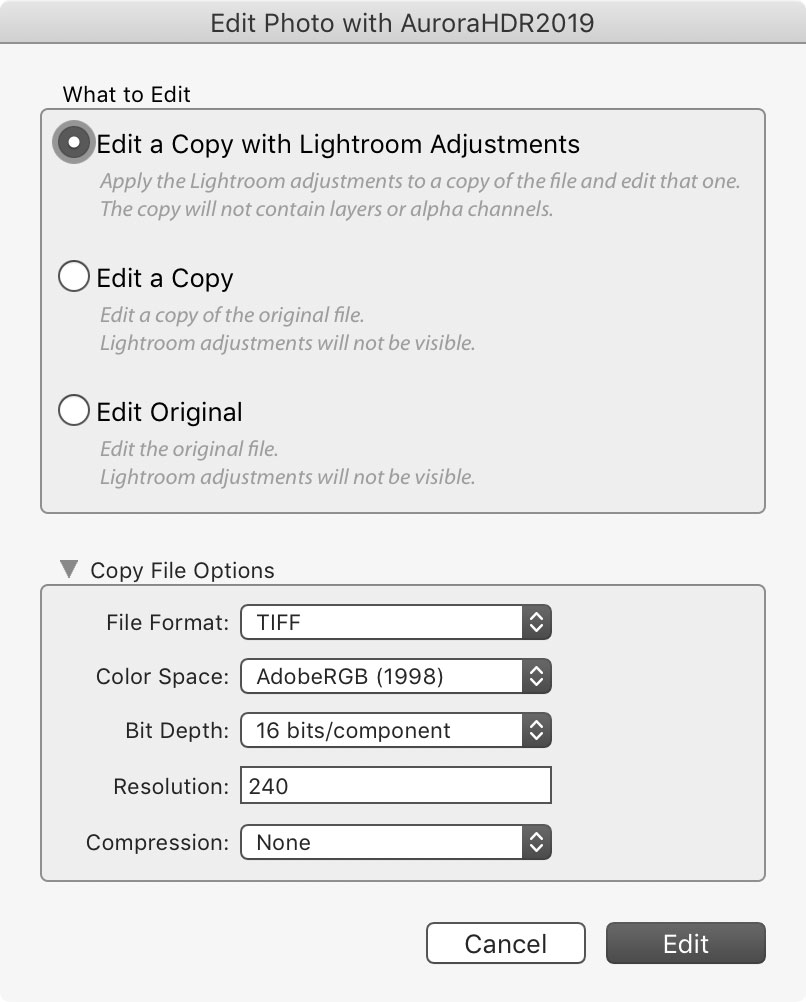
Step Two: Choose Photo > Edit In > Aurora HDR
2019.
Step Three: In the new dialog box, choose to edit a TIFF image in 16-bit color using the Adobe RGB color space.
Step Four: In Aurora
HDR, if the Looks panel isn’t visible, choose View > Show Aurora HDR
Looks.
Step Five: Click the Collections button to browse categories
or download more Looks.
Step Six: Click on a
Look in the browser.
Step Seven: Use the Amount slider to adjust its intensity.
Step Eight:
Use the manual controls as desired to further enhance the image.
Step Nine: Click Apply to return the image to your Lightroom catalog.
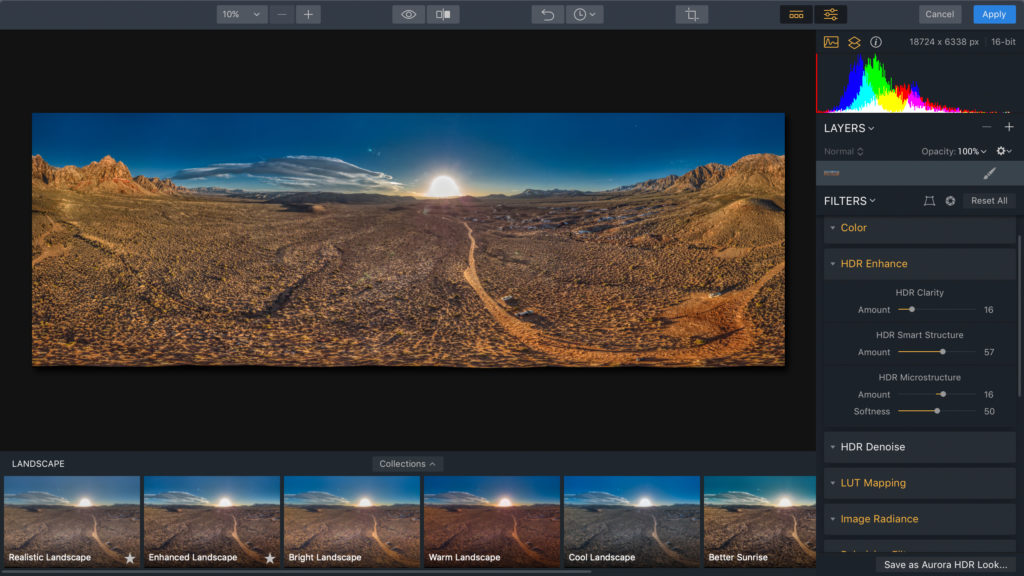
Developing an Advanced DNG
I love the ability to merge panoramic photos right inside
Lightroom. I use it all the time with my drone photographs. Most drones have
panoramic shooting built right in. If not, a gentle tap on the control stick
will let you pan the drone between shots. Just be sure to capture DNG files for
the maximum benefit.
To develop a panoramic DNG:
Step One: Select the
panoramic images in your library.
Step Two: Choose Photo > Photo Merge > Panorama, or press Ctrl+M. A new dialog box will open. After a few seconds, a preview image should appear.
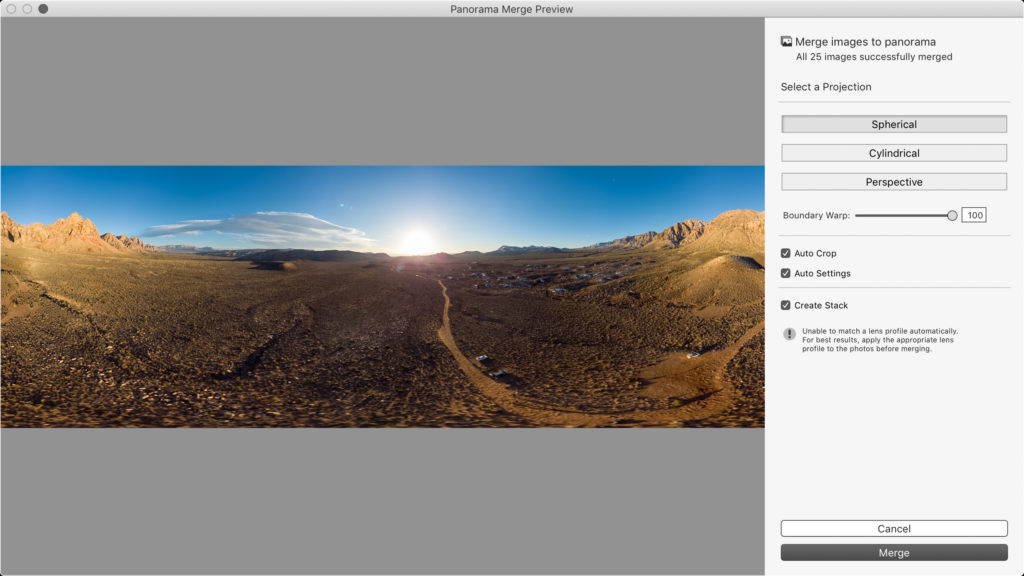
Step Three:
Choose a projection method. Spherical
and Cylindrical usually work best.
Step Four: Adjust the Boundary Warp settings and the Auto Crop to taste to give a full
image.
Step Five: When ready,
click Merge. A new DNG file will be
created.
Step Six: Select the
new file and choose File > Plug-in Extras > Transfer to Aurora HDR 2019. The raw
file will be handed off to Aurora, where exposure and detail can be maximized.
Step Seven:
In Aurora, choose the Color
Denoise and Chromatic Aberration
Reduction options from the gear menu.
Step Eight: Click Create HDR. The full range of details in the raw file will be analyzed and recomposed into a proper exposure.
Step Nine: Use Aurora
HDR Looks or the manual controls to refine the image’s appearance.
Step 10: Click Apply to return the image to your Lightroom library.
 The original DNG file in Lightroom (stitched from 26 raw files captured by a DJI Mavic Air)


Merging Brackets
While Lightroom offers a compelling solution for HDR merging, it still only creates 16-bit files. These new DNG files are quite useful, but merging with Aurora HDR allows you to create a 32-bit image.
To merge brackets in Aurora HDR:
Step One: Select the
source brackets in your Lightroom library. The files should all be in the same
format.
Step Two: Choose File > Plug-in Extras > Transfer
to Aurora HDR 2019.
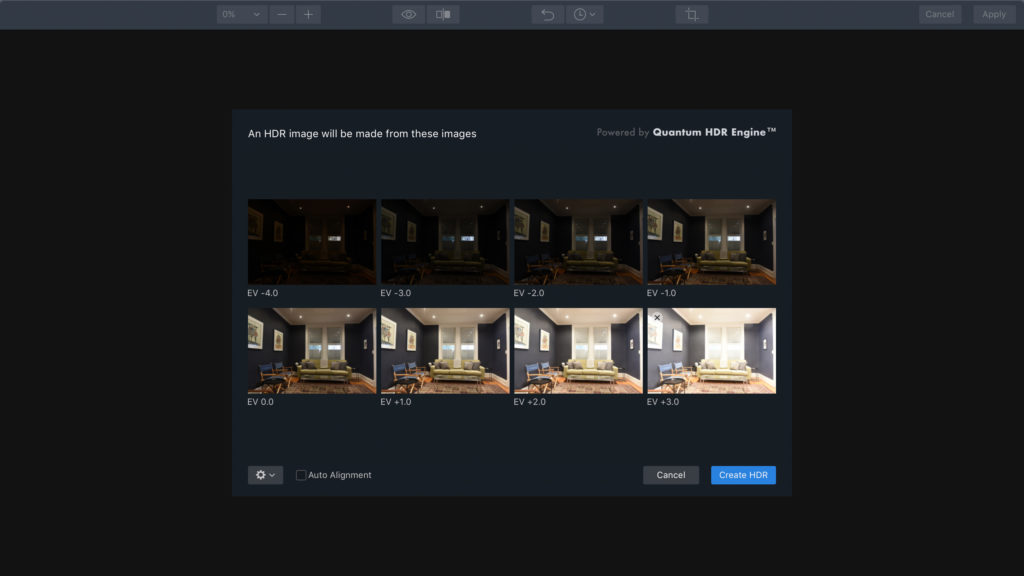
Step Three: Choose options in the merge dialog.
- If you shot handheld, be sure to select the Auto Alignment option.
- From the gear menu, you can remove ghosting and remove chromatic aberration for backlit scenes.
Step Four: Click Create HDR to merge the files. The full range of details in the raw files will be analyzed and blended into a proper exposure.
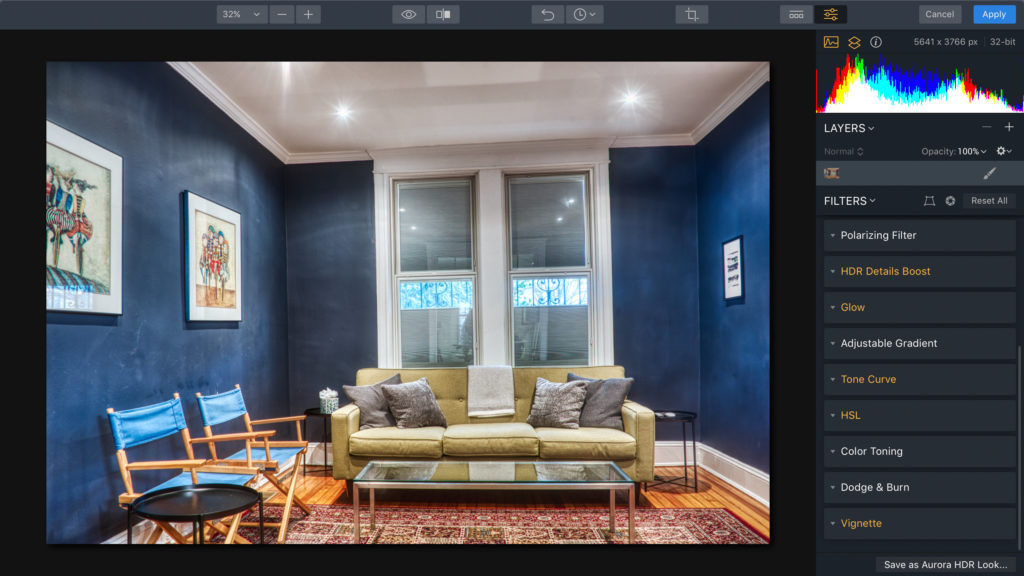
Step Five: Use Aurora
HDR Looks or manual controls to refine the image’s appearance.
Step Six: Click Apply to return the image to your
Lightroom library.

Step Seven: Take advantage of Lightroom adjustments like Upright and Sharpening.
Now You Try
I’m sure you have images in your library where dynamic range is challenging. Try out the techniques in this article and see if they make a difference. Better yet, the next time you’re shooting, give bracketing a try. And don’t forget to give Aurora a chance. It’s perfect for unlocking the hidden beauty in your photos and gives a huge boost to natural light photographers. The power of HDR can be our little secret.
The post How to Recover Shadows and Highlights Like a Pro—A Guide to Maximizing Details for Any Photograph Using Aurora HDR appeared first on Lightroom Killer Tips.