
3 Different ways to remove anything from a photo in Adobe Photoshop
Let’s get started on removing a person from a photo. In today’s fast paced world, people change jobs or exit relationships quicker than the shutter on a digital camera. Ill show you how to get them out of the picture. Yes, terrible pun intended.
Remove a person from a photo in photoshop
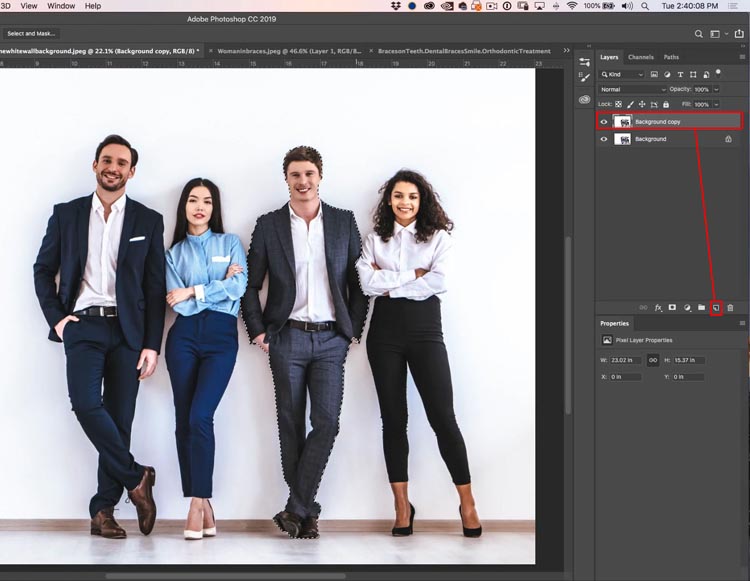
Lets begin with the photo of 4 people, and 4 are about to become 3. The guy on the right is about to get erased.

Step 1.
(Optional) Duplicate the layer to have an unedited copy of the bottom in case we need to do any masking or repair. Drag to new layer icon to duplicate.
Using the Quick select tool, make a selection around the person to erase (or use the lasso tool if you like).
Step 2.
Press Shift+Return, (Shift+Backspace on Windows) This open the fill dialog box
Chose Content Aware and click ok
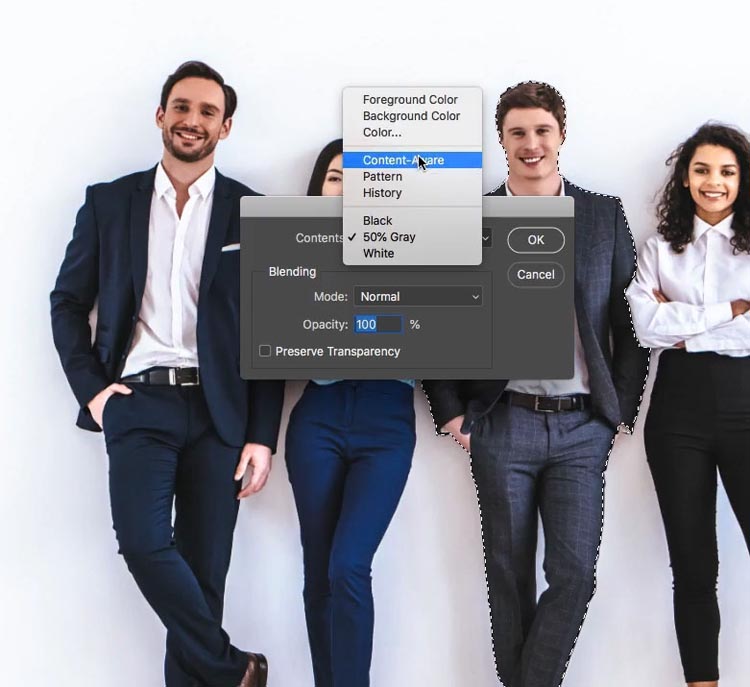
Most of the time, Content Aware Fill works great, but sometimes you get a result like this.

Step 3.
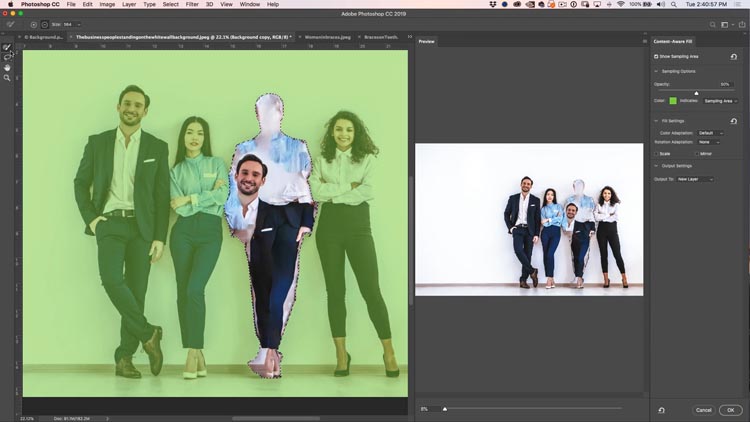
Have no fear, we can give Content Aware some directions. Choose Edit>Content Aware Fill (In Photoshop CC)
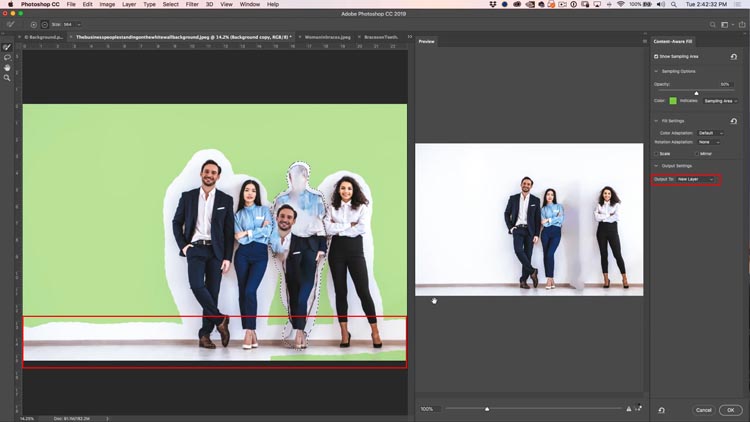
You will see this window. On the left is where we control what CAF (Content Aware Fill) uses. On the right is the preview.
Step 4.
Using the top left tool (on by default) Paint over the people.
Notice that only the green area is used to fill. It looks better, but there is a weird outline.
Step 5.
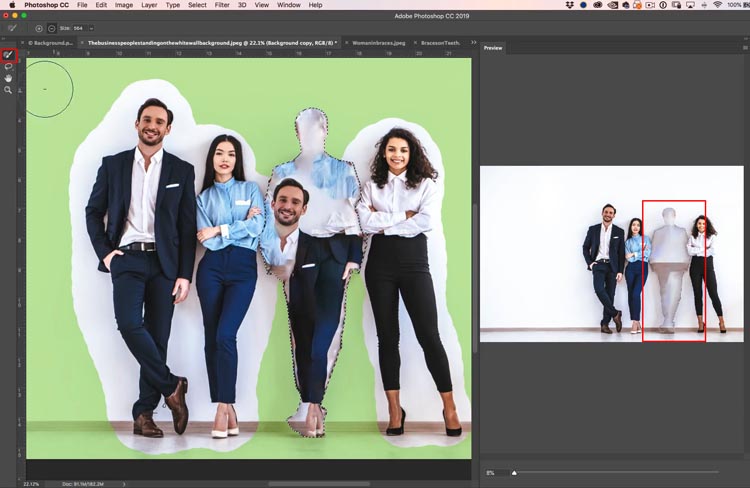
Using the Lasso tool, make a selection around the edges of our person, so CAF has more edges to blend with. (Initially I could have made a looser selection around out guy, but then you wouldn’t learn what to do when it goes wrong).
See how much better the edges look now. If you are lost, check out the video above, well, you really should watch out anyway as there’s a ton of info there).

Step 6.
To get rid of the lines in the middle, use the brush to exclude the baseboard.
By default Output is set to new layer. This is a safe way to go incase you need to change anything.
Click ok.
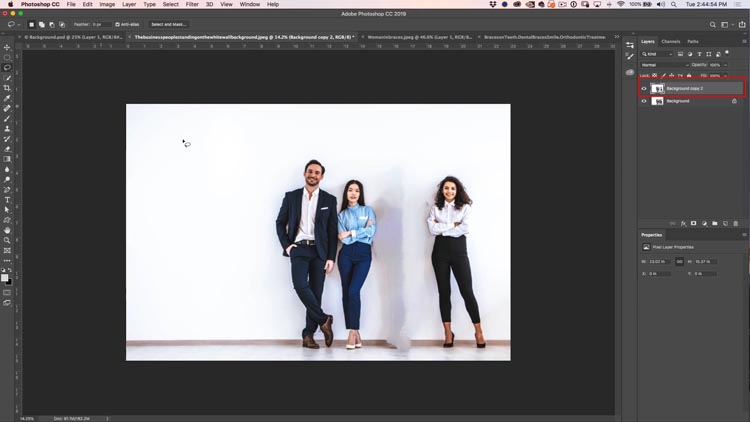
And here you can see the result, with the content aware on a new layer.

Step 7.
When you are happy with the result, merge the Content Are Layer into the layer beneath. Click the top layer and Press Cmd/Ctrl+E
Step 8.
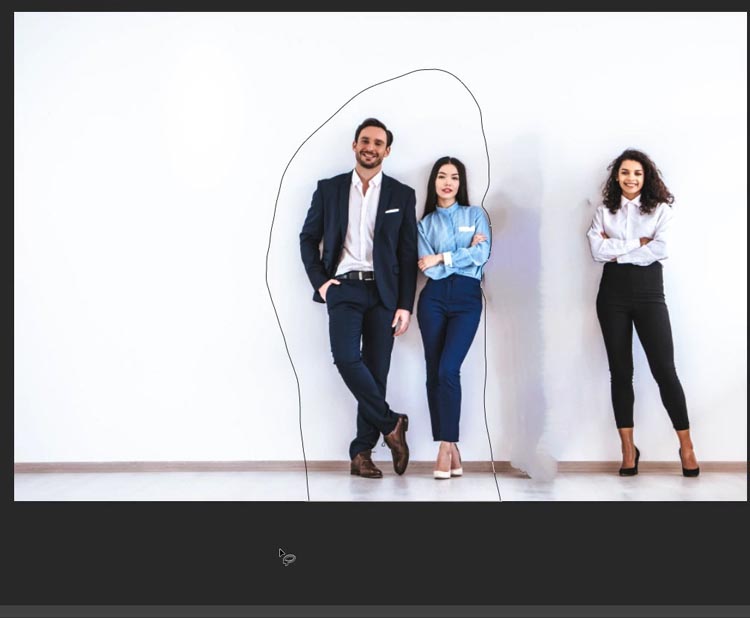
Now, to fill in the gap, we need to move the couple on the left over.
Using the Lasso tool, make a selection around them. Keep it nice and loose, except for the woman in blue’s shoulder, because we want that to snug up against the woman on the far right.
Step 9.
Wait! If you move them over, you will be left with a hole. We need to move them and heal the hole where they were at the same time. What to do?
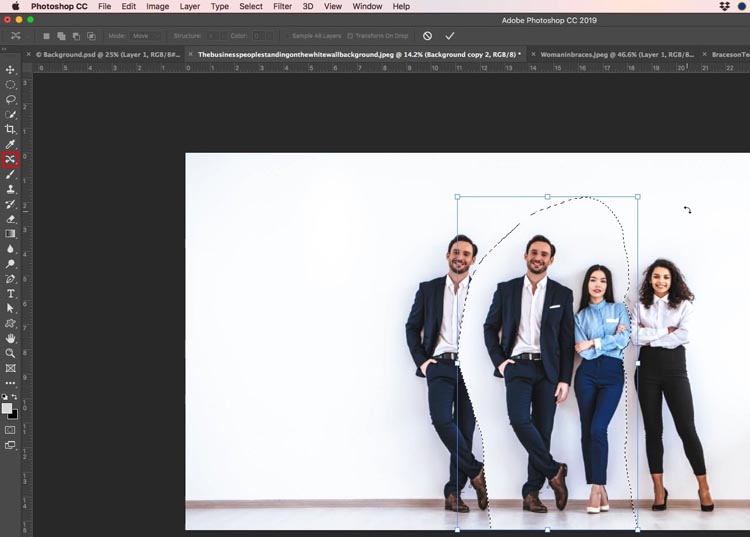
Choose the Content Aware Move tool. (“Oh, that’s what its for?” “Yep”).
Slide our selection over to the right. There are 2 of them, its ok, trust me.
Step 10.
Press enter and the selection will be blended into the new area and the place where they were will be healed too.
You may still need to do a little clean up, but it’s easy.

I just used the Clone Stamp to clean up. Content-Aware or healing brush, work well too. (You are about to see healing brush in action)

How To Remove Power lines from Photos in Photoshop.
Here is the Las Vegas sign. I bet you didn’t realize it was covered with power lines? Lets ex them.

This technique is so simple, you will laugh, you will cry and you will wish you knew this before.
Choose the Spot healing brush.
Click once at one end of the power line. Hold down the Shift key and click on the other end of the power line.
A straight black line will appear for a second.

The line will disappear, and so will the power line. Nice!
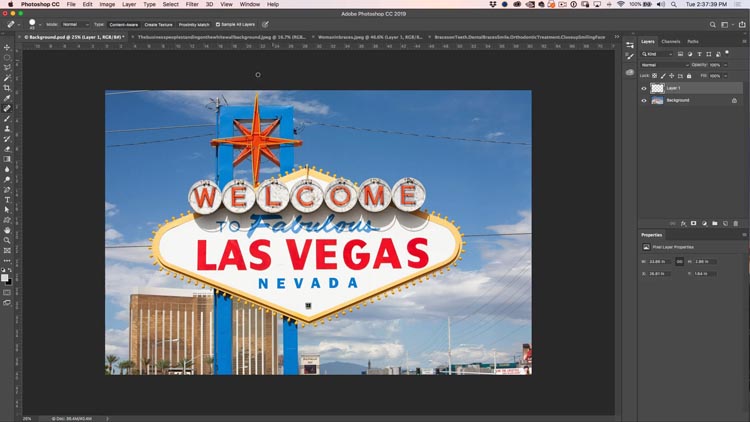
In just a couple of seconds you can remove the lines.

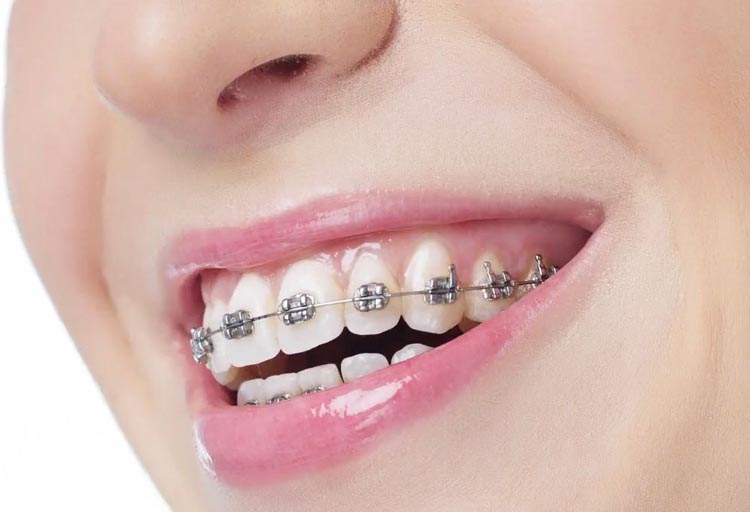
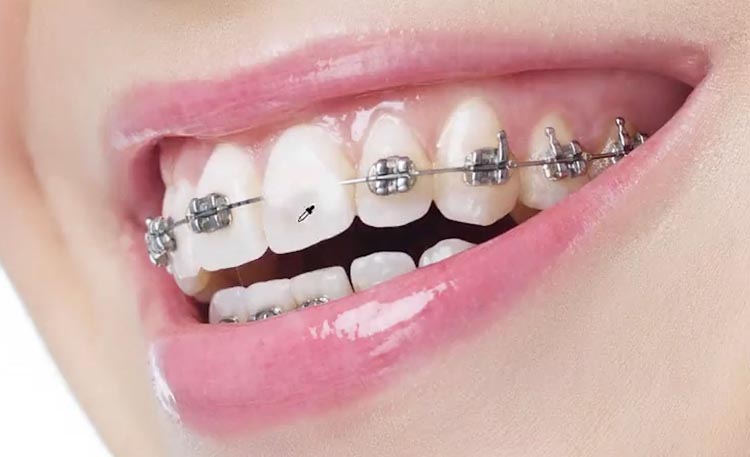
How to remove braces from teeth in Photoshop
This is a super fast and unexpected way to remove braces.
After using the clone stamp tool and the healing brush, I finally realized something about teeth. They don’t have mush detail. IN fact I spent about 12 hours cleaning teeth last week.. in Photoshop. What were you thinking? I’m a retoucher, not a dentist. But this is the exact technique I use most of time on high-end work for Hollywood.
Step 1.
Choose the Brush tool and select a small, soft edged brush.
Create a new layer.
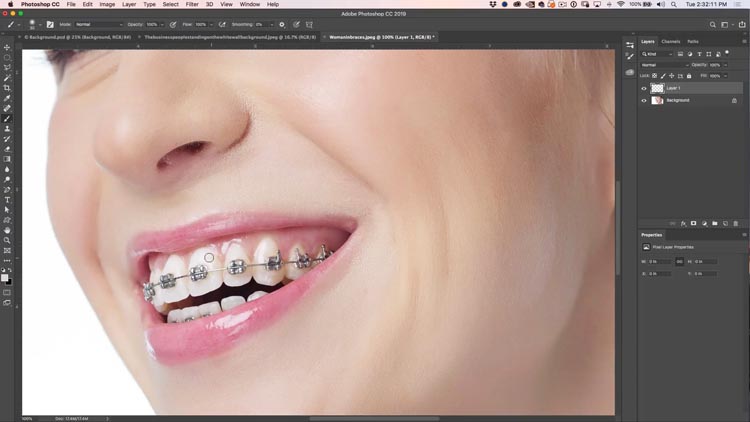
Step 2.
Hold Alt/Option and the brush will turn into an eyedropper. Click close to the area you want to paint to select the color.
Paint of the braces/filling, or anything else you want to remove.
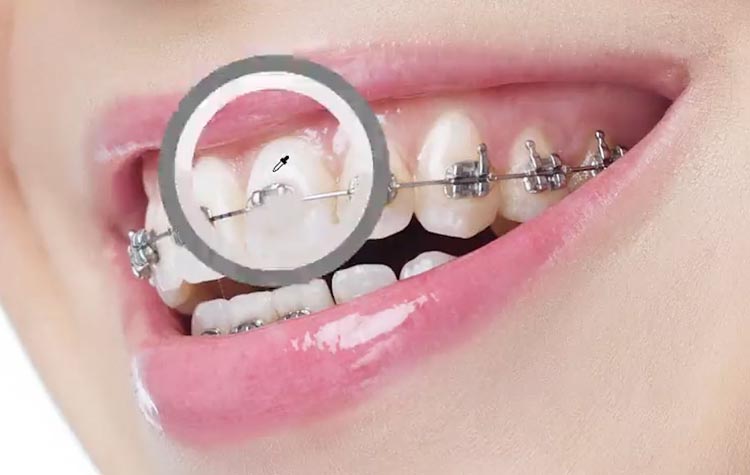
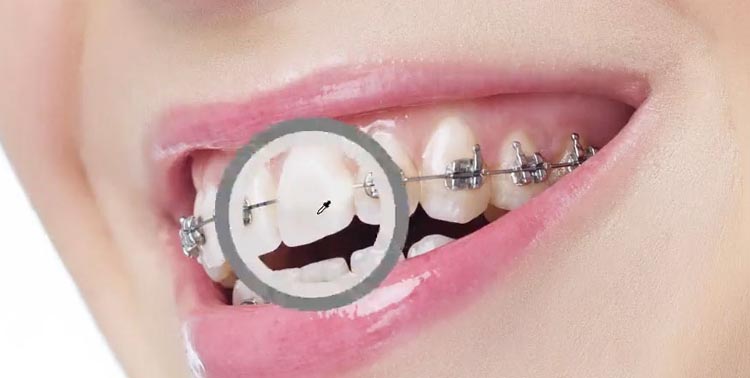
Step 3.
Sometimes you may nice a different in shade from the top of the tooth to the bottom.
Here is how to blend the tones.
Hold alt/Option to sample the color.
Reduce the brush opacity to 20% (The 2 key on the keyboard will do it)
Paint over the area t blend using a low opacity (20% in this case) and eventually the tones will even out. as shown. Remember to keep sampling the new tone. Paint, sample, paint, sample.
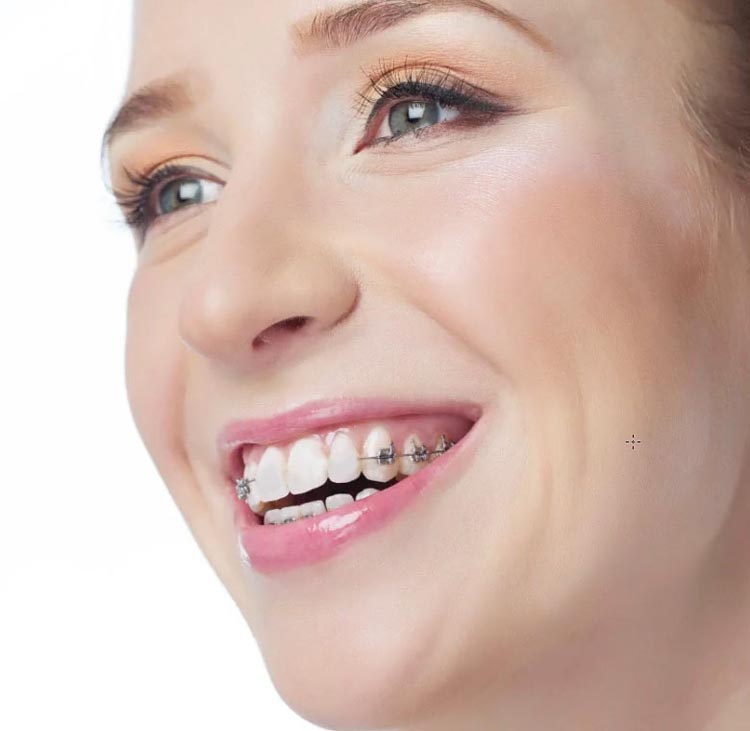
Eventually it will be perfect.
Repear these steps for all the teeth and you are done. Just make sure to zoom innice and close as you work and take your time.
I really hope that you found this video and written steps useful and that this helps you remove things in photos and generally assists with your retouching. If it was helpful, please tell everyone about PhotoshopCAFE and share this tutorial on your social media.
Great to see you here at the CAFE
Colin
PS Don’t forget to join our mailing list and follow me on Social Media>
(Ive been posting some fun Instagram and Facebook Stories lately)
You can get my free Layer Blending modes ebook here
PHOTOSHOP CC SELECTION SECRETS
NEW COURSE BY COLIN SMITH
Stop struggling with selections. Learn how to select and cut out anything from people, hair, trees, complex shapes and even transparency.
Discover how to get perfect edges, without halos and jaggies. Colin shows you exactly how in 18 lessons.
All the images are included for you to follow along.
You will be able to select and cut out anything: faster and cleaner.

MORE INFO HERE
The post How To Remove Anything from a Photo in Photoshop appeared first on PhotoshopCAFE.