
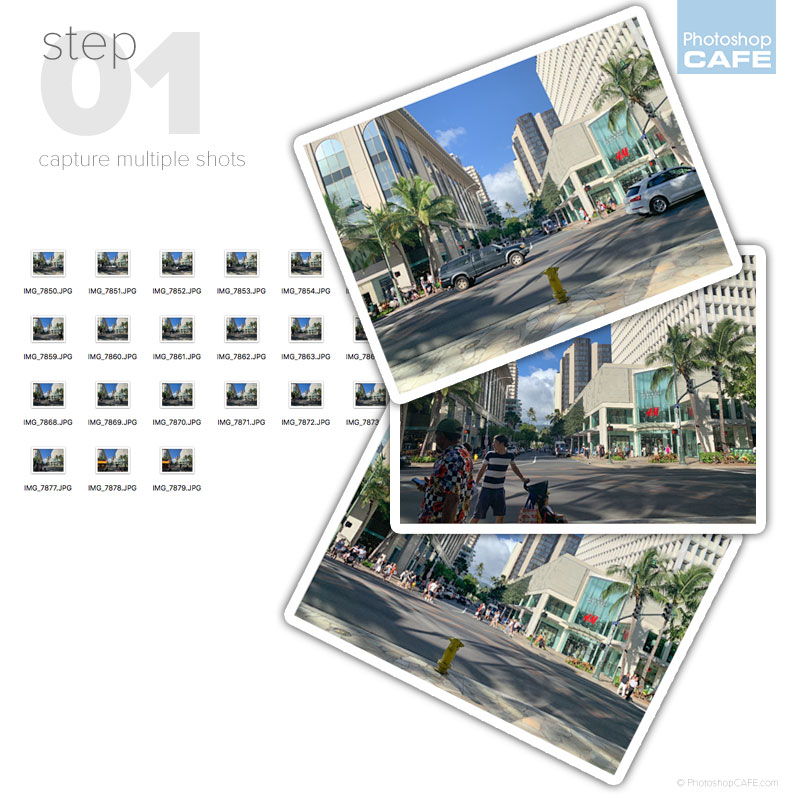
Shooting for tourist removal
The first thing you need to do is shoot the photos, so its easy to remove crowds and distractions later. For this tutorial, I handheld an iPhone and shot the images, just to show a worst-case scenario (This is why PhotoshopCAFE tutorials, actually work). If you use a DSLR/Mirrorless on a tripod, you’ll get even better results.
When you shoot, you will need moving subjects. Keep shooting until every area in the photo has the background revealed at some point. Sometimes you can get the will 3 shots, sometimes it takes 20 or so. Shoot, wait for things to move and then shoot again. A good opportunity for this series was the people were crossing the street.
Step 1.
Upload all the photos and save them on a folder.
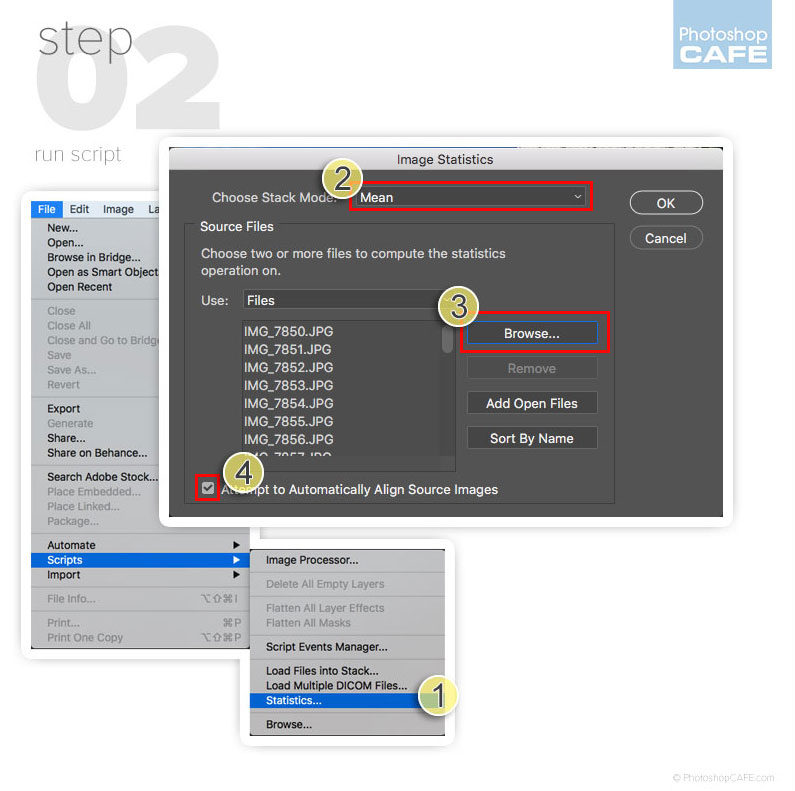
Step 2. Run the Photoshop Script (The Short of it)
This step only works in Photoshop CC. Don’t worry, I’m about the break it down and show how it also works in Photoshop CS6, as well as give you more control in CC.
Choose File>Scripts>Statistics
Choose Mean as the stack mode.
Select your folder of image Tip: (Cmd/Ctrl+A to select all images when you are in the folder.)
Turn on Auto Align
Click ok and you are done.
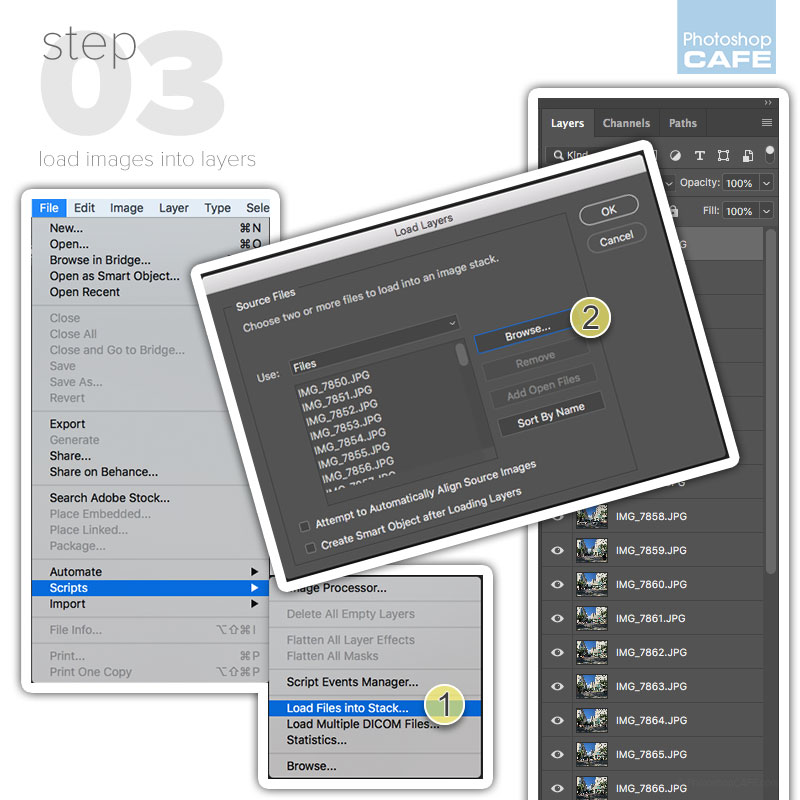
Step 3. Walking through the process. Load images into layers.
Let’s break it down. This works in Photoshop CC and CS6.
Choose File>Scripts>Load Files into Stacks. (1)
Choose your older of images (2)
Each photo will now be in a layer.
Step 4. Aligning all the layers.
If we don’t align the layers with each other, you will end up with a blurry mess.

Select all the layers: Click the top layer. Hold down Shift and click the bottom layer. All will be selected. (1)
Choose Edit>Auto Align Layers. Choose Auto. (2)
Click ok and all the layers will now be aligned with each other. (This may take a moment).

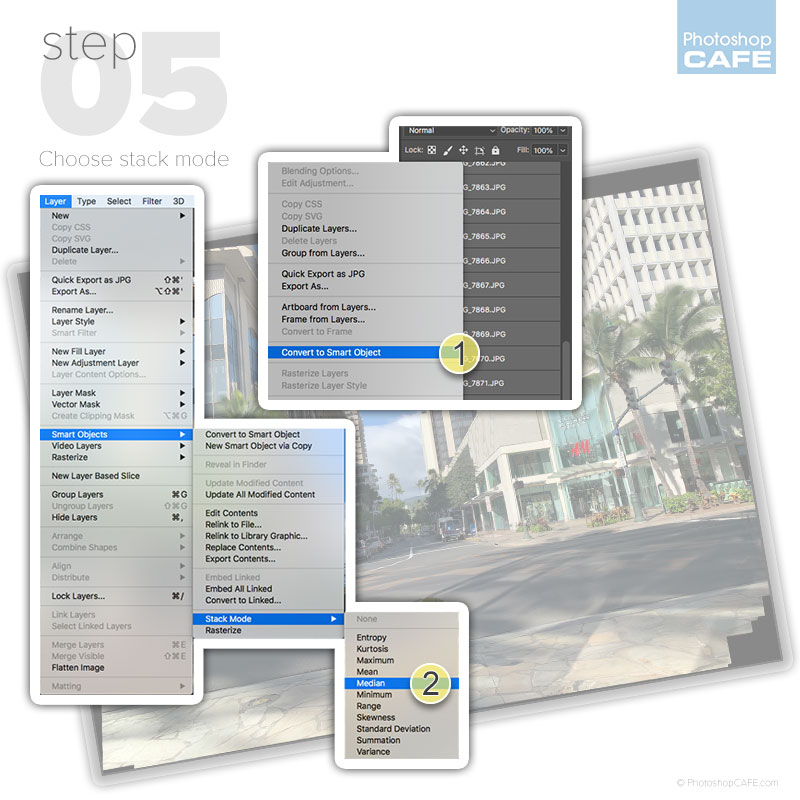
Step 5. Removing all the people with a Photoshop stack mode.
This next step will do all the work for you. This was originally designed for medical imaging purposes in Photoshop Extended, originally dropped into Photoshop CS3 extended. See the PhotoshopCAFE Superguide to see every feature introduced into Photoshop since CS3,
With all the layers still selected in th layers panel, right-click and choose Convert to Smart Object. This is the key to it all working.
Choose Layer>Smart Objects>Stack Mode>Medium.
(The stack modes are like Blend modes for Smart Objects, but way-more sophisticated).
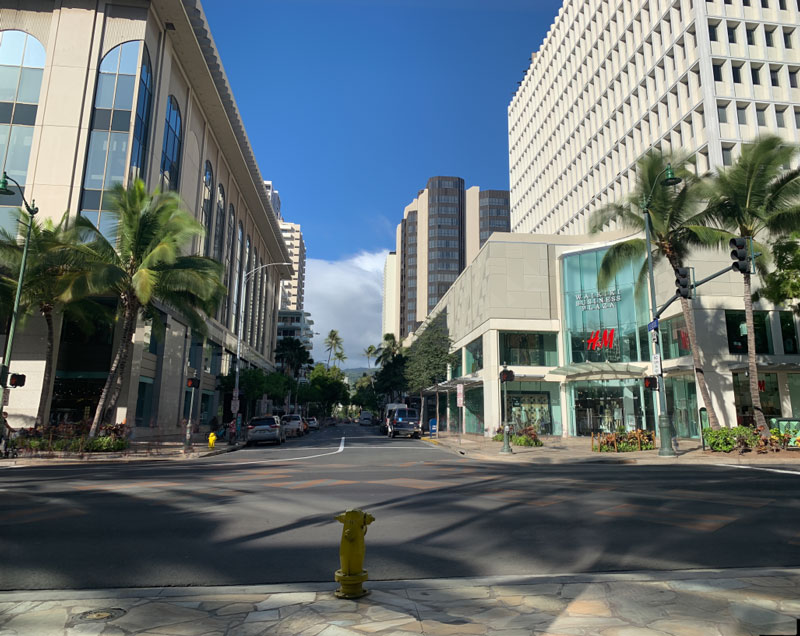
And the result is all the distractions are gone from this merged photograph.
As you can see the Medium Stack Mode did all the heavy lifting and removed all the temporary objects, AKA people and moving vehicles.
You may still have to do some minor touch ups, but most of the work is done for you in just a few clicks.
Here are the rest of the tutorials in the How To Remove Anything From A Photo in Photoshop series. Let me know how you like this series by dropping a comment here, or on our youtube page. (Don’t forget to subscribe).
How to Remove anything from a Photo in Photoshop
This tutorial is part of a free tutorial series by Colin Smith, see the other tutorials here.
- How To Remove Anything from a Photo in Photoshop
- How to Remove Reflections from Glasses in Photoshop
- How to remove a person from a photo in Photoshop
- How to Remove Shadows from a Photo in Photoshop
- How to Remove the Background of a photo in Photoshop
- How to Remove Tourists in Photoshop Crowd removal
If you liked this tutorial, please tell your friends about the new and updated PhotoshopCAFE. Its the Same PhotoshopCAFE I started in the year 2000, but I have updated almost all the tutorials and add a new one every week.
Colin
PS Don’t forget to join our mailing list and follow me on Social Media>
(Ive been posting some fun Instagram and Facebook Stories lately)
You can get my free Layer Blending modes ebook here
PHOTOSHOP CC SELECTION SECRETS
NEW COURSE BY COLIN SMITH
Stop struggling with selections. Learn how to select and cut out anything from people, hair, trees, complex shapes and even transparency.
Discover how to get perfect edges, without halos and jaggies. Colin shows you exactly how in 18 lessons.
All the images are included for you to follow along.
You will be able to select and cut out anything: faster and cleaner.

MORE INFO HERE
The post How to Remove Tourists in Photoshop in 3 clicks – Crowd removal appeared first on PhotoshopCAFE.