
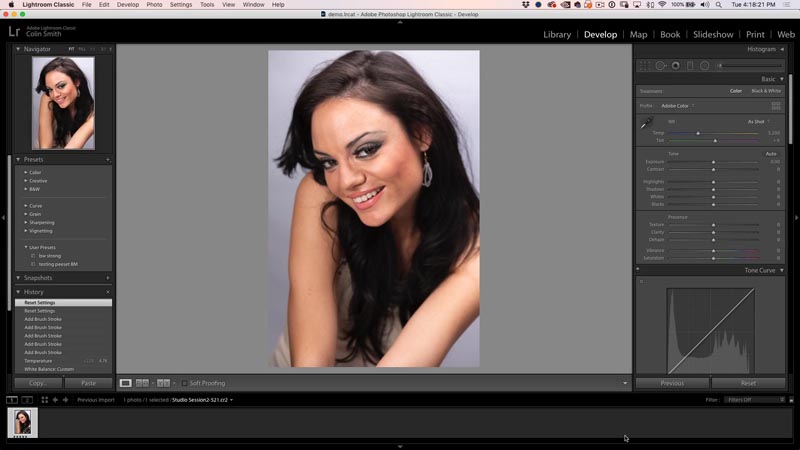
Begin with a photo in Lightroom or Camera RAW. This is model, Lina that I photographed with a Canon 5D.
Step 1
Choose the develop module.
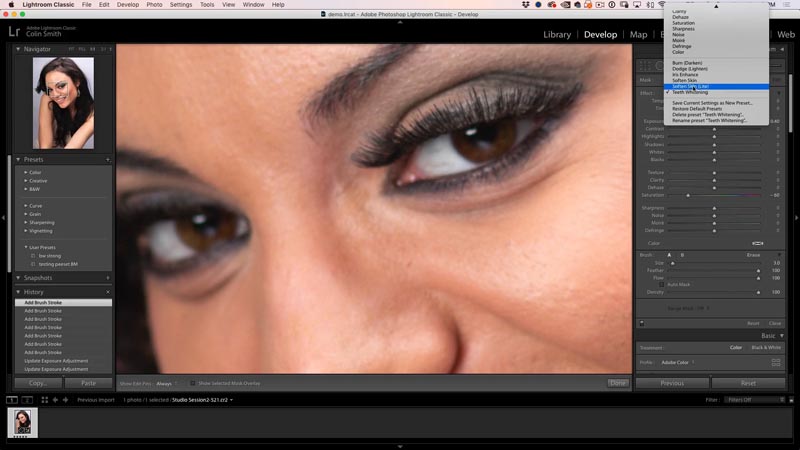
Step 2. Whitening teeth
Choose the Adjustment Brush.

Click at the very top of the adjustment panel, where you will see the presets.
Choose the teeth whitening preset (if you are on ACR, skip to the next step, as these presets aren’t in Camera Raw).
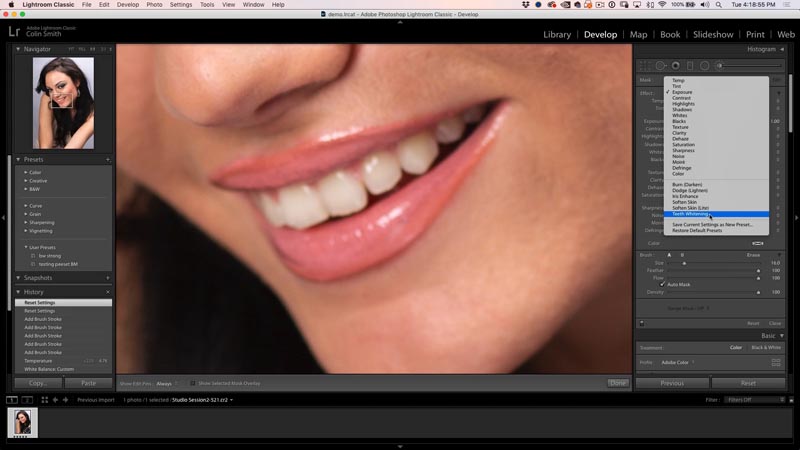
Choose these settings if you don’t have the preset.
- Exposure = .4
- Saturation = -60
Turn on Auto mask, so you don’t paint outside the teeth and desaturate the gums.

Paint on the teeth to make them bright and white, but natural looking.
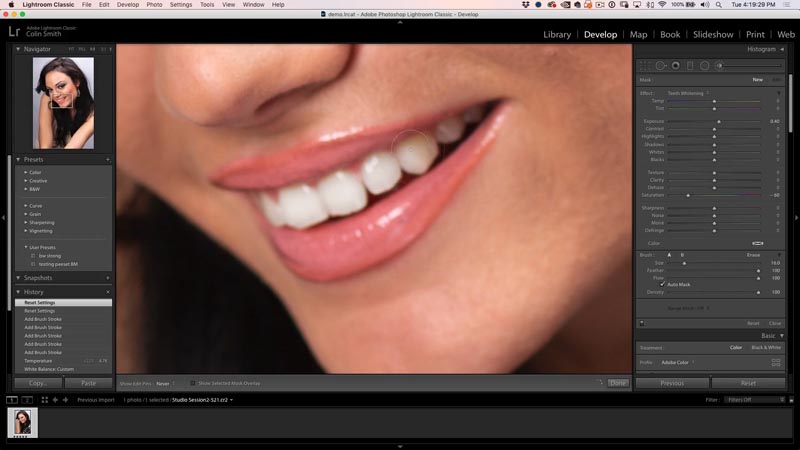
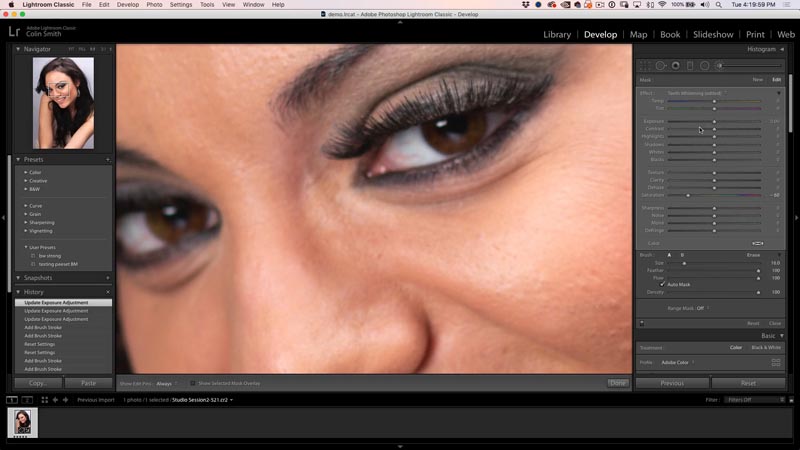
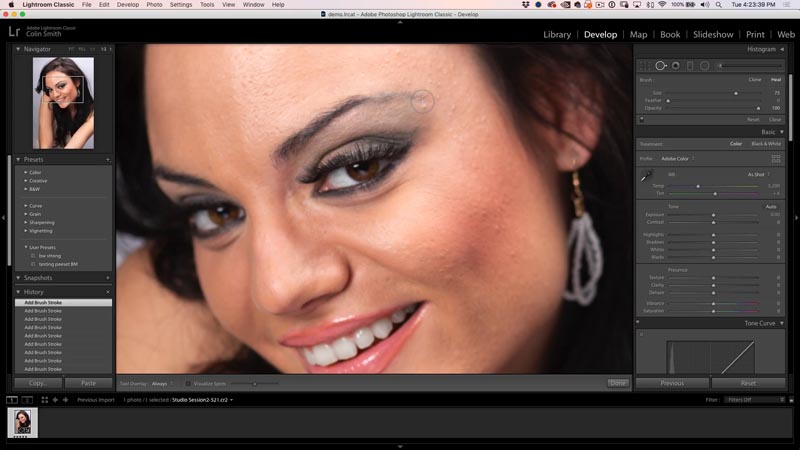
Step 3: retouching the eyes
We want to remove the red veins and also brighten up the iris.
With the adjustment brush, reset everything, except for saturation. Reduce that to -60.
Carefully paint over the veins and red areas.

Brightening up the irises.
Click on the adjustment brush again to start a new brush.
Choose iris enhance in the presets, or use the following settings:
- Exposure .35
- Clarity 10
- Saturation 40
Using a small brush with Auto Mask off, paint in the iris of each eye to add some life

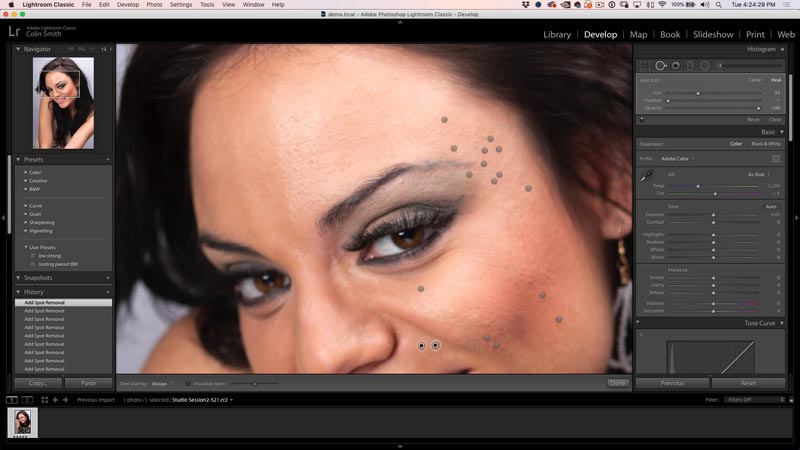
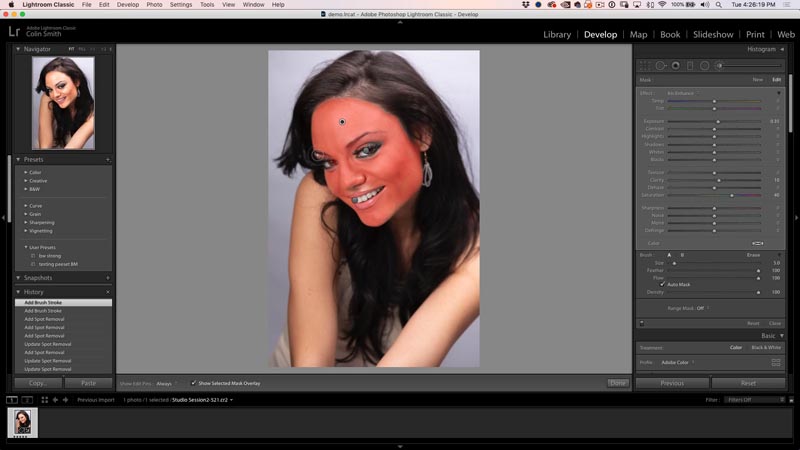
Step 4. Removing blemishes on the skin
This next step addresses blemishes such as pimples.
Choose the spot tool and adjust the brush size until its about double the size of the blemish.
Click just once to add the spot. Lightroom will sample the surrounding area and fix the blemish. If you don’t like the result, press the forward slash key / and Lightroom will sample from a different area.
Repeat this for each of the blemishes.
NOTE: If you want to fix individual wrinkles, drag with the spot tool across the wrinkle and lower the density.
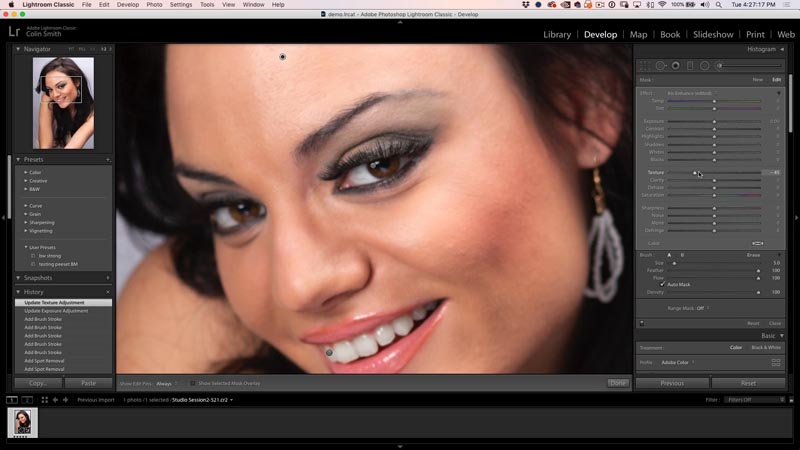
Step 5, smoothen the skin.
Now we want to smoothen out the skin texture to make it silky smooth.
The first thing is to mask the face. Choose the adjustment brush.
Turn on “Show Selected Mask Overlay” at the bottom of the main window.
Using Auto Mask, paint over the face, being careful to avoid the eyes and mouth.
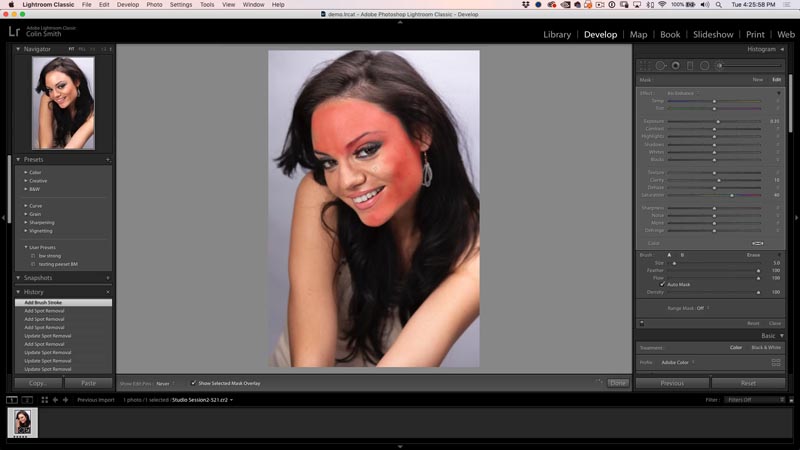
You should have the entire face selected now.
Reset all the settings on the adjustment brush by holding down Alt/Option and clicking on “effect” at the top of the adjustments.
Hide the mask overlay.

Now, adjust the texture to the left until it looks nice and smooth, but not so far that it looks unnatural.
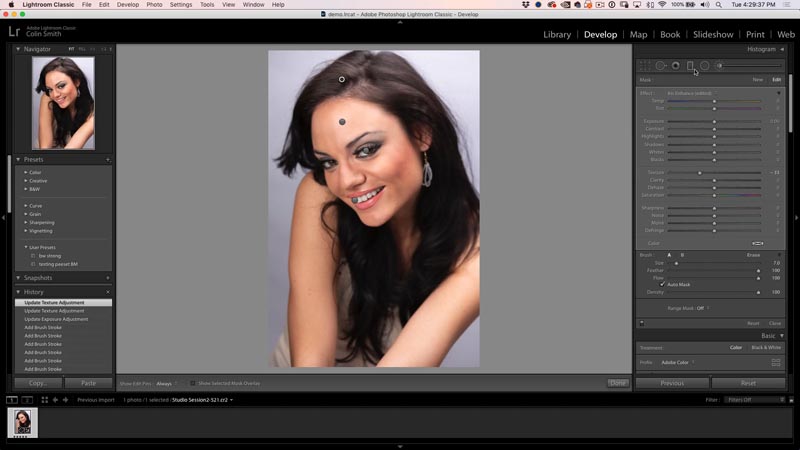
Step 6. Adding shine to the hair.
Do you want silky smooth hair? A lot of people forget about this step.
Click on the adjustment brush to create a new brush. In the same way, we masked the face, now mask the hair.
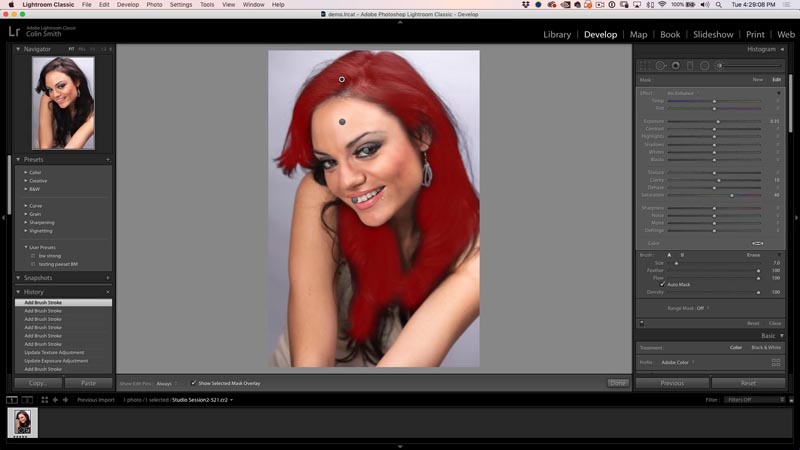
Adjust the texture until it looks good. For some weird reason, a lot of people add sharpening to the hair, thinking that adding detail will look good. All that does is make hair look dry and stringy. Reduce the texture and it looks smooth as silk. A sheet of hair looks better than straw-like strands.
If you get stuck on any of these steps, please watch the video at the top, which goes step by step through everything.
If you want to really learn Lightroom, Check out my new Lightroom Classic training. Photoshop Secrets: Lightroom for Digital Photographers. It’s the most comprehensive training for Lightroom Classic out there and it’s one of those unicorn training courses. Very practical, plain English, easy to follow, lots of mind-blowing tips and super useful. If you have watched a course like this you will know what I mean, If not, you’re missing out ?
Thanks,
Colin
PS Don’t forget to join our mailing list and follow me on Social Media>
(Ive been posting some fun Instagram and Facebook Stories lately)
You can get my free Layer Blending modes ebook here
The post How to retouch a face in Lightroom or Camera Raw appeared first on PhotoshopCAFE.