
First, what is the “Sharpening Mask?” It is when you’re applying Sharpening, but you don’t want the sharpening to affect the entire image. For example, if you’re sharpening a bridal portrait and you don’t want her skin sharpened, or you’re sharpening a landscape shot and you don’t want the clouds sharpening.
When you use the Masking slider (in the Detail panel), it removes the sharpening from those areas as you drag the slider ot the right. On Lightroom on your desktop or laptop computer, you see a preview of which areas are being masked by holding the Option key and then dragging the slider. The areas that appear in black are no longer be sharpened. It makes it really easy to see how far to drag the Masking slider when you can see what’s being sharpened (and what’s not). It’s quite different on mobile (as you’ll see below).

STEP ONE: Here’s what you do: Once you’ve applied some amount of sharpening (in the Detail panel), tap and start dragging the Masking slider (shown circled here in red), to the right (as shown above).
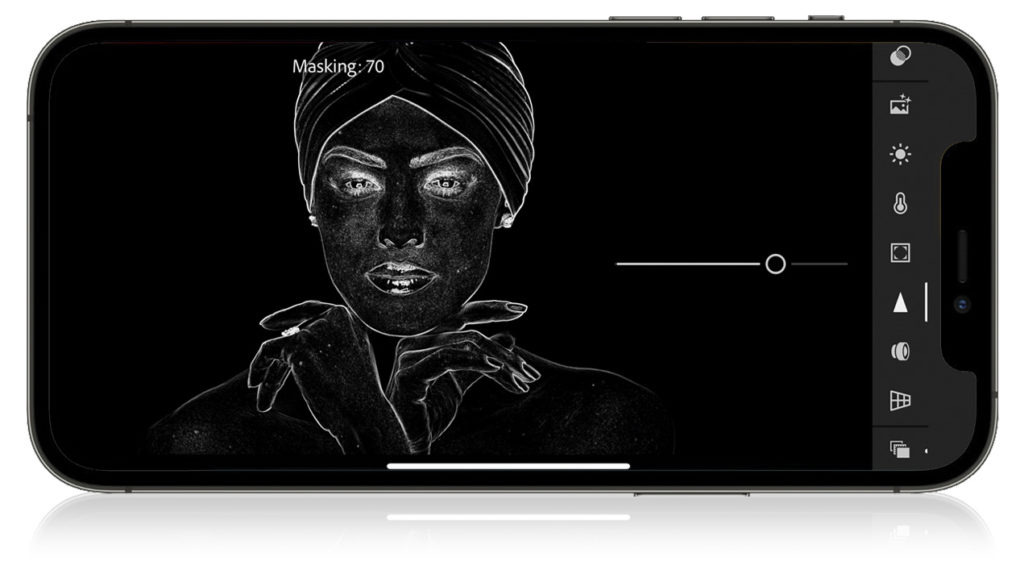
STEP TWO: While your finger is still on the Masking slider, tap anywhere on the screen and you’ll see the Masking preview take over the screen (as seen above).
Yeah, it’s a little different, but it gets the job done. 
TIP: This also works when setting your White and Blacks points (using the Whites and Blacks sliders).
OK, let’s rock this week, everybody! #GoBucs!
-Scott
The post How To See The Sharpening Mask Preview Using Lightroom on Mobile appeared first on Lightroom Killer Tips.