
How to stack presets in Lightroom and Camera RAW
There is something really important to understand about creating presets that changes their behavior. If you watch the short video, I demonstrate exactly how this works. Some presets cause everything to reset, other presets only change some sliders and can be stacked on top of each other. Sometimes when you apply a preset it seems to replace everything, and other times it seems that parts of a previous preset seem to “stick”. Why is this?
This tutorial will work for Lightroom as well as Adobe Camera RAW. They both use the same preset system, when you install presets in Lightroom or Camera Raw, they will appear in both applications. A restart is required.
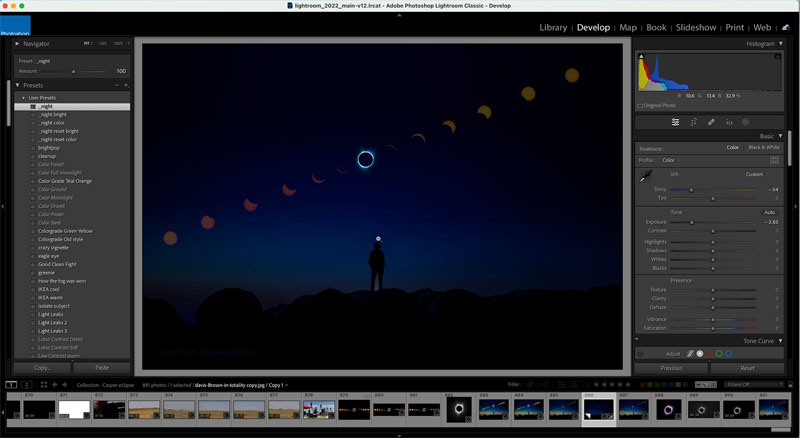
For example, here is an image, where I have turned up the color temperature to demonstrate how this works. I want to add a light leak, I roll over the first preset, the colors haven’t changed.
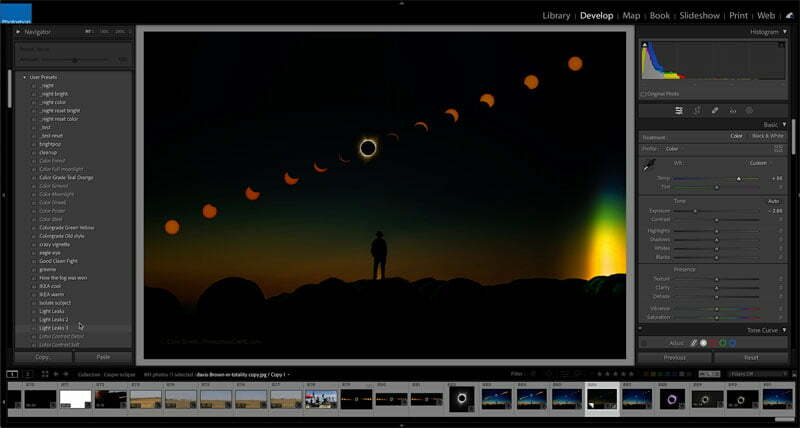
I roll over a second light leak preset and the colors still haven’t shifted.
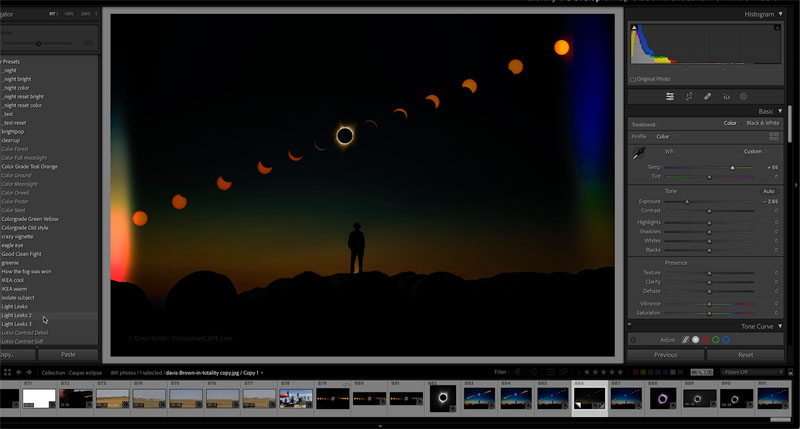
I roll over a third light leak preset and now the colors are shifting. Why is this? What’s different about this preset?
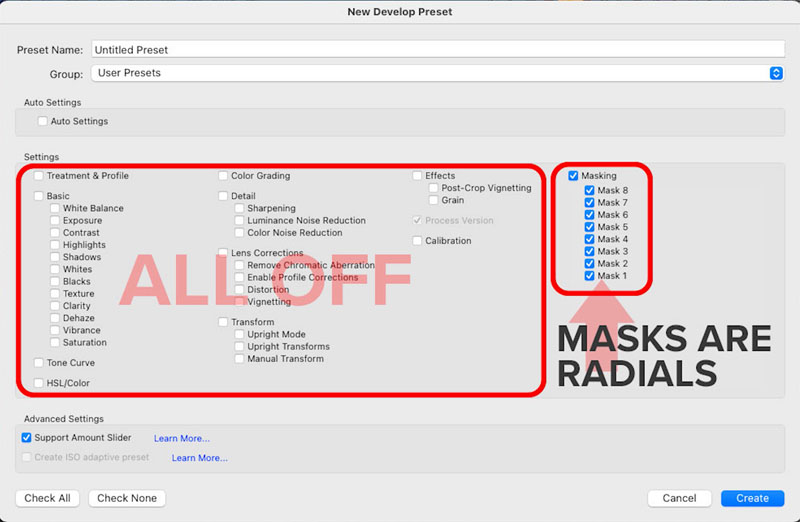
When you create a preset, do you ever wonder if you should check the boxes of the adjustments you aren’t using? (In the develop module, click the + button at the top of presets and choose New Develop Preset.)
When you check all the boxes it makes what I call a “reset preset”. What this means is when you apply this preset, everything that is checked will be changed to the settings on the preset. What if you haven’t moved a slider? Zero is a setting too! So if you haven’t moved the slider and you apply this preset it will move all the sliders to zero that haven’t been changed.
Use this option if you want to apply an absolute preset and have the entire image reset. This means any previous adjustments will be lost.
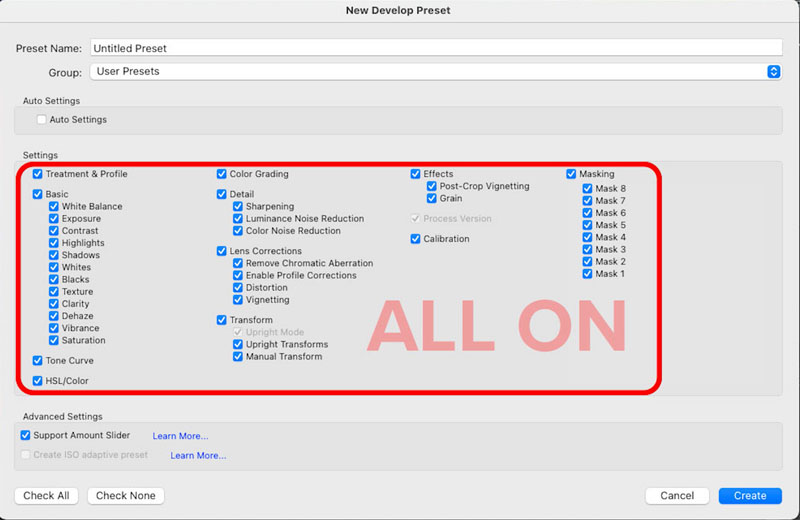
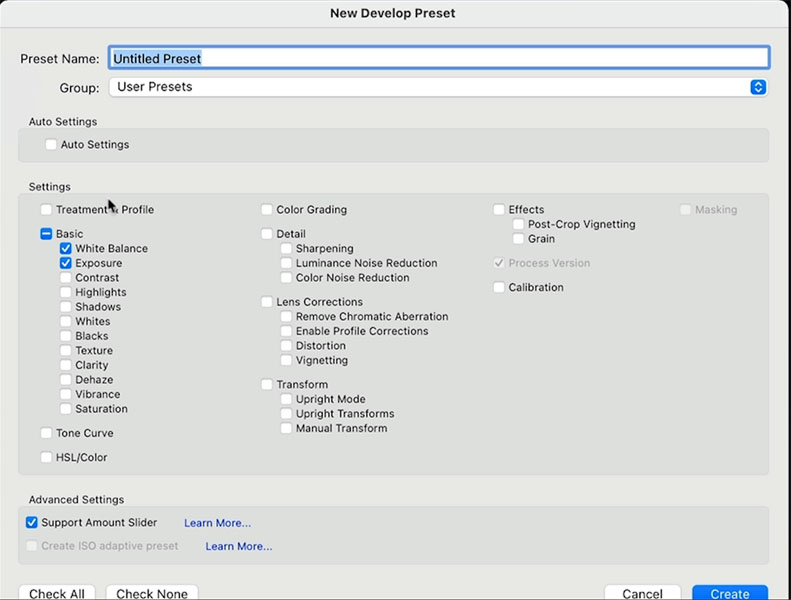
What if you want to retain any previous adjustments and only change something like a crop, a mask, noise reduction etc?
Then leave the fields unchecked. Any unchecked field will be ignored when you apply the preset and its won’t change.
What is the point of all this?
It allows you to be strategic with your presets and stack the. For example if you have presets that only change the color, you can do all your brightness and definition adjustment and try on different colors without losing all your work. Another use case if Light leaks or smart presets where you are apply a sky adjustment or something.
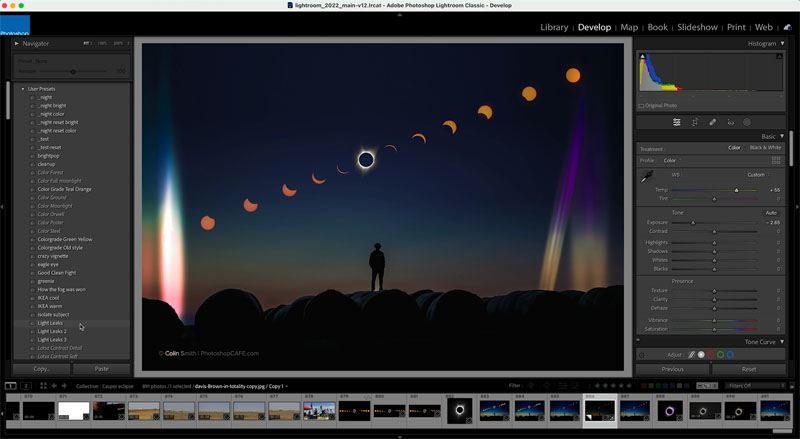
Or maybe you only want to change the white balance and exposure settings, then do something like you see here. All other values will remain unchanged from before you applied the preset.
You can see the White balance and Exposure settings change
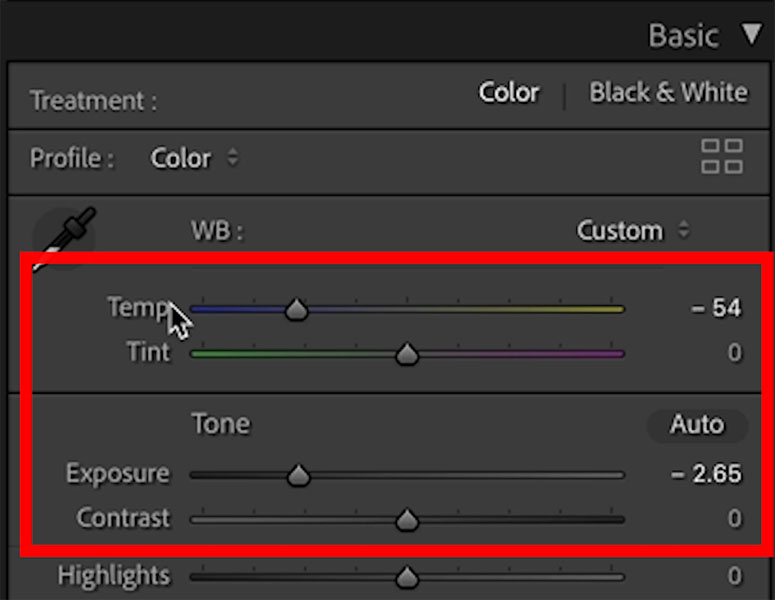
You would get this result on a neutral image
Other types of special effects, such as a black and white look, you way want a complete takeover, so check all the boxes for a reset preset.
Make sure you watch the video to see a demonstration and get a better understanding of how this works.
BTW, if you want my Lightroom Presets, you can download them for free here. If you already receive our newsletter, you will see a link to the vault near the bottom where you can download directly..

Thanks for checking out this week’s tutorial
Colin
Check out my Flagship Lightroom Course. This is the fastest and most comprehensive way to learn Lightroom Classic (Digital Download).
Learn Lightroom Classic 12 (2023 edition) from start to finish in over 140 short lessons. Beginner to experiences, there is something for everyone. It’s like 3 courses in 1 and incluses all the images I’m working on as well as over 30 bonus presets.

The post How to stack & Layer Lightroom Presets & Camera Raw Presets appeared first on PhotoshopCAFE.