
New Features in Photoshop Sky replacement.
Photoshop just got an update and there’s some updates to the sky replacement. We can now bring in multiple skies in, plus we’ve got a bunch of free skies. Let me show you how to do it right now.Check out the short video above, and follow the written steps below for Photoshop CC 2021 and newer. If you are on Photoshop CS6, you can swap a sky a different way, tutorial here.
This tutorial is 2 parts. The first part I’ll show you how to get additional skies and load them into Photoshop (This the new part). The second part I show you how to use sky replacement to replace the sky and make a reflection
How to add photos to Sky replacement and get additional free Skies for Sky Replacement in Photoshop
Choose Edit>Sky Replacement.
Choose: get more skies.
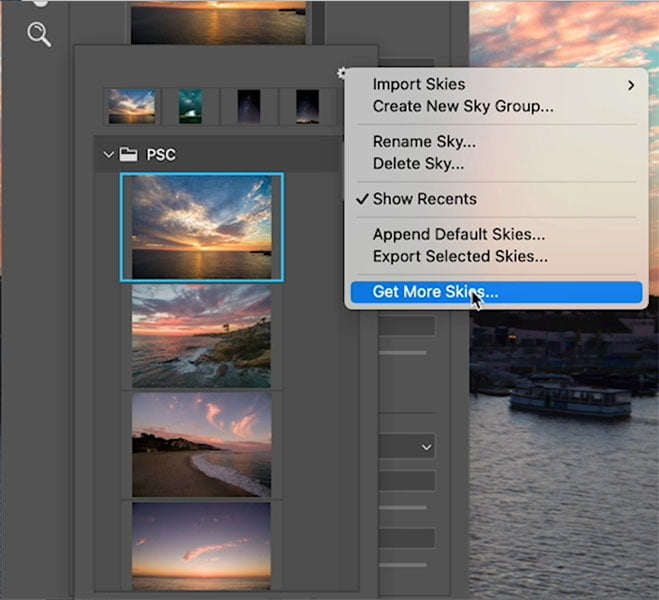
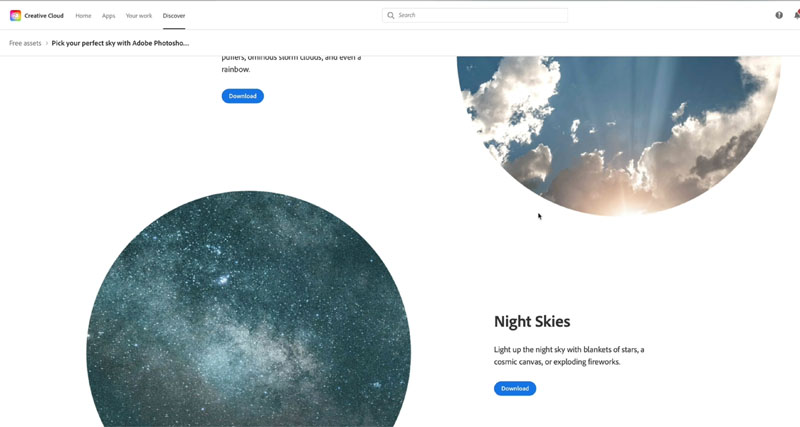
So it’s going to take us to Adobe Creative Cloud, and then we’re going to see some different collections here.
So here’s a bunch of skies that Adobe is giving us.
Click download to download them.
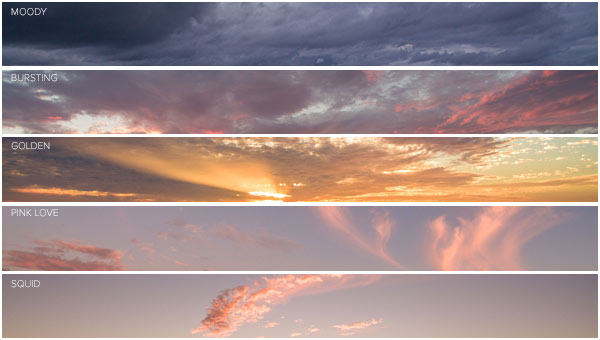
And by the way, if you want some of mine, just head over to photoshopcafe.com/vault and you can download my sky pack. (If you’re already on the mailing list, look in a previous newsletter, you’ll see a link where you can download them directly from the vault).
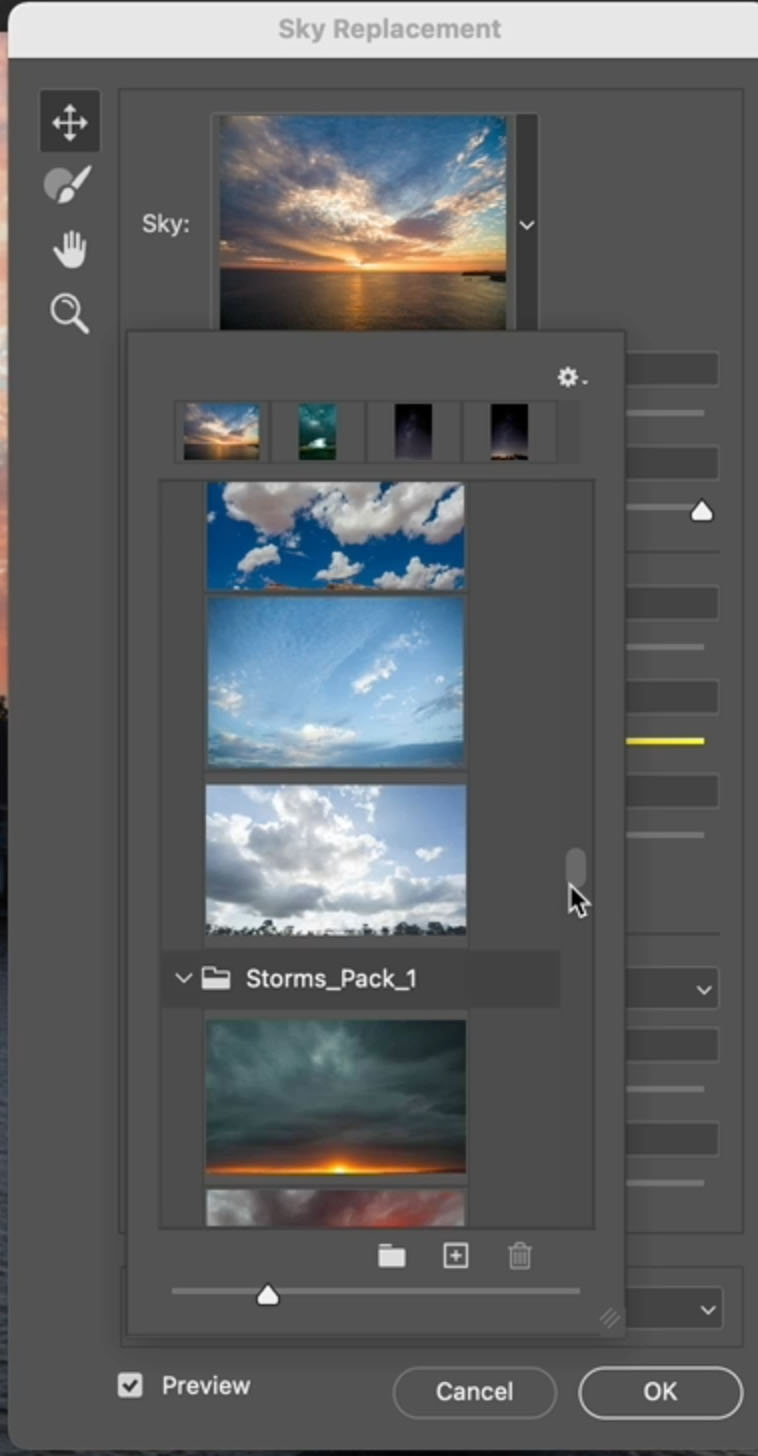
Now you’ve downloaded the skies. Let’s bring them into sky replacement.
Click once again on the little arrow, choose the gear, and this time import skies, and we’re going to go from sky presets for the Adobe one, or From Images for any others, including the ones from the vault.
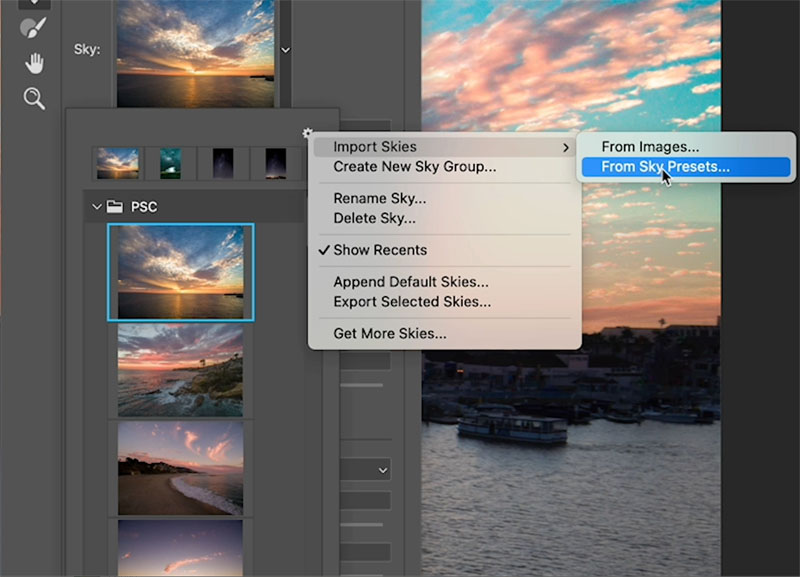
Navigate to our downloaded Skies. To select multiple ones, selected the first, hold the shift key, select the last one. (Bringing in multiple skies at once is a new feature).
choose open.

Scroll through and see the new collections have been added.
How to replace a sky with a night sky in Photoshop
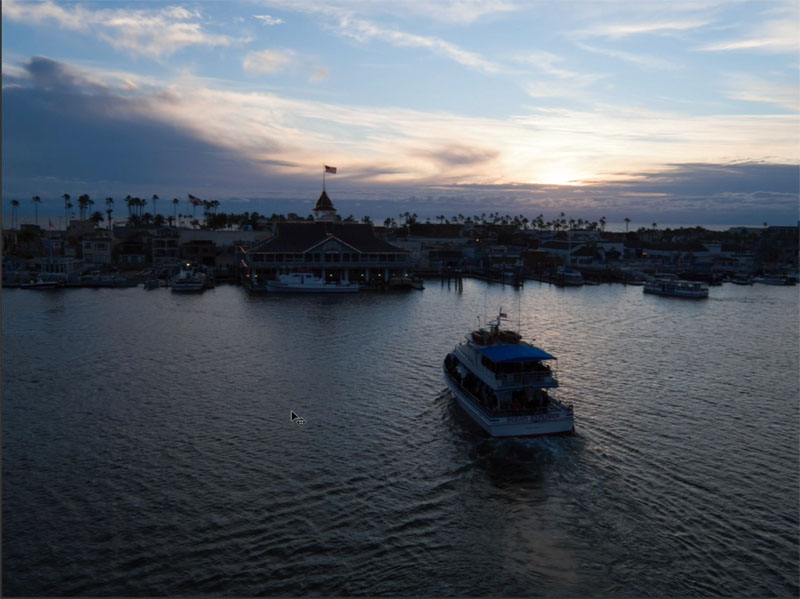
Here’s a shot that I made with with my drone at Newport Beach, California. I want to replace the sky with something more interesting.
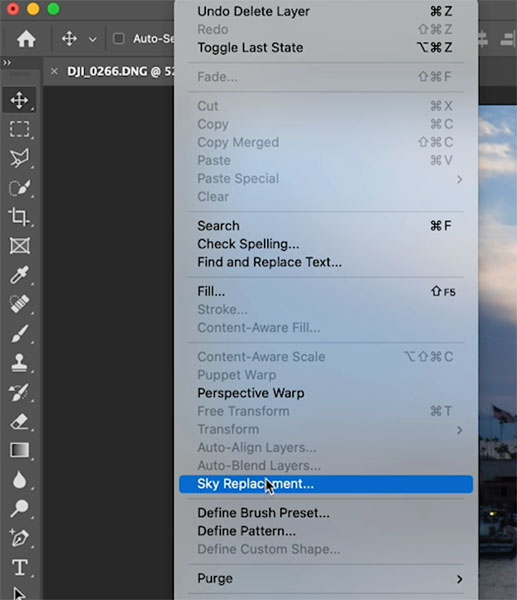
Choose Edit>Sky Replacement.
Now, this feature is not new, but there’s new features within this feature, so I’ll make this tutorial very simple. A more advanced Sky replacement tutorial is here.
You will see the Sky Replacement dialog box. Click the arrow to the right of the thumbnail to view the skies you have available. (later in this tut, I’ll show you how to add more).
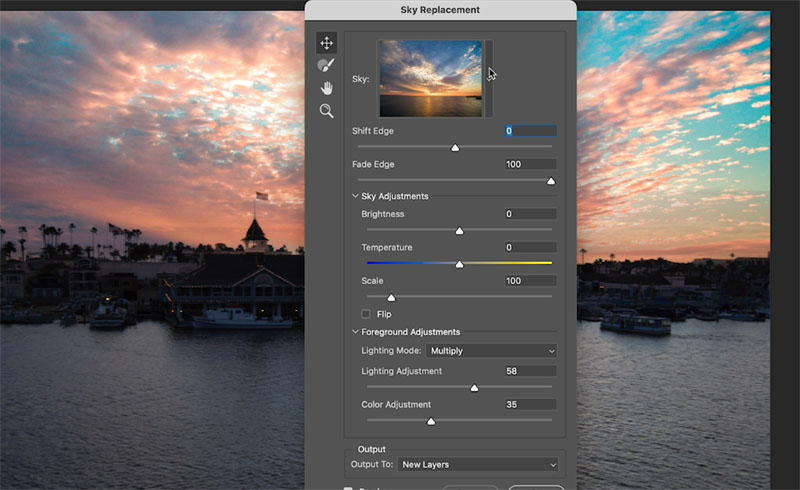
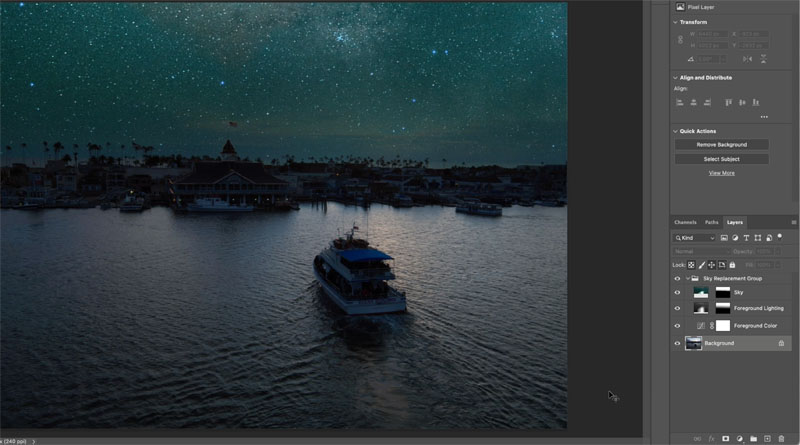
Here is one of the new ones from Adobe. It’s a night sky, with a nice star-field. Notice that this is a vertical photo, and we’re seeing a little bit of that tent in our image.
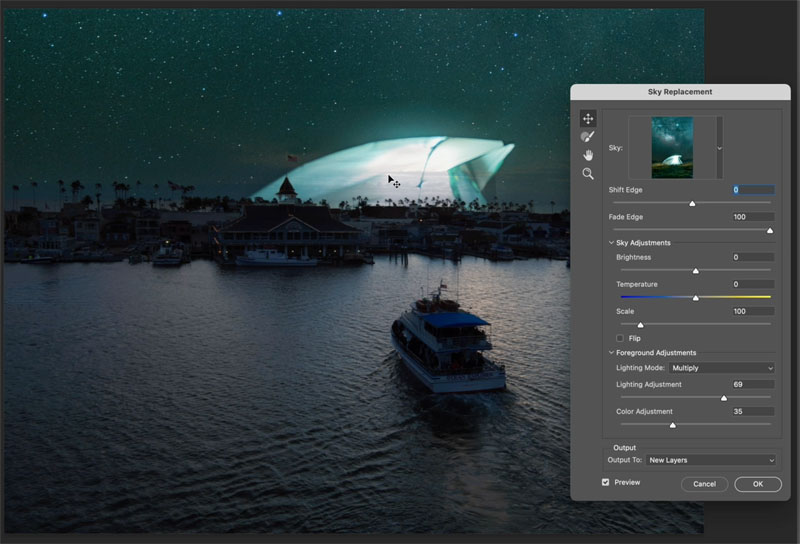
While this panel is open, we can still drag down to reposition the sky
Click OK to apply
Crete a reflection of the sky in the water
So why don’t we create a nice reflection from the starfield.
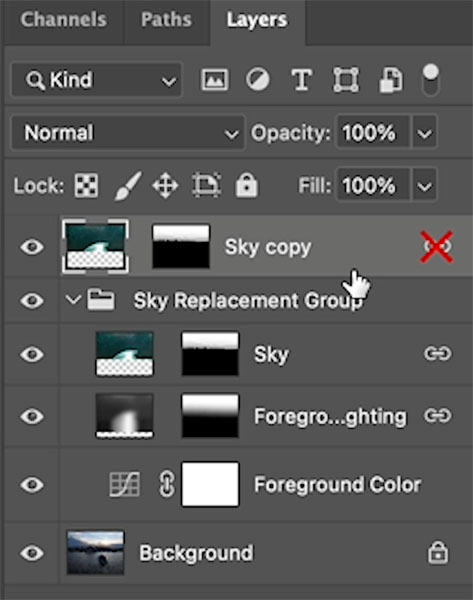
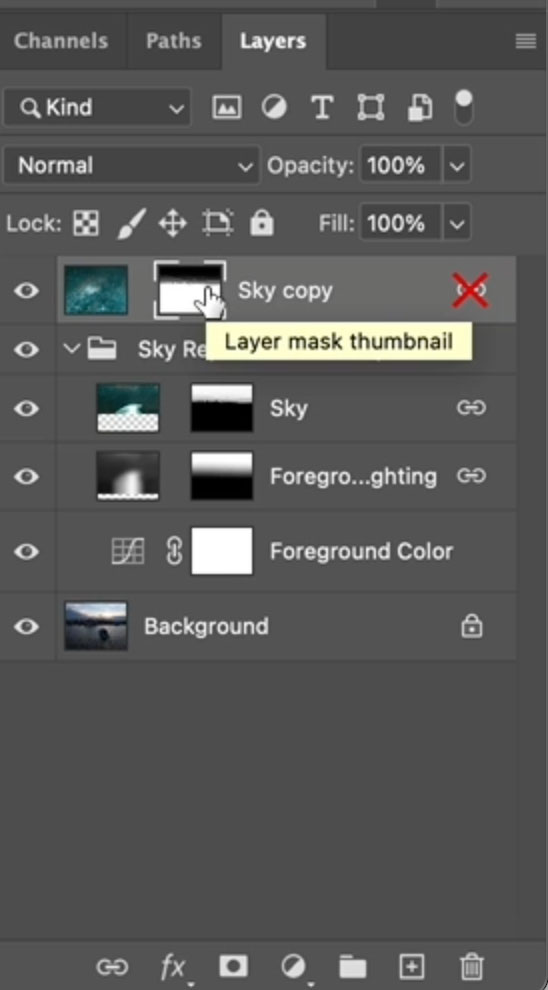
Click the Sky layer.
Holding down Alt/Option and dragging up, out of that group until you see the blue line. Release, and now we’ve made a copy of thatlayer.

Before we manipulate the new layer, hold down the Shift key and click on that chain link and that will unlink it. Otherwise, any change will affect all the linked layers.
Press Control/Cmd+T for free transform,
right-click and choose flip vertical.
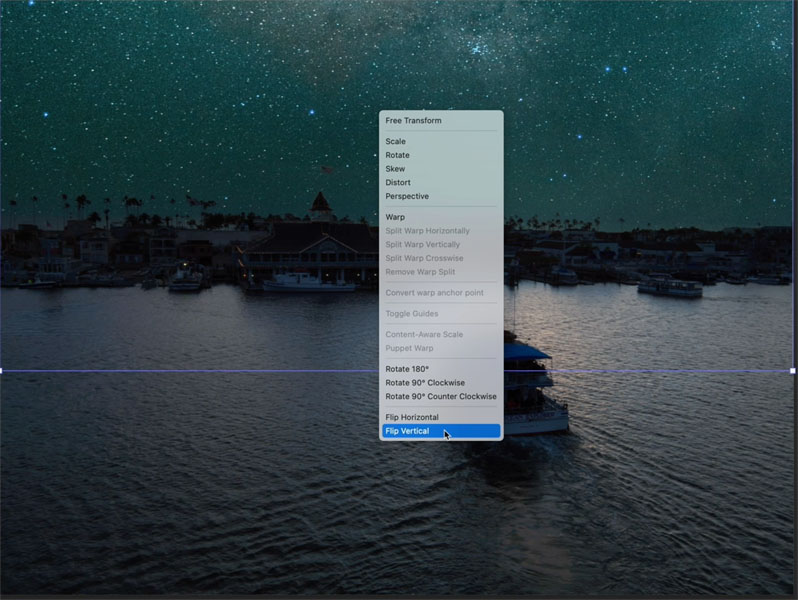
Just drag it down a little bit, and I’m holding the shift key to keep that in position.
Notice we can’t see the reflection, and that’s because of the Layer mask.
Click on the Layer mask, Press Control/Command +I to invert it.
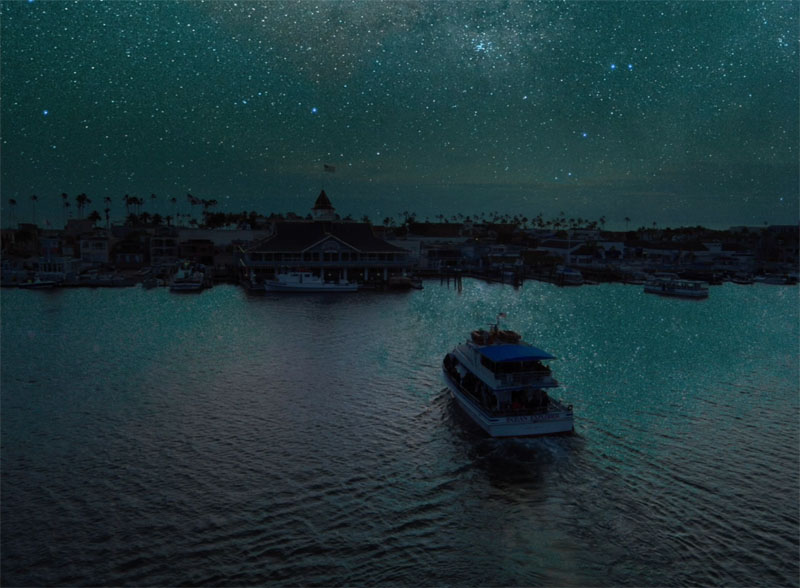
Now we can see our starfield underneath. And if we want to reposition it, just drag it down until we get a nice mirror image.
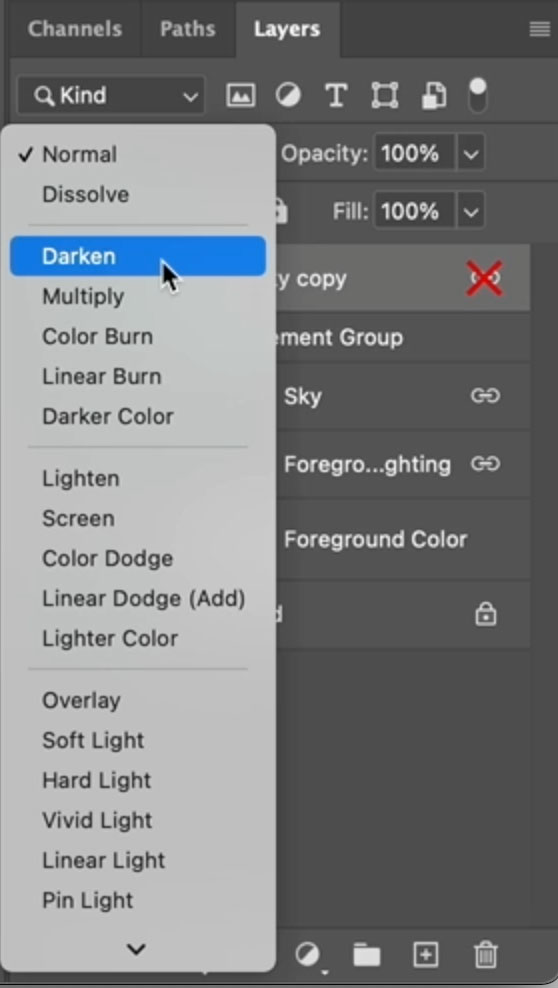
Now to make it blend with the photo, let’s just use a blend mode.
Where it says normal, click and choose darken,
Notice the sky reflection is hidden dark areas so you don’t have to go in and mask it out.
So now we can see a little bit of reflection happening in the water. Lower the opacity a little if you want. (80% here)
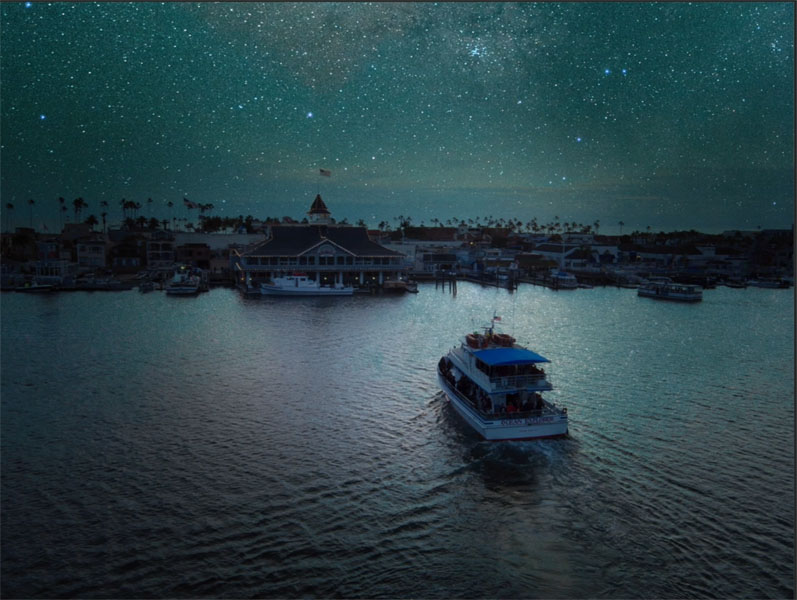
One last thing you could do to just kind of brighten this up a little bit. (This is on the video above)
Create a curves adjustment, and under properties let’s grab the mid to dark tones. Let’s bring them up, make them a little bit brighter.
Invert that mask. (Control or Command I)
Grab a brush, set the foreground colour to white, paint over the area you want to keep or just brighten up a little bit.
So it brings a little bit of attention to the centre of our photo.
So anyway, do you find this useful? Then let me know in the comments underneath. Also, do you guys like sky replacement or not? Personally, I love it, but I’d love to know what you think.
If you are new here. Welcome to photoshopCAFE.com. Thanks for joining us.
Consider Consider joining our mailing list so you don’t miss any of my tutorials.
For more, follow us on Social Media
And anyway, guys, until next time, I’ll see you at the cafe.
Colin Smith
The post How to use New features of Photoshop Sky Replacement (August 2021) and free sky packs from Adobe appeared first on PhotoshopCAFE.