
In Part 2, we’re continuing with our Adjustment Brush tutorial with learning about the super helpful Auto Mask feature.
The Auto Mask Feature: 90% of the time, it’s awesome!
The Auto Mask feature helps to keep you “painting inside the lines” (so to speakI). As you paint with Auto Mask turned on, it tries to “sense” the edges of areas to keep you from accidentally painting over something you didn’t want to paint over.
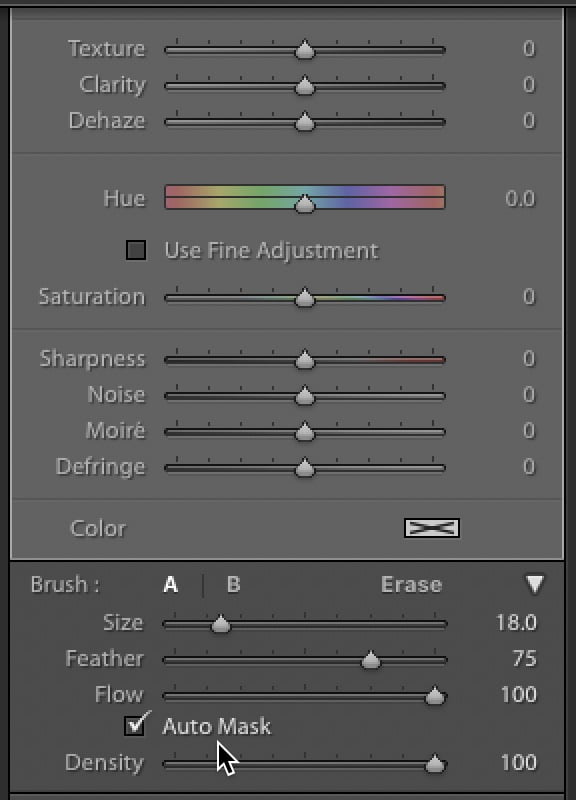
You turn it on by clicking the Auto Mask checkbox near the bottom of the Adjustment Brush panel (right above the Density slider). To turn it off, you can either uncheck the Auto Mask checkbox , or just press the letter “a” on your keyboard.

For example, if you were painting over the sky above some mountains to darken the sky, but when you get near the tops of the mountains, you want to make sure you don’t paint over the mountain tops (which would darken them), so you’d turn on Auto Mask. As along as the center of your brush cursor (the red arrow above is pointing to it) doesn’t pass over onto the tops of those mountain, you’ll only paint over the sky (the edges of your brush can paint over the tops of the mountain, as you see above, but not the crosshair in the center of the brush cursor).
Auto Mask Downsides
To pull off the mini-masking-miracles that Auto Mask does, of course it has to do a lot of math as you paint with it as analyzes the area beneath that crosshair the whole time you’re painting, and that makes the brush move slower as you paint, especially when you’re painting over a large area like the floor. That’s why you might find it really helpful to turn Auto Mask off when you’re painting over a large area like this (or the sky, or a big wall, etc), simply because the brush will now paint much faster, so you can cover a large area like this really quickly.
Seeing Your Mask
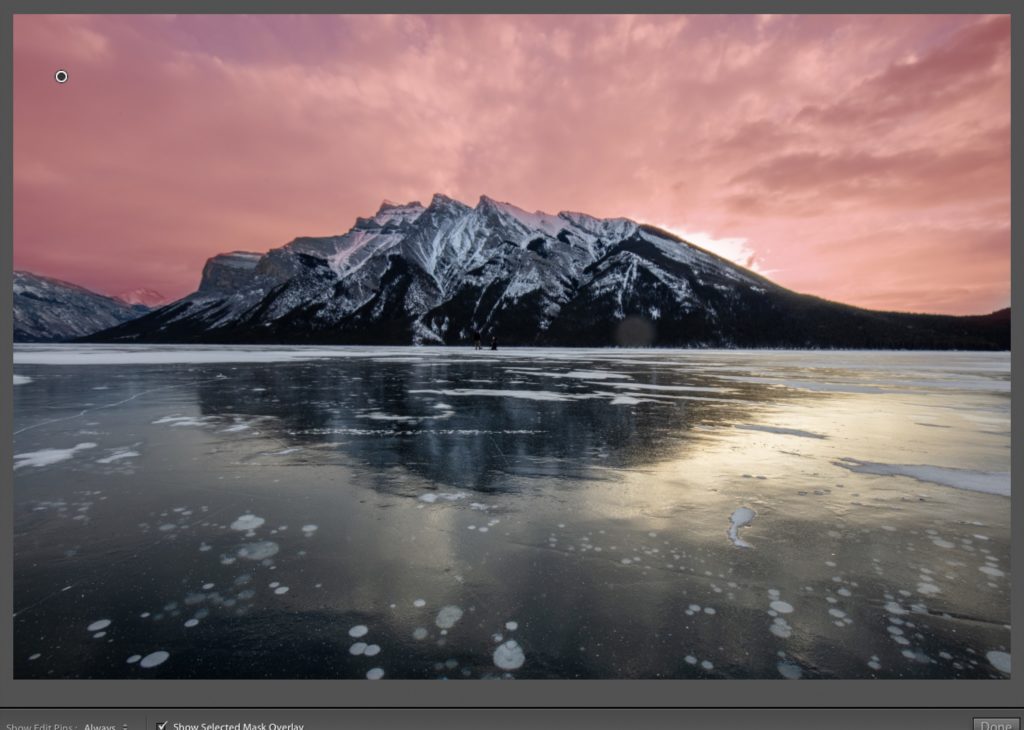
I think one of the most helpful features is the ability to see the mask (the area you’ve painted over), and there are two ways to do this. If you just want a quick peek (maybe just to see if you missed an area while you were paint, or if you accidentally painted over an area you didn’t want to), just move your cursor right over the pin in question, and it instantly displays the areas you painted over (the mask) in red, as seen above where I painted over the sky, so when you view the mask, the sky appears tinted red. When you move your cursor away from the top of that pin, it returns to the normal view.
If you do see a problem, you might find it easier to leave the mask turned on and edit that mask while it’s constantly displayed on screen (I sure do). To do that, either turn on the Show Mask checkbox at the bottom of the panel, or just press the letter “O” on your keyboard to toggle the Show Mask feature on/off.
If you make a mistake (or Auto Mask makes a mistake), or you paint over an area you didn’t mean to, you can “paint away” those areas you didn’t mean to mask. Just hold the Option key (or Mac) or the Alt key (on a Windows PC) and it temporarily changes your brush into an Erase Mask brush. Now, shrink the size of your brush (using the left and right bracket keys on your keyboard again), and paint over those areas you didn’t want effected, and as you paint it removes the red tint, which removes the darkening from the sky.
You can check multiple pins one at a time by just clicking on them to make sure you haven’t missed any areas, or painted over areas you didn’t mean to, and now you can fix them quickly and easily paint “painting the error away.”
There’s much more to the Adjustment Brush
We’ve just started, but at least this will get you up and running. I’ll cover more features and tips for working with the Adjustment Brush here on the blog, so stay tuned. 
Have a good one,
-Scott
The post Learning Lightroom’s Adjustment Brush (Part 2) appeared first on Lightroom Killer Tips.