
What’s new in Photoshop 2024, Photoshop v25
Adobe released the new update to Photoshop and we will look at the new features. Some of these features have previously been in the Photoshop beta and I’ve already done in depth tutorial in each. Where appropriate, I’ll add links to the other tutorials. This is a overview of everything that is new, in the main shipping version of Photoshop.
First: I have already been asked this question many times: “Can I now uninstall the Beta version and just work in the new update?” The answer is, it’s up to you. Both versions can co-exist on your computer. If you were just using the beta for Generative ai, sure you can get rid of the beta. New features will appear in the Photoshop beta before they make their way to the regular Photoshop, so it’s up to you if you want a steak peek or not. As always, I’ll let you know in our newsletter and make tutorials to make you aware of new features.
The floating taskbar has been tamed.
You may have noticed the taskbar that appears when you do certain things in Photoshop.
This taskbar is loaded with shortcuts to common tasks.
But sometimes it gets in the way and jumps over your image
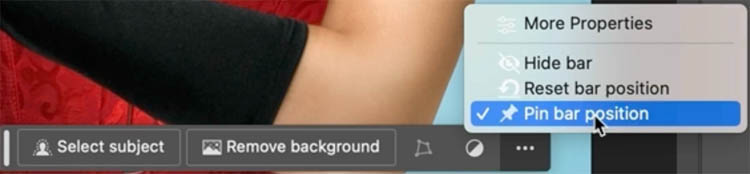
If you click on the Menu, you can choose Pin Bar position. It will now stay wherever you put it.
I heard a lot of complaints that it didn’t remember this when you restart Photoshop and you have to keep pinning it every new session.
I’m happy to say, the bar stays put now, even when you restart.
Updating Photoshop to v25 aka Photoshop 2024
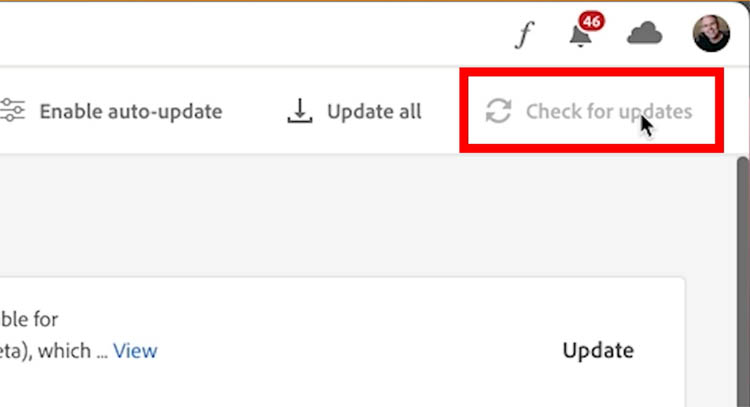
Sometimes people have trouble finding the update.
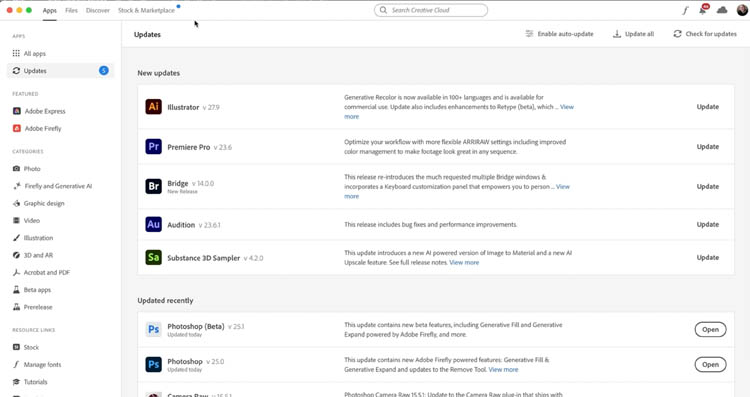
Launch your creative Cloud app, from the top taskbar on Mac, or bottom on windows. (Or search “Creative Cloud”)
On the left, click updates
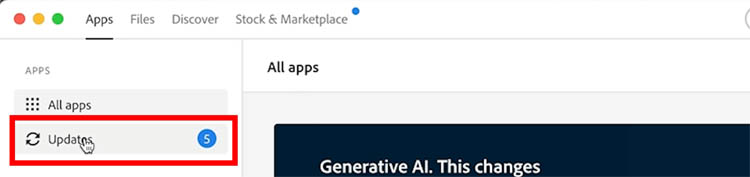
Here is a step, many people miss.
Click on check for updates on the top right.
This will look for the very newest updates, often they aren’t loaded in yet.
You will see Photoshop with update next to it. You can see I already updated mine here.
NOTE: This is a new version and will replace your version 2023 if you choose that option.
Be aware, because it’s a full version update, you will have to reinstall your plugins. If this is an issue for you, keep version 2023 as well and launch that when you want to use your plugins.
Generative Fill in now in the main Photoshop version
Gen fill is now out of beta and available in the main Photoshop. It has 3 main uses. Replace, expand and remove. I’ll cover them briefly here, but choose the ai art and tools category here at PhotoshopCAFE, for lots of detailed free tutorials on these tools. Check out my full course with lesson files to learn even more. Because it’s out of beta, Generative Fill is now approved for commercial purposes.
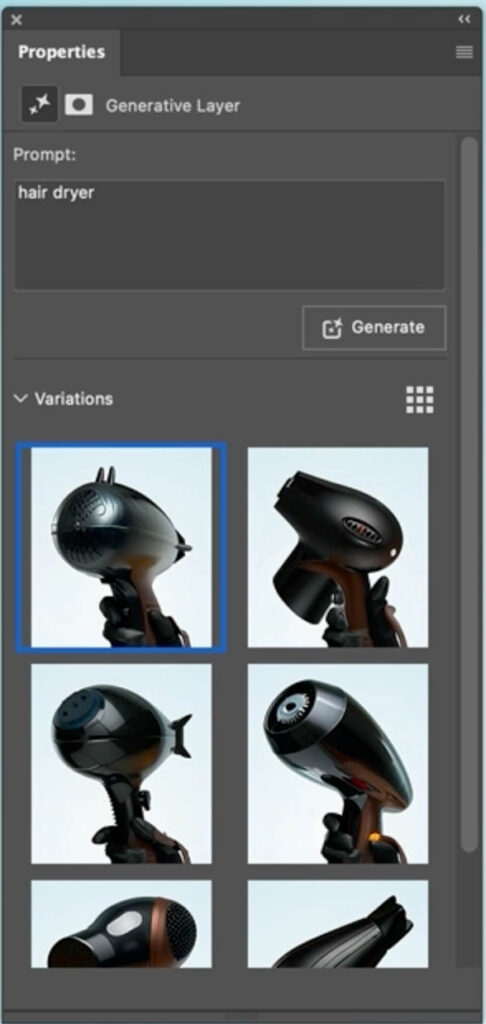
Lets look at replace using Generative Fill ai.
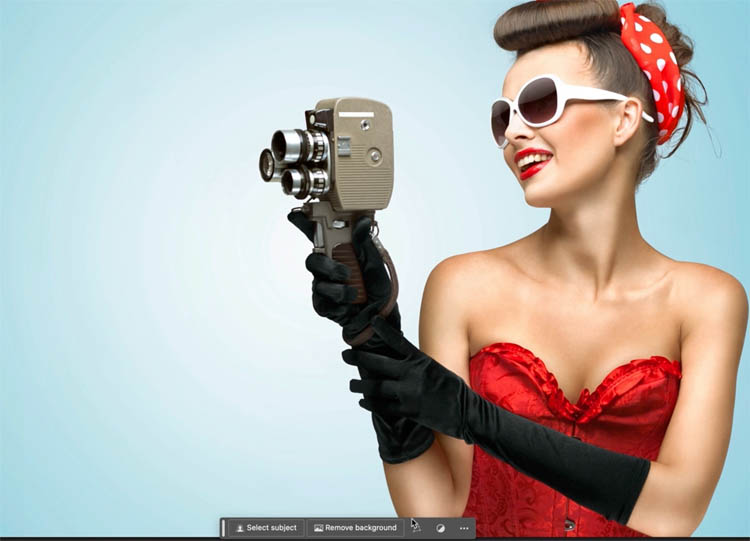
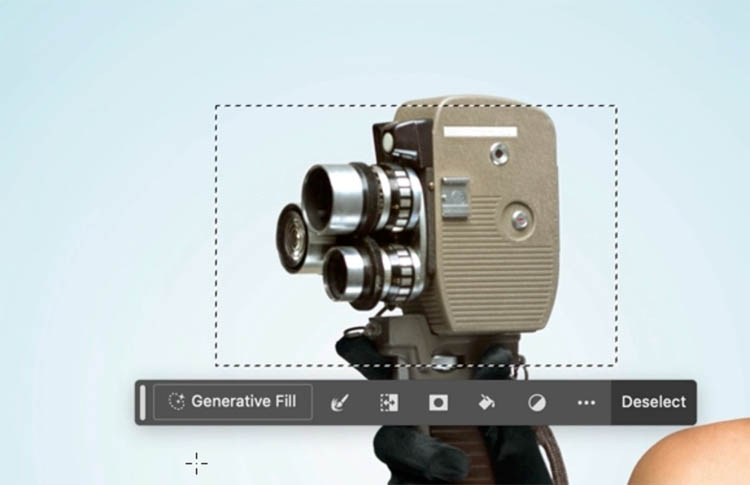
Make a selection around an object to replace.

Type in what you want. Let’s do hair dryer.
Click generate

You will now see the object you described. This is not stock photography. This image has never existed before. The ai looks at all the images it has been trained on, by looking at millions of photos. It then knows what a hairdryer should look like and generates (or draws) one to match the lighting and angle of the photo. I go more in depth on my topical tutorials. Generative Fill tutorial.
Notice the the properties panel, you can click on 3 variations.
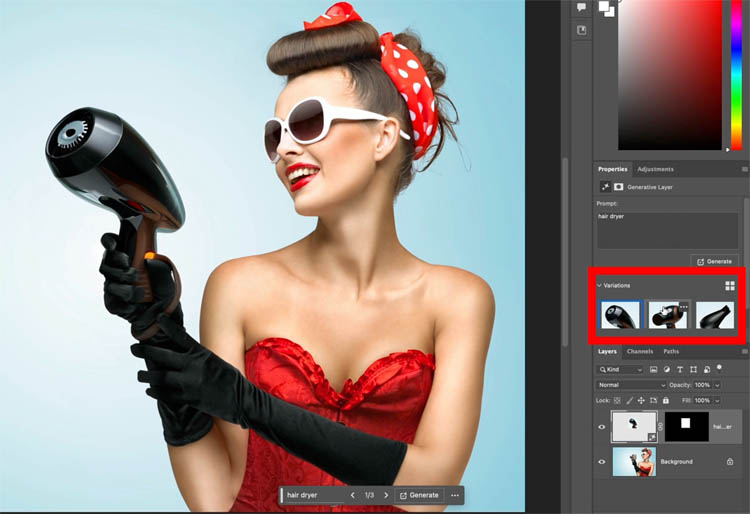
There is also a new button in the Properties panel that allows you to see larger thumbnails.
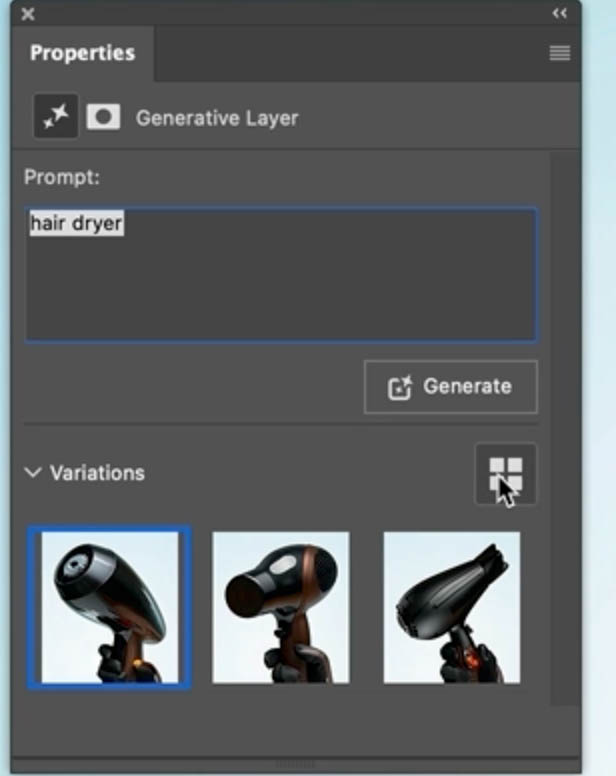
If you click, generate again, you get 3 different variations. Generate as often as you like to get more options.
Generative Fill for expanding or outcropping
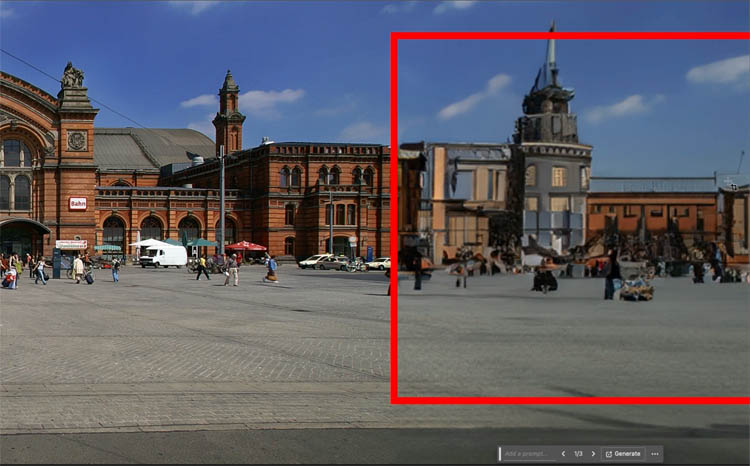
The 2nd use is to extend a canvas, this is probably the one we will use the most.
Say we want to expand this image into a panorama.
Choose the crop tool
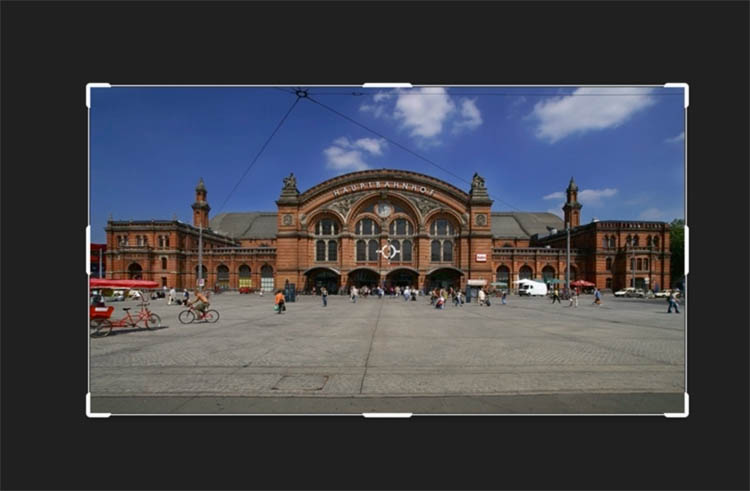
Drag outwards with the crop tool to expand the frame.
This is very extreme, often we will do it just a little bit.
Without entering any text, click generate. (You will notice new tips as the expansion is happening). This happens on the cloud, you will need internet access to use this tool.
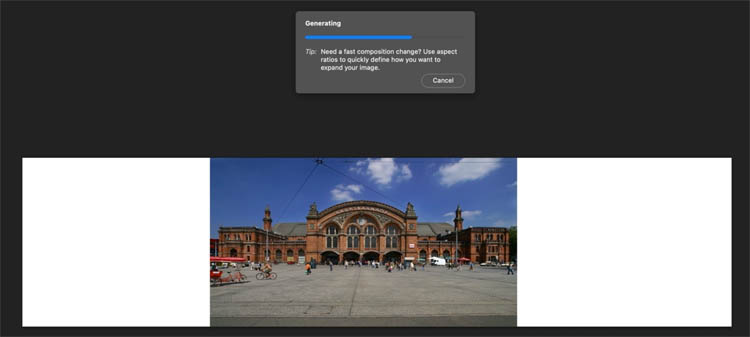
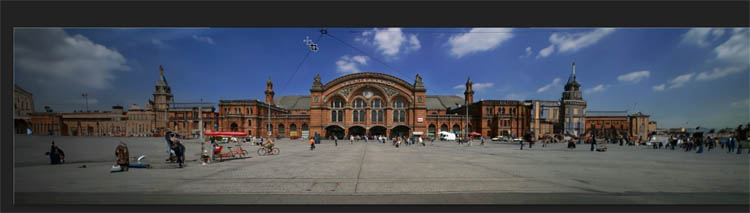
You will see that it generated pixels to match the existing image.
The new generated pixels aren’t factual, they are randomly created match the aesthetic. So think of this as an aesthetic way of using it, for things like design and not for location factual uses such as a hotel listings. I’ve covered all the ethics in other tutorials, so we will just stick to the tools in this one.
One of the downsides is the resolution of generated pixels is limited at this time. Here is how to hack higher resolution from Generative Fill.
Adobe has said that high resolution is coming.
Generative Expand
Before getting to the 3rd use of Generative fill, let’s look at a closely related tool. Generative expand.
Generative expand is basically Generative fill, but with fewer steps and the ability to use the sizing presets in the crop tool. I have a separate tutorial on Generative Expend here.
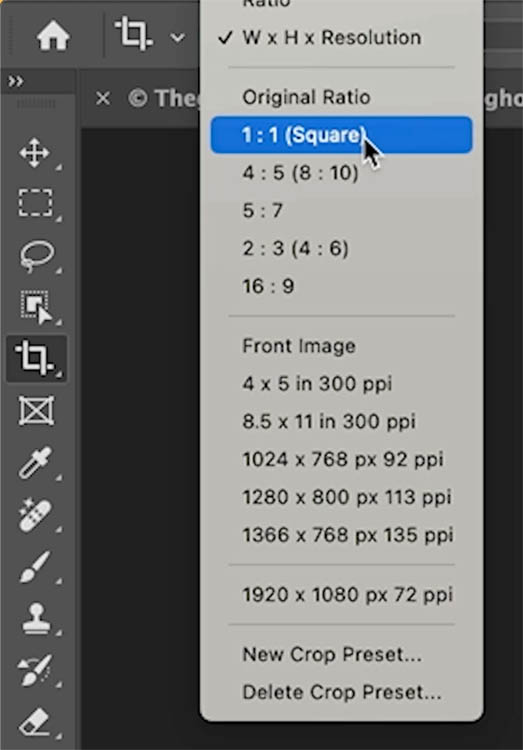
Choose the crop tool and use an aspect ration preset if you like.
Let’s make a square with 1:1
Drag with the crop tool. Position the image within the frame.
Click generate
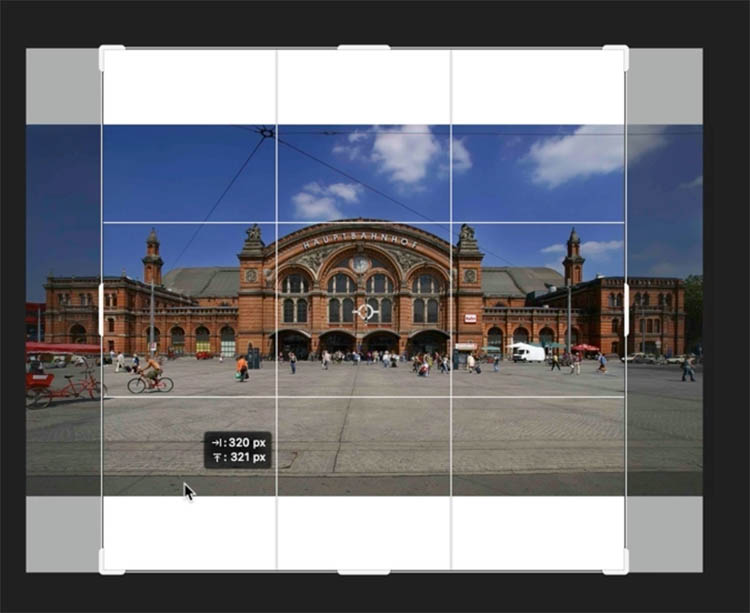
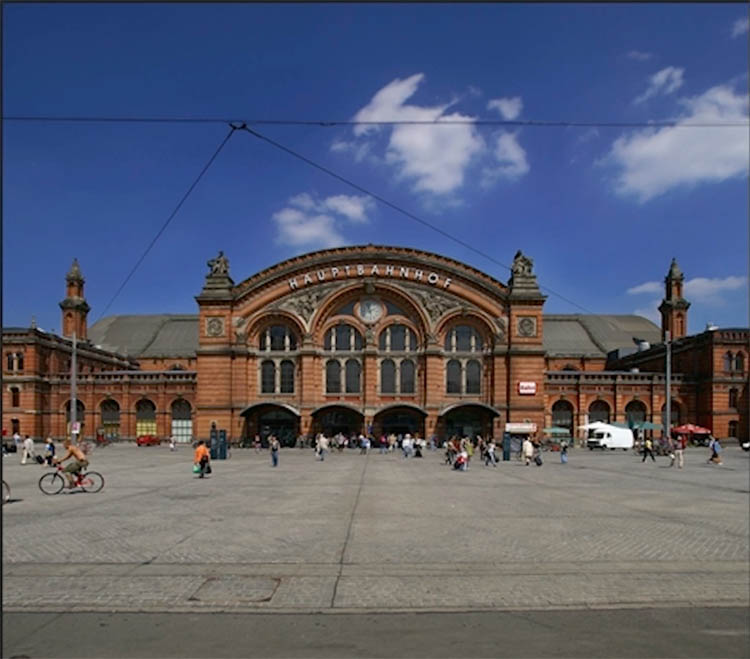
The crop tool will crop away the sides and generate pixels at the top and bottom to fill the square.
This is game changing for social media, and changing image aspect ratio. Previously, we had to do a lot of cloning and content aware fill to do the same thing.
Generative Fill for removing object
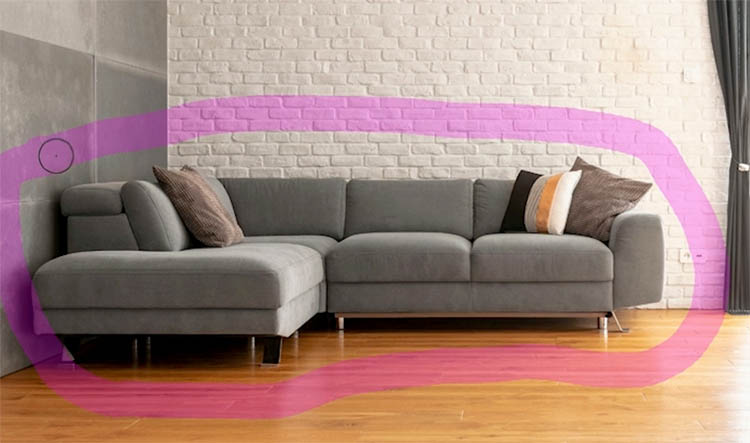
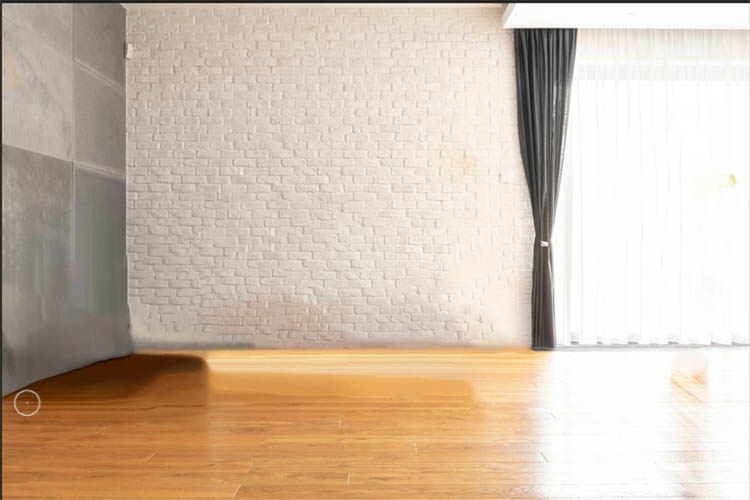
The 3rd main use for Gen fill, is removing things from a photo.
Make a selection around the car.
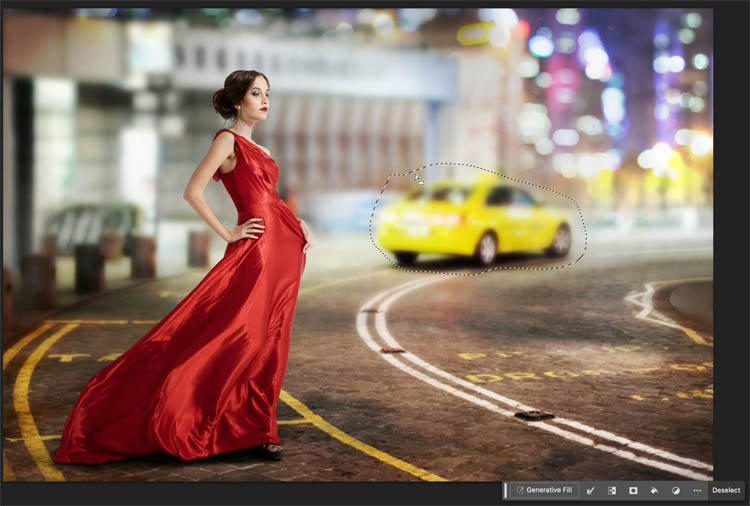
Click generate

The car is gone and background has been created to fill the hole.

Generative Fill is amazing, but there are things it can’t so, or do well, and we address that next. First more info about the changes.
Generative Fill as paid add on
Generative Fill is entering a paid phase in its life. Don’t freak out yet though, let me tell you what’s happening.
All this ai stuff takes an incredible amount of super-computing power. The processing is done in large and expensive data centers. So it’s not free for Adobe to run, in fact it’s very expensive. So here is what Adobe has announced:
Starting November 1 2023 there will be a limit on generations. For Full Creative Cloud members, it’s 1000 a month, for Photoshop and photography program, it’s 500 a month. Each generation counts as 1. Honestly, from using a paid mid-journey account for a year, most people won’t get anywhere near the 500 or 1000. But if you do hit that allotment, you will still be able to generate, but it will be slower. You can buy more fast credits if you want.
Credits refresh each month and you can’t accumulate credits, it just restarts. From the lounge on Adobe’s website, it sounds like the higher resolution generation will count as more than 1 credit each. No more is known at this time.
Only Generative Fill and Generative expand count as credits. The remove tool and other ai tools don’t use credits.
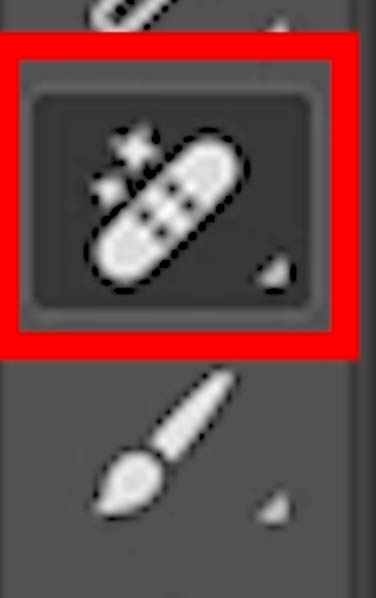
Remove tool
If you want to remove things from your photos, the ai powered remove tool is a better option on many cases. I compared the remove tool ai with Generative fill here.
Choose the remove tool
Paint over the plant.
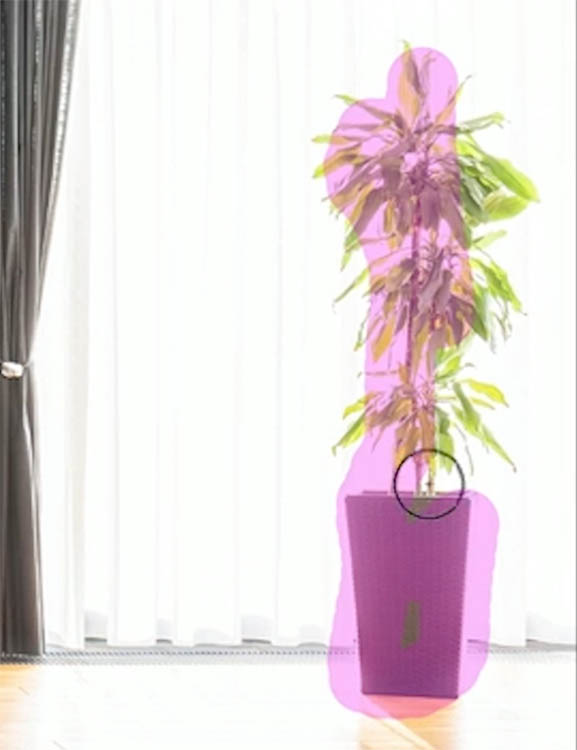
The plane disappears and is filled with natural background.
New way of using the remove tool
This is a brand new behavior. You can circle the object you want to remove, much like you would with magic eraser on the Google Pixel phone.
And it disappears.
Advantages of the remove tool over Generative fill include:
- Often faster
- On device, so no internet needed
- Works in full resolution
- No ai Gen credits used
New Gradient tool
The new gradient tool features re editable and non destructive gradients, I made a tutorial here on the new Photoshop gradient tool
For the sake of this example, let’s do lighting on a mask. I made another tut here, and it’s popular!
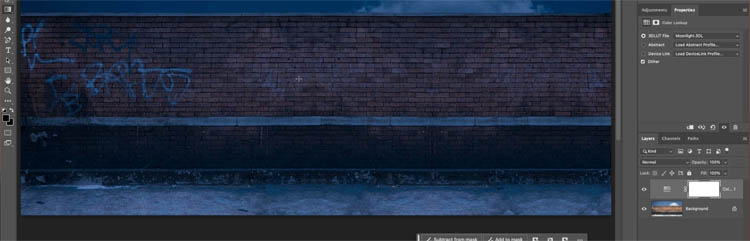
Start with a wall
Lets make it nigh-time
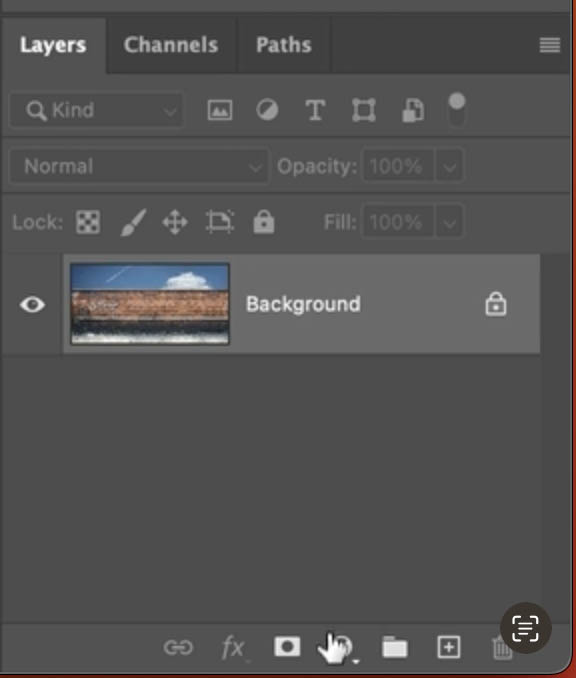
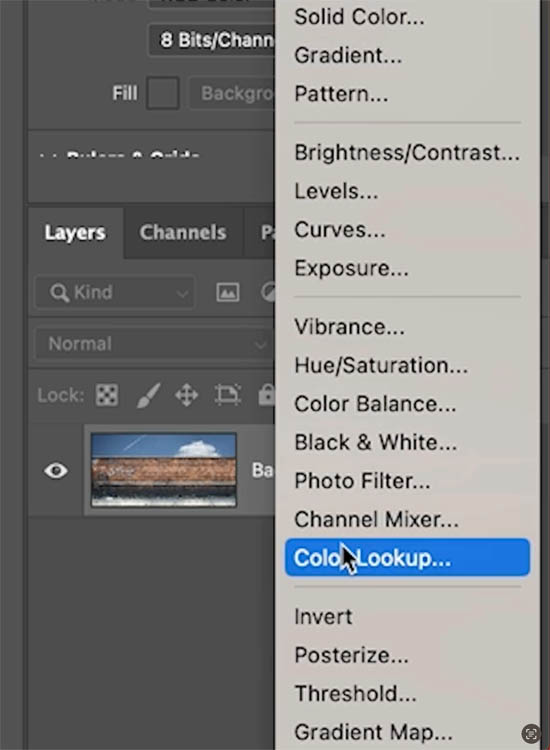
Add an adjustment layer
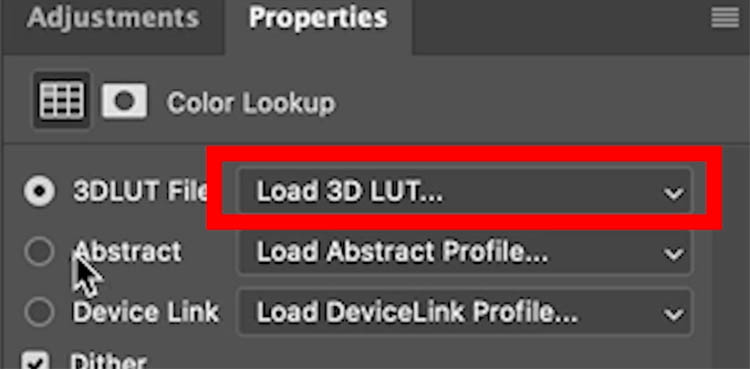
Choose color lookup
Click Load 3D LUT on the properties panel
Grab moonlight
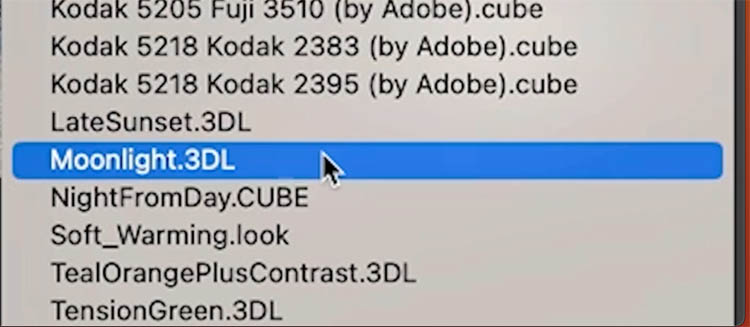
Now it’s night.
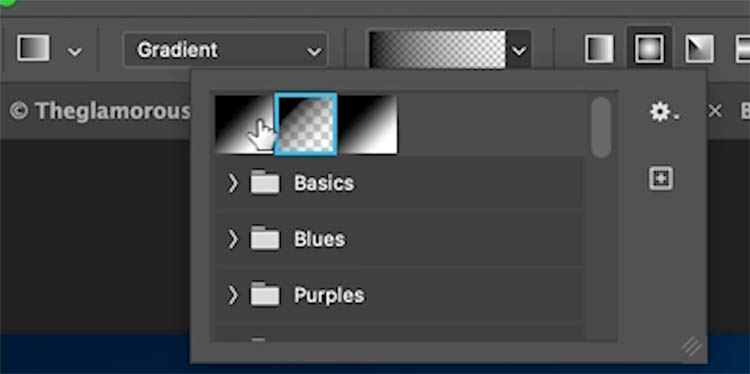
To add a spotlight, choose black to white as fairground and background
Choose gradient tool (make sure it says Gradient, and not Classic Gradient)
Grab black to white and make it a radial gradient.
Drag to add a spotlight effect
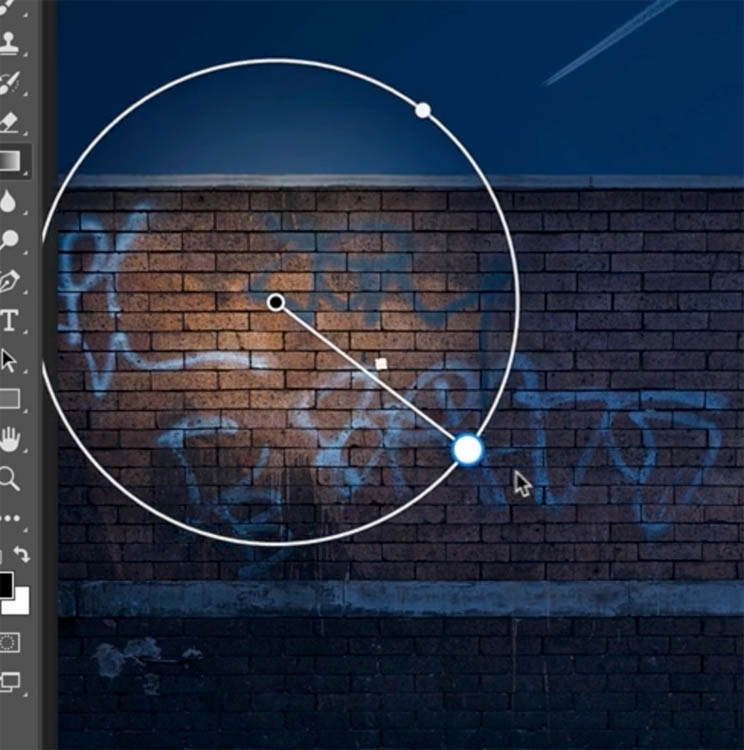
Drag the dot on the side to change the shape.
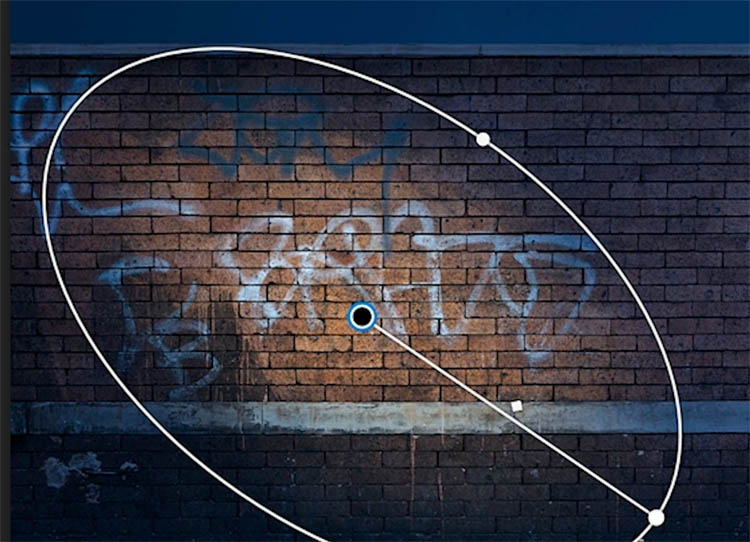
You can add more than 1 light, see the video at the top
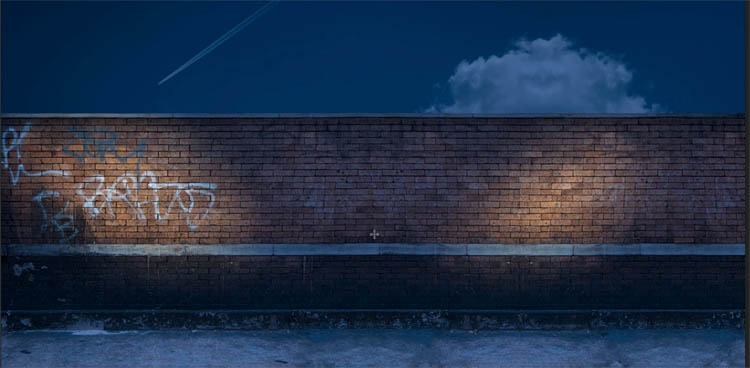
Some people wills, we could do that in Lightroom and Camera RAW. You would be right, but remember, this is a fully functional gradient tool that is capable of so much more, I’m just using it on a mask here to demonstrate.
Ok, that’s a wrap up of the new features in a nutshell. Check out all my other in-depth tutorials to explore there features more.
Thanks
Colin
By the way, I heard from some people they were waiting for Generative Fill to come to the main Photoshop because they didn’t want to mess with the beta. Well, it’s here now.
As you may know, I made a course on Generative fill (the first and as far as I know, the only course) and everything on the course works exactly the same in the final release, except you don’t have to download the beta anymore. If you missed the discount before, I thought it would only be fair to offer it again here if you are now ready to jump in.
I’ll give you a week to use the code GENFILL2 to save 20%. Grab it here (If you already bought the course, you don’t need to buy again, it’s unchanged, as the features are unchanged)
The post Photoshop 2024 New Features appeared first on PhotoshopCAFE.