
In case you missed my takeover post from Tuesday while Scott is away on vacation (with links to the previous tips), I’m back as promised with tip #12! I find that many people can go years without ever discovering that you can save the settings on the Import window as a preset. Did you know that? I love this for several reasons:
- Consistency in workflow
- You can look in one place to confirm all your settings are just the way you want them
- You can create as many as your workflow requires
- Saves you time
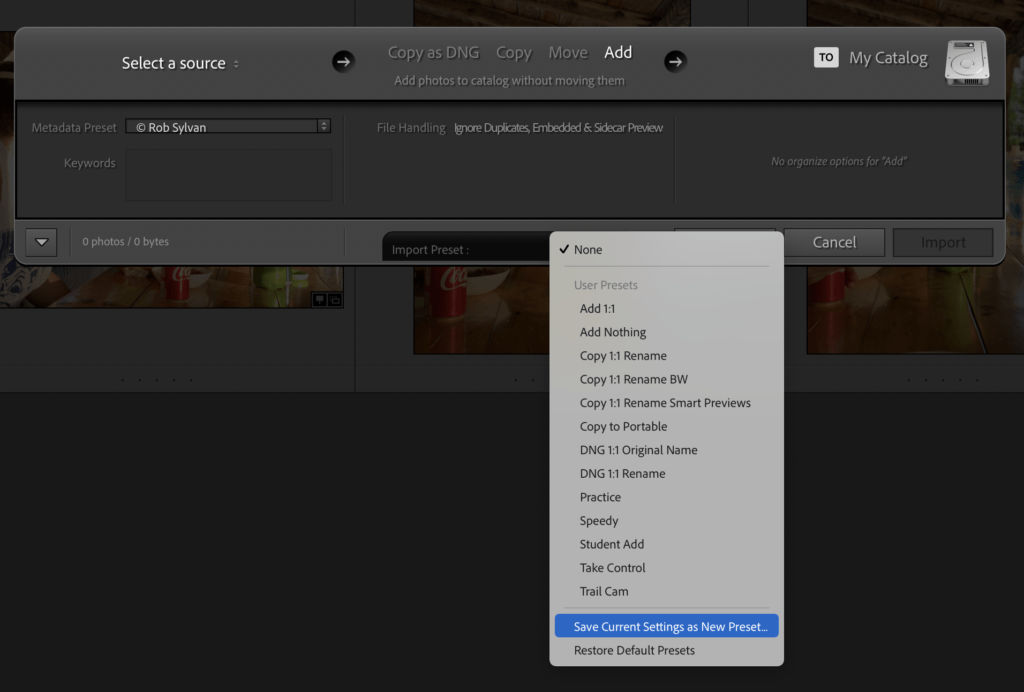
Scott goes into the details of creating these step by step, so I won’t re-create that wheel, but the gist of it is to configure the entire Import window the way you want it for a given workflow, then click the Import Preset drop-down menu (skillfully hidden) at the bottom, and choose Save Current Settings as New Preset, give it a meaningful name, and away you go.
If you have more than one way of importing photos, such as if you choose different destination folders based on subject matter, you can create a new Import preset for each workflow. Then, in the future, just make sure the correct source is selected in the Source panel, select your desired Import preset (if it is not selected already), and you’re done! I want to get through that Import window as fast as I possibly can to get on with the rest of workflow, and this is the fastest way to do just that.
Side note, that capture above shows the Import window in its condensed mode, which is triggered by that button on the bottom-left of the screen. Once you have your preset made, you don’t even need to see the full size Import window anymore either.
Hope you found that helpful! Back tomorrow for one more bonus tip before the weekend. See you then!
The post Tip Number 12 for People New to Lightroom Classic appeared first on Lightroom Killer Tips.