
Adobe just announced updates to Lightroom Classic, Lightroom, and Adobe Camera Raw. This brings Lightroom Classic up to version 11.0, Lightroom up to version 5.0, and Adobe Camera Raw to 14.0. There’s an exciting new feature added to all three programs that transforms what we knew as local or selective edits to what will now be referred to as Masking. This is a huge evolution that brings along a new interface, powerful new features, and a significant improvement to how we can adjust specific regions of our photos. While Masking is sure to be the most talked about addition, there are other new features to know as well. Let’s dive in and see what this release has to offer.
Upgraded Catalog – Lightroom Classic
The first thing you’ll notice after installing and then launching the new version of Lightroom Classic is that you’ll be prompted to upgrade a copy of your catalog. This is normal when a completely new version is released (as opposed to a dot update of an existing version). I recommend taking the opportunity presented to give the upgraded catalog a meaningful name (which may not be the default name). Simply enter the desired name in the provided field, then click Upgrade to kick off the process. When the upgraded copy is complete it will open into the new version of Lightroom Classic with all the photos, edits, and work from the previous catalog. You only need to do this once, and in the future, you’ll simply open the upgraded copy in the new version of the program.
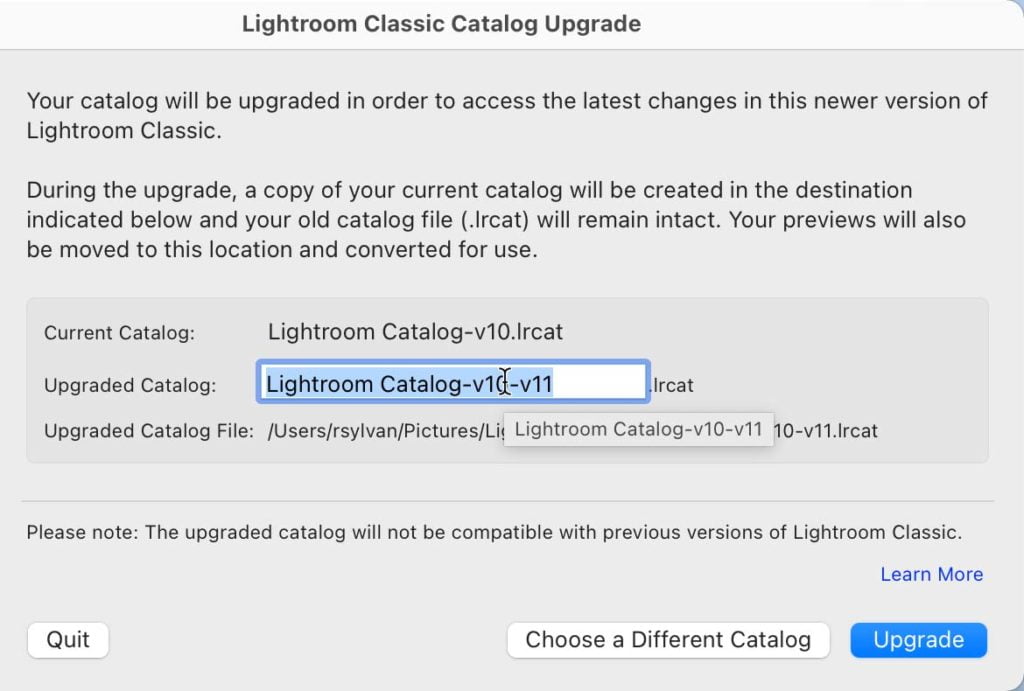
You should also be aware that there is a new file that appears in the folder alongside the catalog file. The new file, with a .lrcat-data file extension, contains the smart selection masks created by the new Masking tool as well as 3D LUTs from profiles. It is integral that you keep this file with your catalog if you need to move it to a new location. This file is also now included in the built-in catalog back up function.
Introducing Masking -Lightroom Classic, Lightroom, and Adobe Camera Raw
Look for the new masking icon in all three programs. One click will open the new masking panel that provides access to the newly renamed Brush (formerly, Adjustment Brush), Linear Gradient (formerly, Graduated Filter), and Radial Gradient (formerly, Radial Filter) bringing consistent names to the same tools found in all three programs.
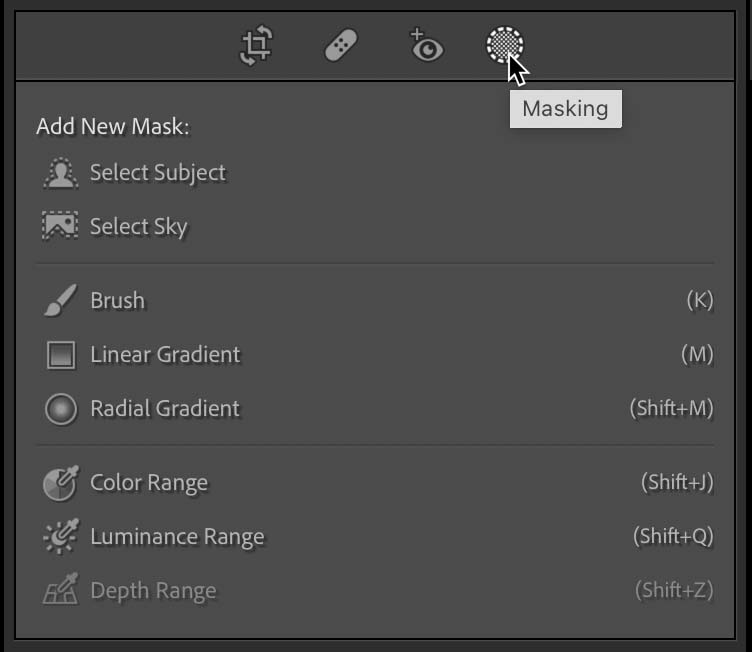
In the previous version we could only add what was called a Range Mask to an existing local adjustment tool to refine what part of the photo was being affected by the adjustment. In this new version of Masking, we can apply Color Range, Luminance Range, and Depth Range masks to the entire photo if desired, or they can be used in conjunction with other masking tools to create more complex masks.
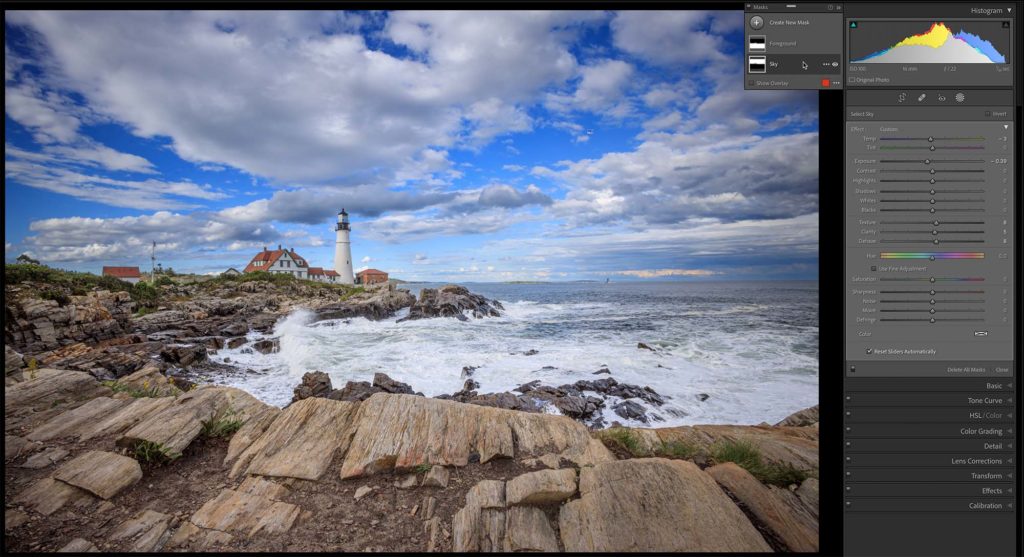
Leveraging the power of AI-based machine learning mask generation, we now have two entirely new ways to create masks called Select Subject and Select Sky, which do exactly what their names suggest. Clicking Select Sky will employ this technology in analyzing your photo to create a smart selection mask based on the sky in the photo.
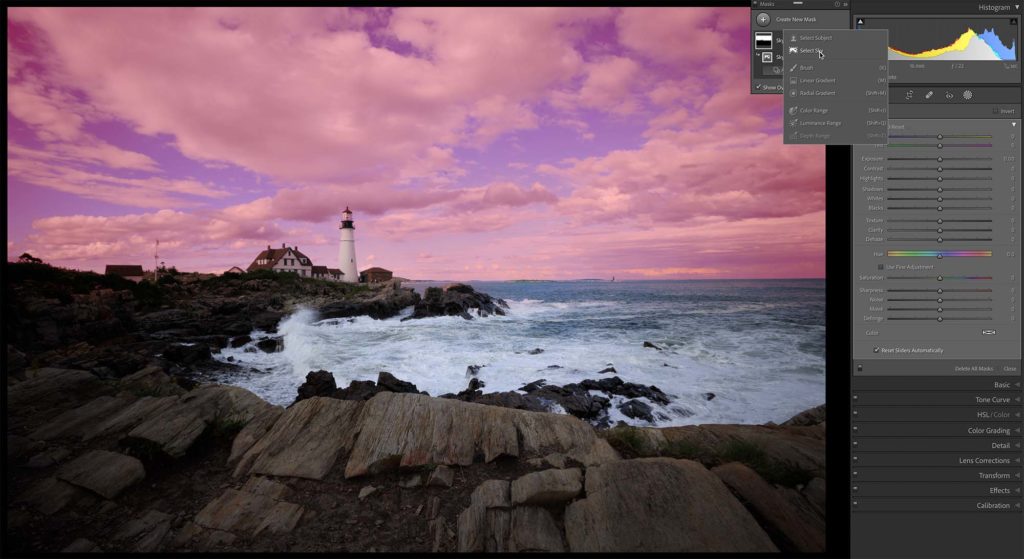
Which you can then refine using the other tools via Add or Subtract or even Invert the mask to select everything but the sky.
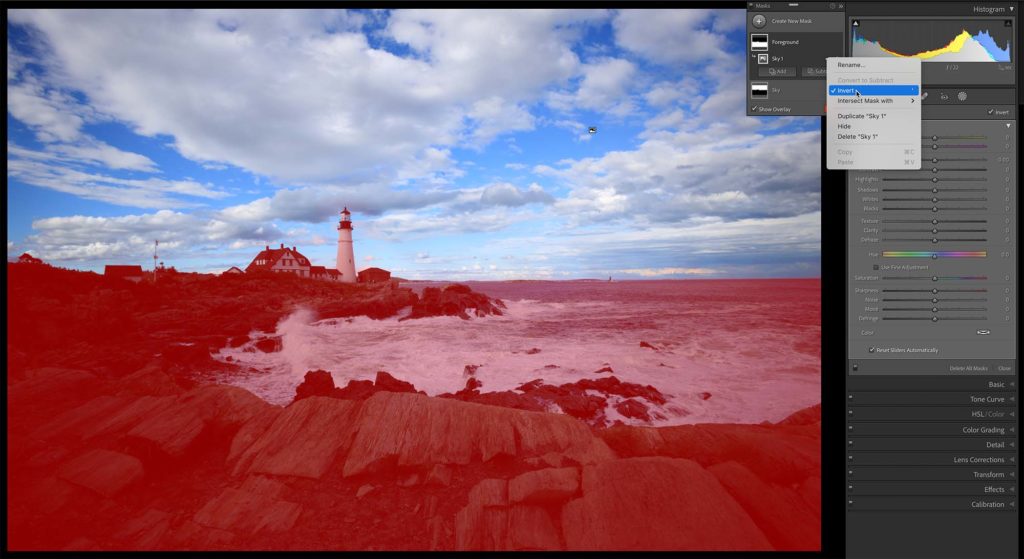
With the mask applied, you can then proceed to apply adjustments to just the desired regions of the photo without affecting the unmasked regions, just as we did in the previous version.
This is just a simple example of how we can begin to use these new tools. Be sure to check out my Under the Loupe column in this issue for a more in-depth look at the new Masking feature.
More Premium Presets – Lightroom Classic, Lightroom, and Adobe Camera Raw
We were introduced to premium presets in the June 2021 release, and Adobe continued to work with photography professionals to expand new and existing categories with over 70 additional presets. Open the Presets panel to explore the new presets under Retro, Black & White, Cinematic, Food, Landscape, Lifestyle, Travel, and Architecture for applying new looks to your photos. These presets can be used as a new starting place, a finishing touch, or just inspiration for what is possible.

Lightroom and Adobe Camera Raw also gained these new presets. Note that in Lightroom, the preset group previously named Library is now named Yours to denote that it is where you can find your own presets. The reset of the features covered below pertain specifically to Lightroom Classic.
Redesigned Metadata Panel – Lightroom Classic
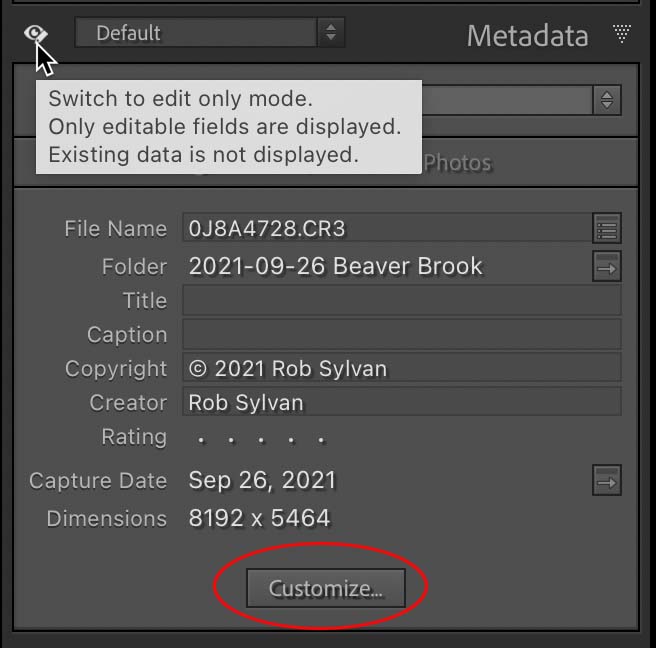
While not as exciting as the new Masking functionality, the Metadata panel got a significant redesign. First, you’ll notice that the Default view has fewer metadata fields than you may remember. This is because now you can completely customize which fields you want to display and even customize the order they appear in the panel. Click the Customize button to open the Customize Metadata Default Panel dialog box.
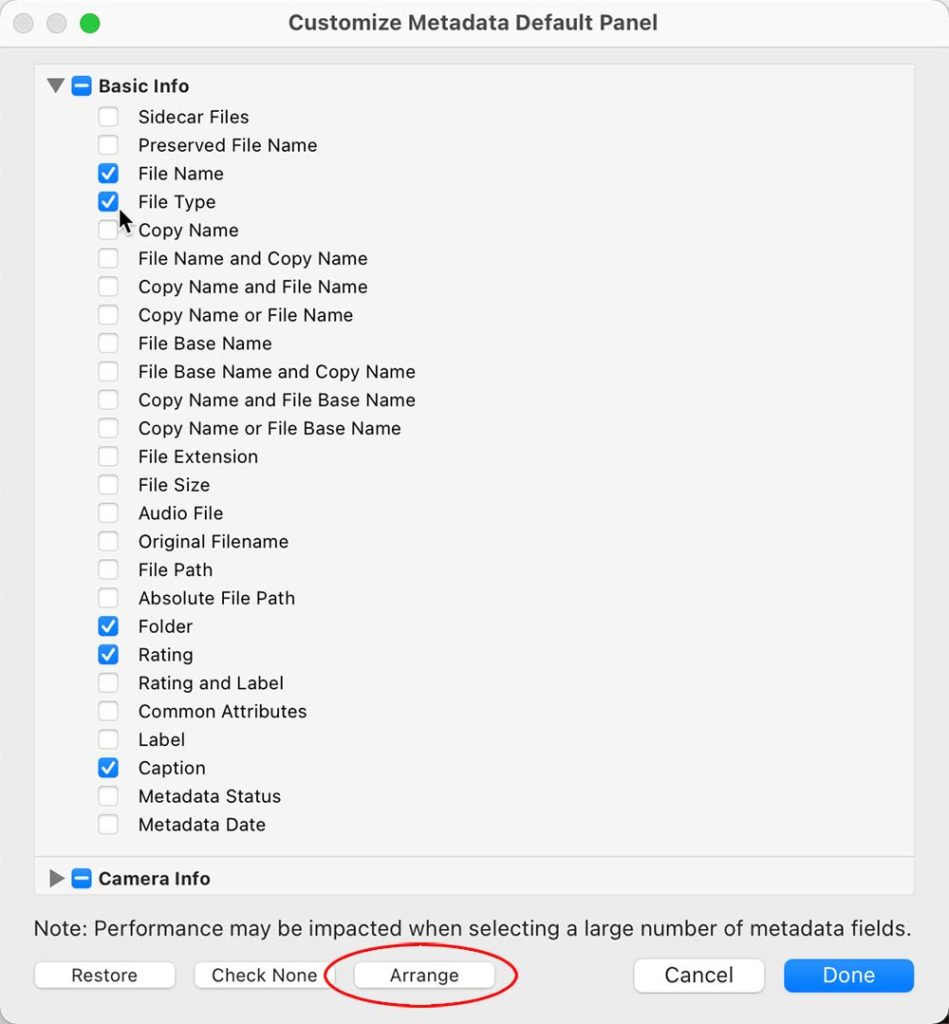
Here you can check the box next to any field you want to include and uncheck the box next to fields you don’t want to see. Keep in mind that the more fields you include the more it can impact performance. Once you’ve decided on the fields you want to include, click the Arrange button to manually place them in a preferred top-down order. Click Done to return to your newly customized panel.
New Additions to the Library Filter Bar – Lightroom Classic
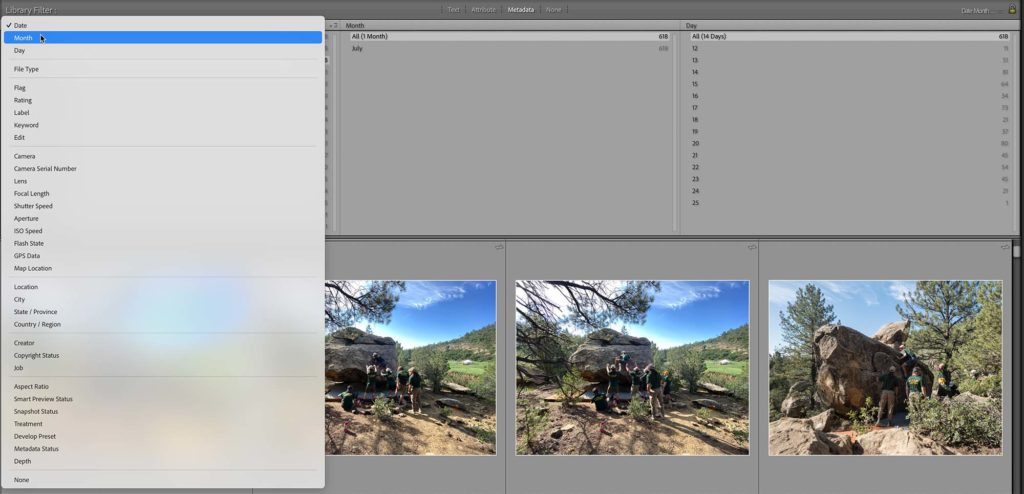
The Library Filter bar that appears above the thumbnails in Grid view is probably one of the most underrated tools for finding and filtering photos within your catalog, whether you apply it to the entire catalog or the contents of collections and folders. In this update, we gained the ability to filter on Month and Day to home in on photos from a more specific period of time.
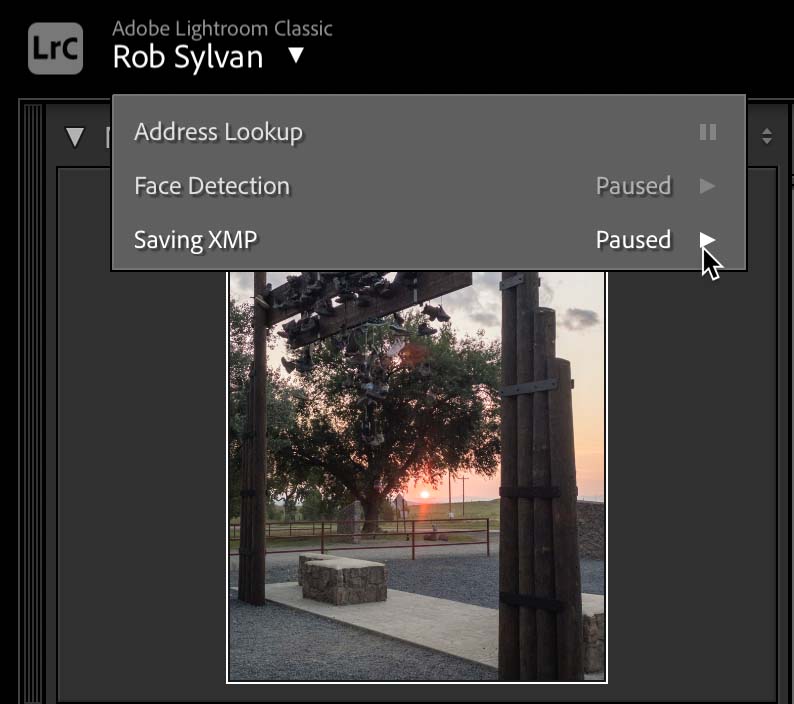
Auto Save to XMP – Lightroom Classic
If you do not have the Automatically write to XMP box checked in the Metadata panel of the Catalog Settings dialog, then this won’t apply to you. However, if you do opt to have Lightroom Classic write its changes to each photo’s XMP metadata space in addition to the catalog file, then you’ll be pleased to know that this function has been optimized in a few ways. First, it won’t start writing to XMP until after you switch to selecting a different photo (as opposed to writing to XMP while you were editing). Additionally, there is now a way to pause writing to XMP in the Activity Center if you need to for performance reasons.
New Camera and Lens Support – Lightroom Classic, Lightroom, and Adobe Camera Raw
As with every update and new version released, we’ve also gained support for new cameras and new lenses. You should also check out Adobe’s own HelpX pages to learn more about what’s new.
The post Today’s Lightroom Update, with its New Masking Feature, is an Absolute Game Changer! appeared first on Lightroom Killer Tips.