New Features in Lightroom Classic June 2020 Release.
This is quite a big release for Lightroom Classic. Check out the video to see the new features and learn how they work. Let’s take a look at the new features now. Remember, the processing engine is the same as Camera Raw, so when Lightroom gets an update in the develop module, so does Camera Raw. I have covered that big ACR update in the Photoshop release article.
First up in the Branding change. LrC for Lightroom Classic. The CC is gone in the name, so the previous Lightroom Mobile, that was Lightroom CC is now just called Lightroom. This is the original Lightroom, LR 1-6. then CC for a second, then changed to Lightroom Classic recently, and it still is Lightroom Classic. Not confusing at all, right? All you need to know, is that the Lightroom you have always known, the one the pros use is Lightroom Classic. The new Lightroom, is the one that was formally known as Lightroom Mobile.
The Creative Cloud logo has also changed to a rainbow color.

The new features
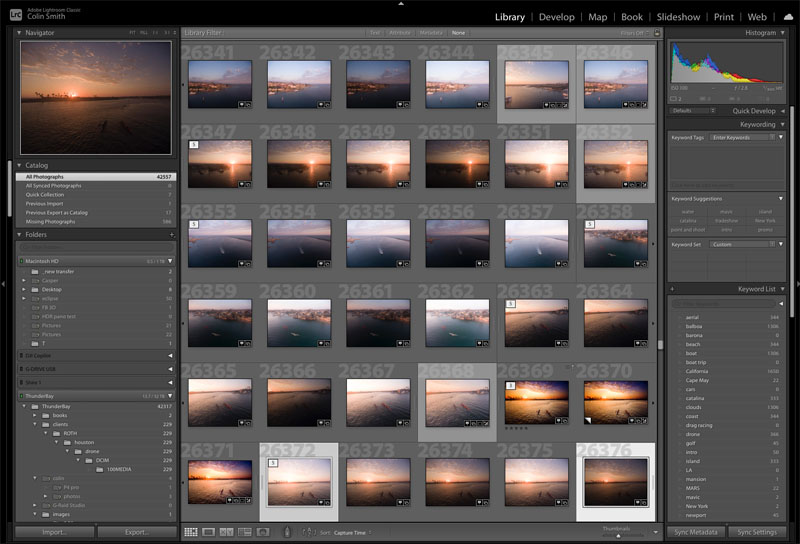
Grid Optimization for faster scrolling.
A lot of work has gone into optimizing performance in this release and the grid view is a recipient of that hard work. You will notice that the grid view scrolls much smoother than before. You can also use the up or down arrow keys to scroll through the grid.
Edit Sliders Performance improvements
Another area you will see speed improvements is processing. While you move the sliders, the main view is updated in the realtime, the thumbnails in the film strip and Navigator, don’t update until you release the slider. This puts performance where you need it.
New UI for Curves
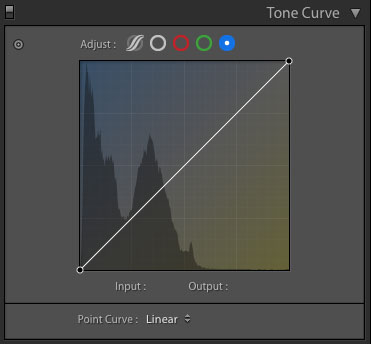
You will notice that the curves panel has been modernized, with simpler buttons to go between parametric and point curves. You can also get into the color channels easier and there is color hinting in the color channels to show what colors are affected.
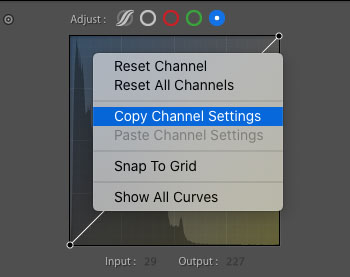
If you right -click there are also new options. New Right-click options
You can use the Keyboard arrow up and down arrows to adjust the curve.
There are IO textboxs, so you can enter values.
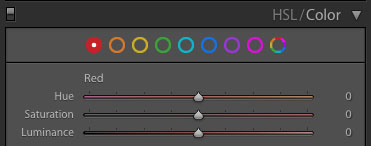
Color panel UI update
The color panel has new buttons
Local adjustments Hue Slider
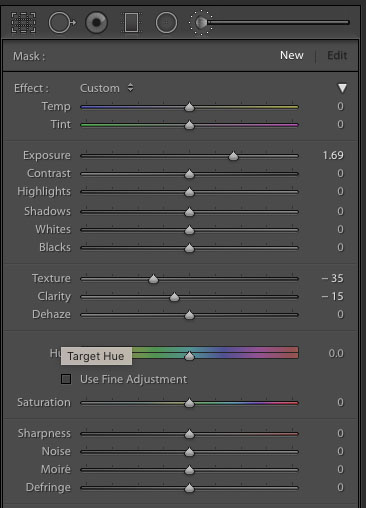
This one is really neat. There is now a hue slider for the Adjustment Brush, Gradient and radial tools.
If you move the hue you can change the color of the selected area. If you click, Use fine adjustment, the slider will move slower, this is good for fine details such as shifting skin color to remove sunburn etc. (TIP: Hold down Alt/Option key to evoke Fine Adjustments).
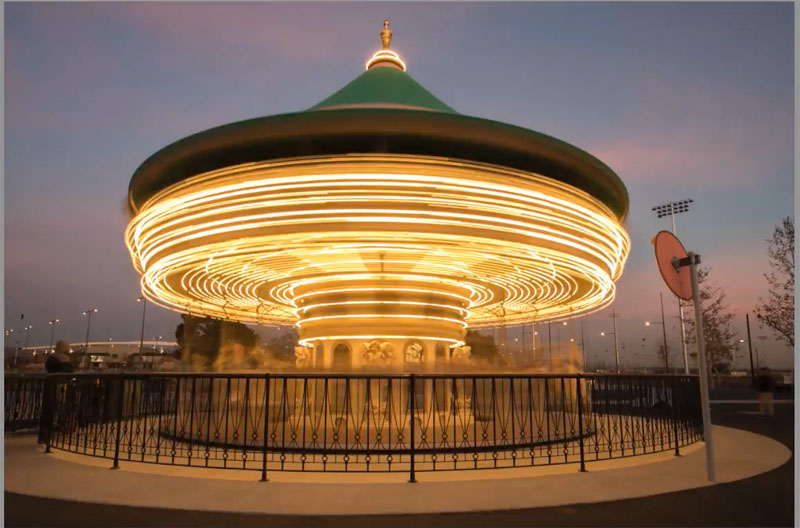
Here is a carousel that I photographed in Great Park Irvine.
Select he top with the adjustment brush. It’s red because show mask is on.
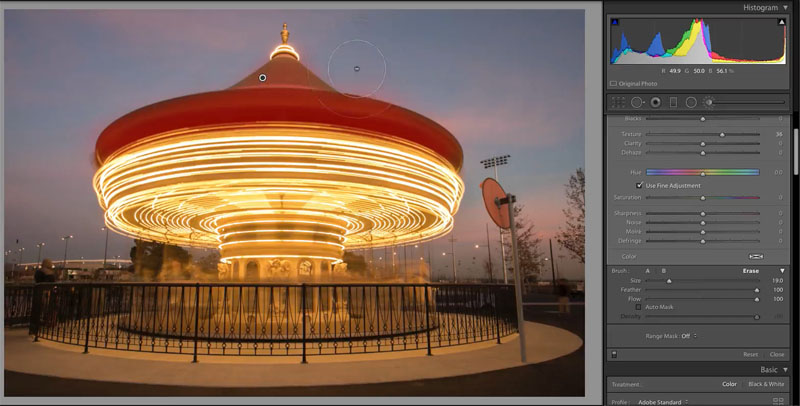
Hide the mask overlay. Move the hue slider to change the color.
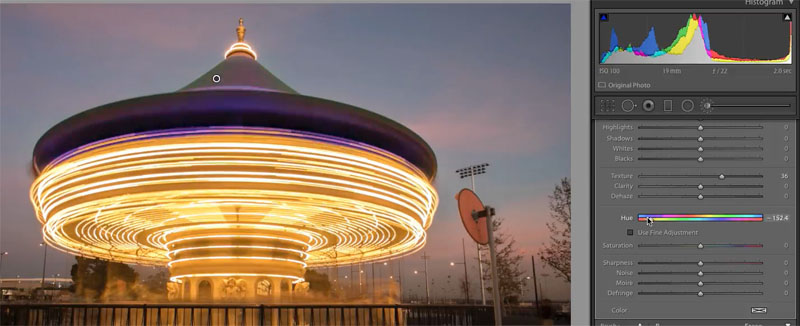
As you move hue, you can keep changing the color.
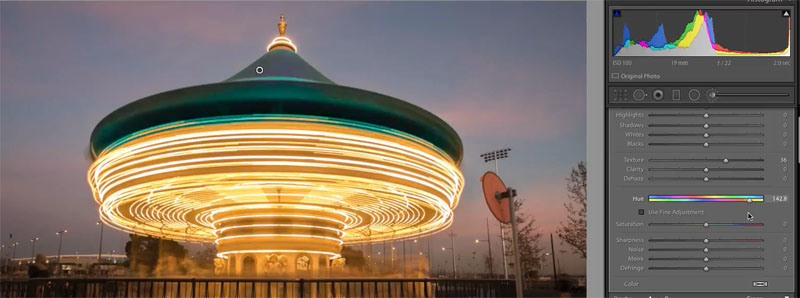
Paint on different parts of the photo to change colors, such as the back of the mirror.

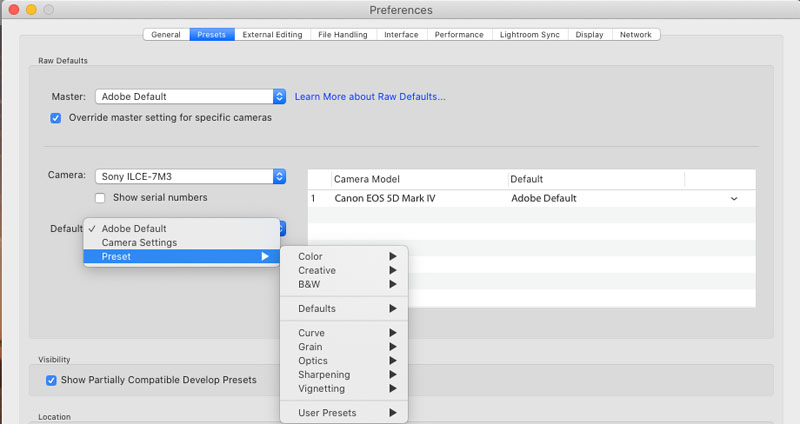
New RAW Defaults, and the ability to set per camera.
When you import RAW photos they are all in Adobe color profile. This was the default. Now you can change the default to the camera settings, or you can change by camera.
Choose your cameras from the list and choose the profile you want to use. Whenever a RAW file is imported from a selected camera, it will use the assigned color profile, even a preset. If the camera isn’t in the list, it will take the Master preset at the top.
ISO adaptive presets
This is a really amazing feature. Usually a preset adds the same settings to any photo. This one looks at the ISO on the photo and can apply different settings depending on the ISO.
As you may know. When you shoot a photo with a very high ISO, there is more noise “grain” than a photo with a low ISO. So you might apply noise reduction to the high ISO image, but you don’t want it on the low ISO one or it will overly smoothen the photo. The preset can adapt. To make an ISO adaptive preset, you need to select at least 2 photos with different ISO.
Say you have 2 photos, the first with ISO 1,000 and another at ISO 100. Sync the settings (existing presets works too) and set the noise reduction to 50 on the ISO 1000 image and the noise reduction to 0 on the ISO 100 photo. With both photos selected, press the create preset button and turn on “ISO adaptive Preset” at the bottom of the new preset window.
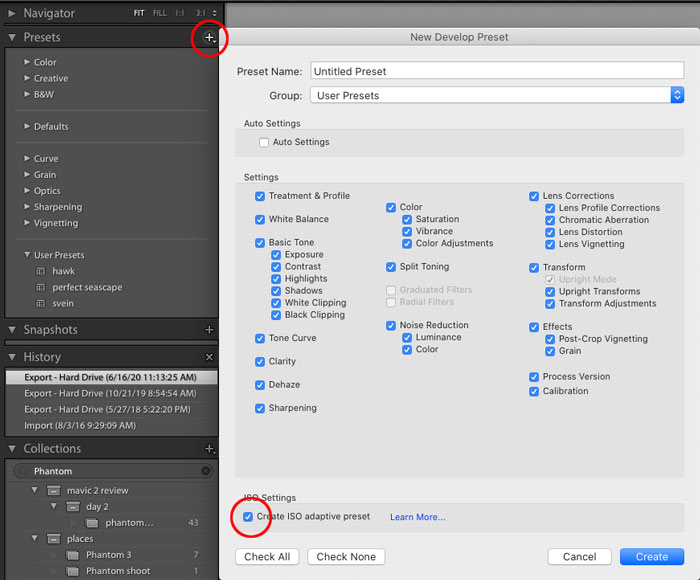
Now when you apply this preset to any photo of ISO 1000 it will apply a 50 NR setting. If you apply the preset to a 100 ISO image, it will have a 0 NR setting. Its smart, but even smarter.. If you apply the prset to a photo shot ay ISO 500, it will apply a NR setting of 25. It adapts for the ISO of the image and proportionally applies the settings. If you don’t quite understand, watch the video at the top of the page.
Sync UI
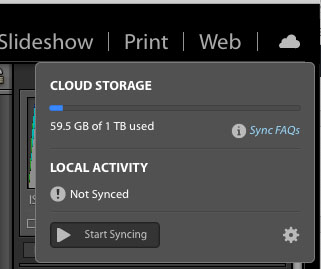
On the top right, you will see a cloud. This i the Sync UI. The cloud will change to reflect the status of syncing photos with the cloud )you can turn it off if you wish as well).
Click on the cloud and a panel will appear with details.
Collection search
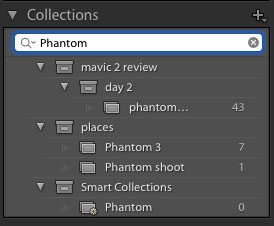
As the name applies, you can now search your collections.
If you have lots of collections, like I do, it can really simplify sorting and finding.

Multi batch exports
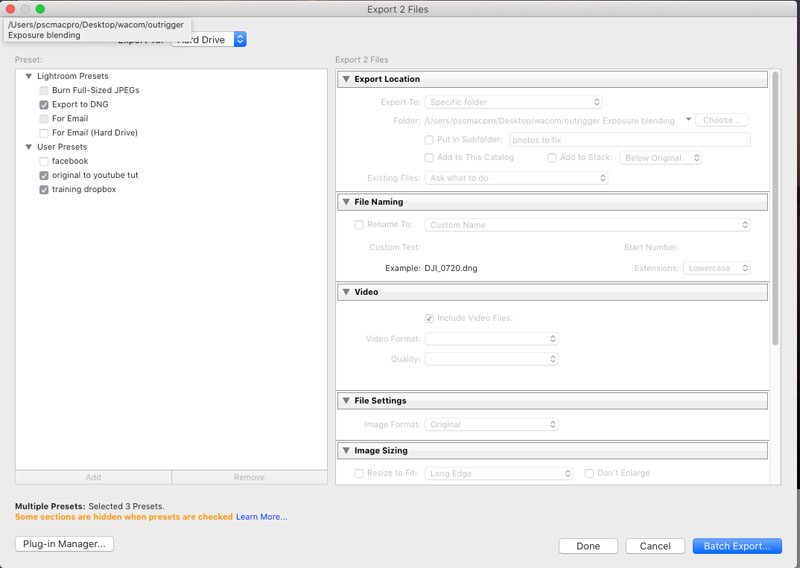
When you export multiple photos, this is known as a batch export.
If you make export presets (it’s really easy to do) you can select these presets for exporting.
Now you can select multiple presets and export into multiple formats at once. You can even choose different naming for each one.
Thanks for checking out this guide, I hope you found it helpful. See the new feature guide on Photoshop 21.2 June 2020 update, new features
Lightroom Classic For Digital Photographers
I am also releasing a new version of my comprehensive course: Lightroom for Digital Photographers this week, so keep an eye out for that (anyone who has bought this in the past 30 days, gets a free upgrade – contact me at the support link above).
Thanks
Colin
The post Lightroom Classic 9.3 2020 June release – New features in Lightroom Classic appeared first on PhotoshopCAFE.
