
What’s new in Lightroom 12.3?
It’s April and usually around this time every year, Adobe drops updates into their CC apps. The biggest updates are usual April and around October at Adobe Max (I usually speak at the event, although I haven’t yet been invited for this year).
Lets have a look at the new features. Note, most of these are also in Camera RAW which shares the same processing engine.
Denoise AI Noise Reduction
The first feature is a noise reduction that actually works, and works well. Its not without its caveats at the moment, see more about that on the dedicated tutorial I made on Denoise.
When you shoot with a high ISO you can get a lot of noise of grain in the image, especially the shadows.

Under The Detail panel you will see a new option that says Denoise. (Currently only works on Bayer and X-trans raw files)
Click on denoise (If it isn’t grayed, out. If it is grayed out, its not a Bayer or xtrans. Most DNG do not work at the moment. Adobe says they are working on it. No estimated date is given.
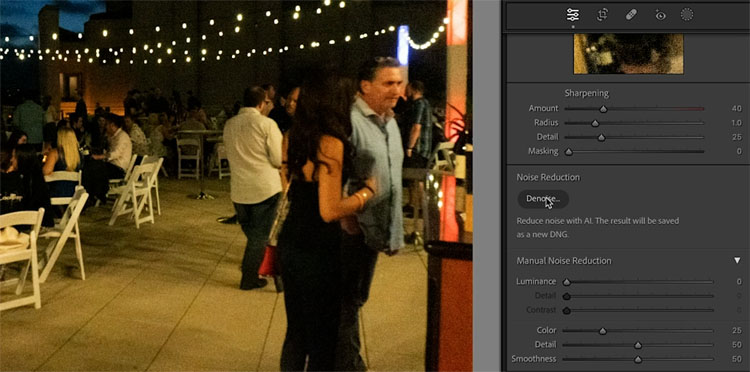
A panel will open with an amount slider. Mine shows an estimated time of 10secs. I have heard from some users, their estimated time is up to 10 minutes. Again, Adobe is aware and working on it.
Click enhance.
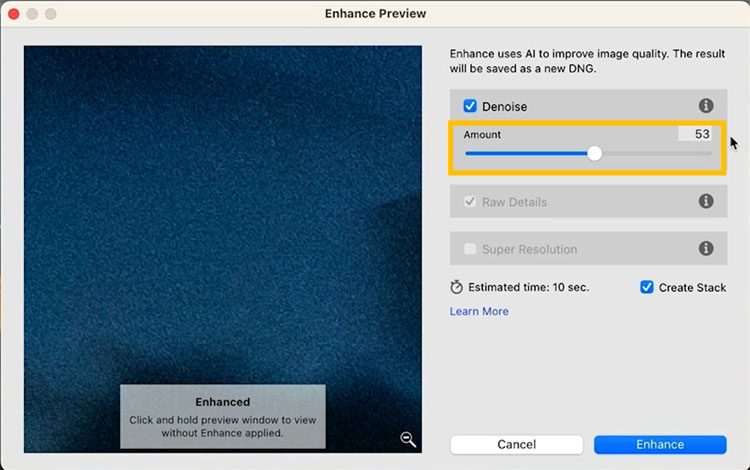
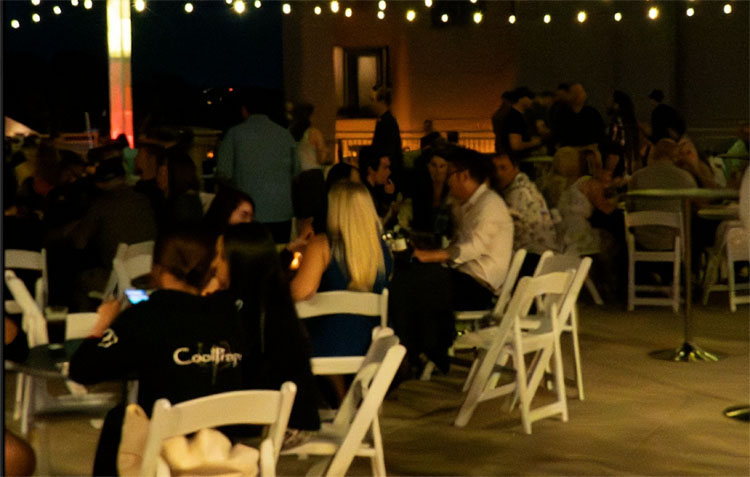
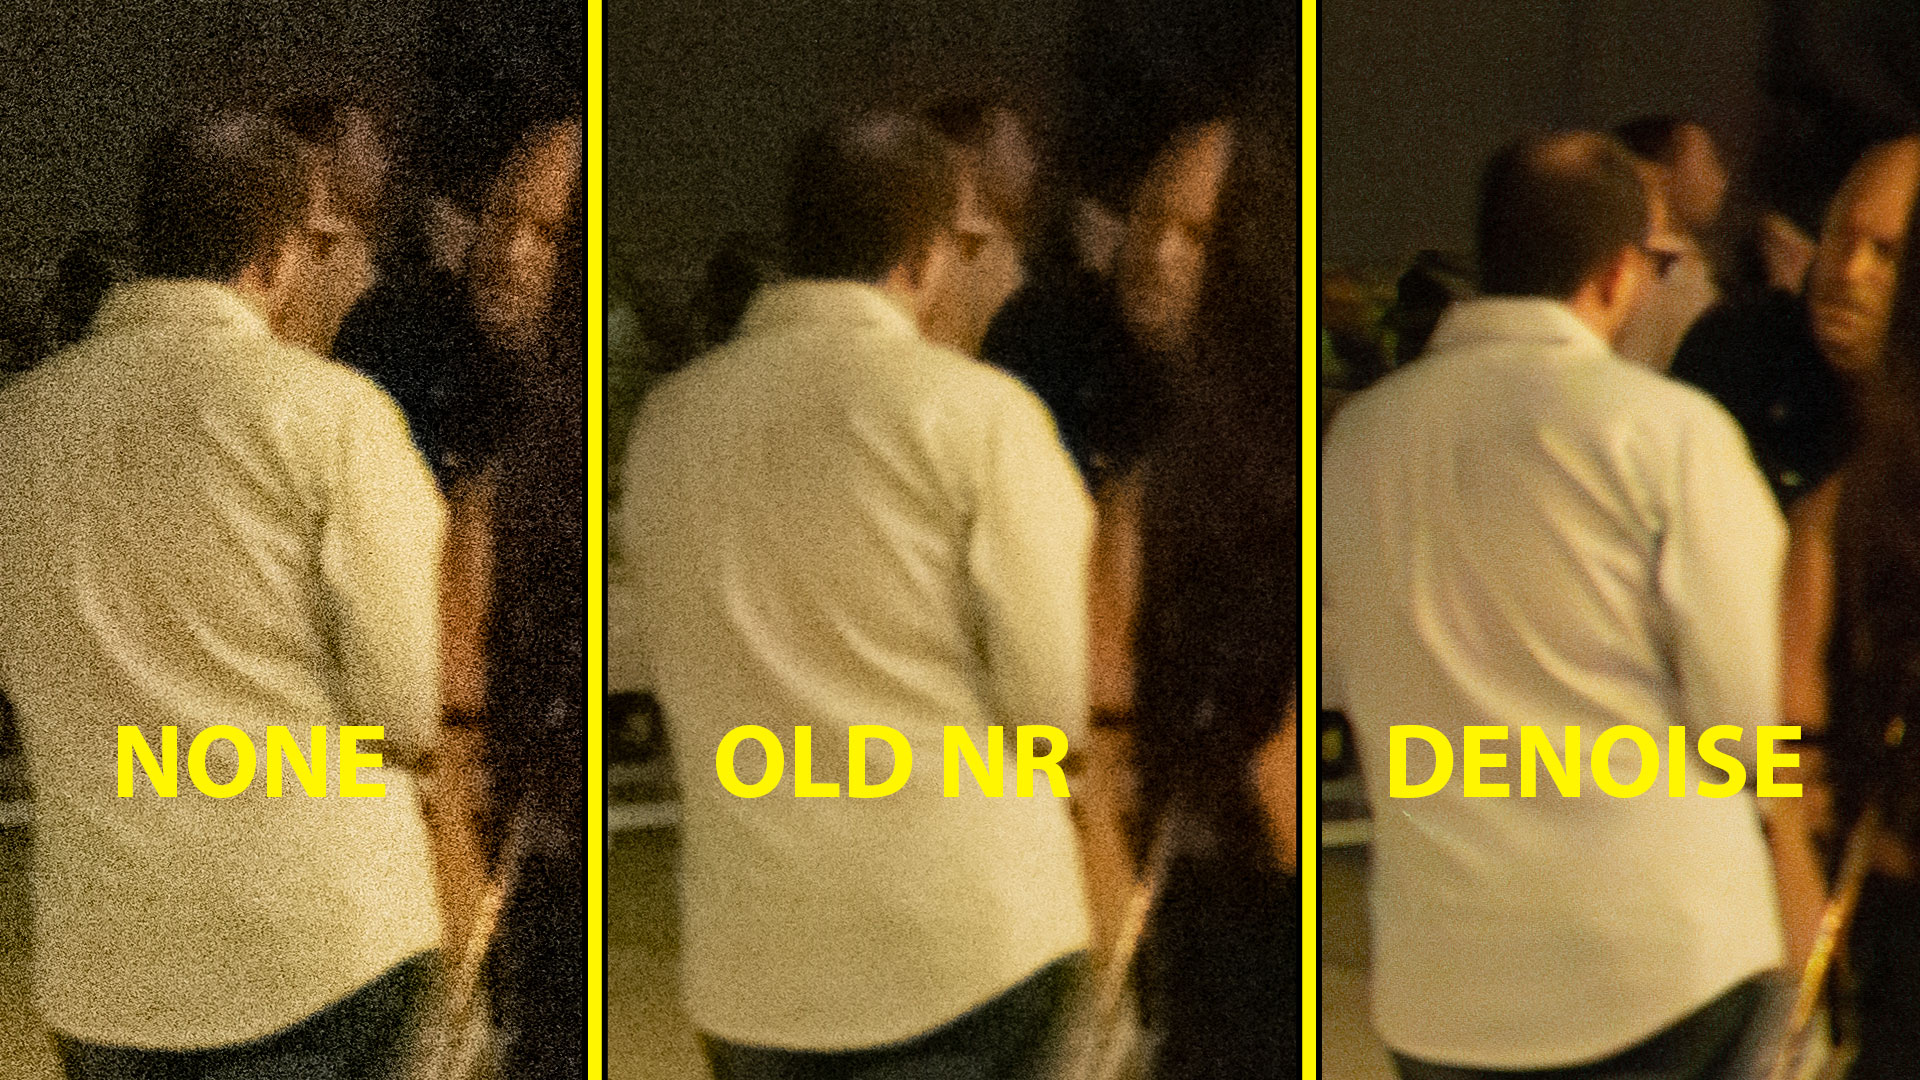
A new DNG file will be created with the Noise reduction applied. It works VERY well, as you can see below.
The manual Noise reduction is still available, you can see the difference here.
Yes, these can be batched processed, covered in my other tutorial, referenced earlier in this article.
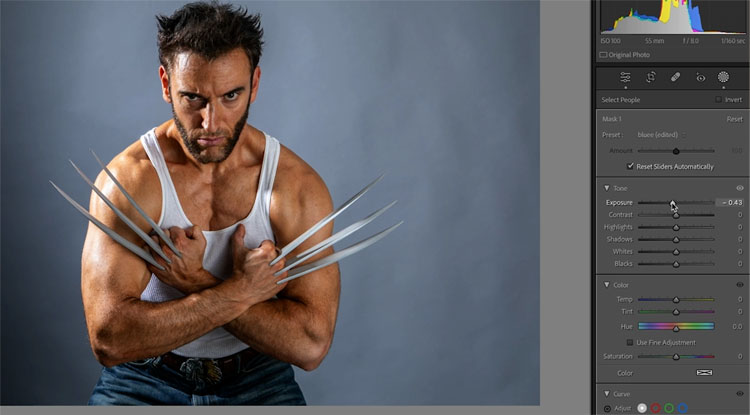
New AI Masks in Lightroom and Camera RAW
By now, I’m sure you are aware of the AI masks. (I have made other tutorials on the ai masks) There are 2 new masks in the Person options.
Click on masks.
When a person is detected, you will see person 1. (more if there are multiple people).
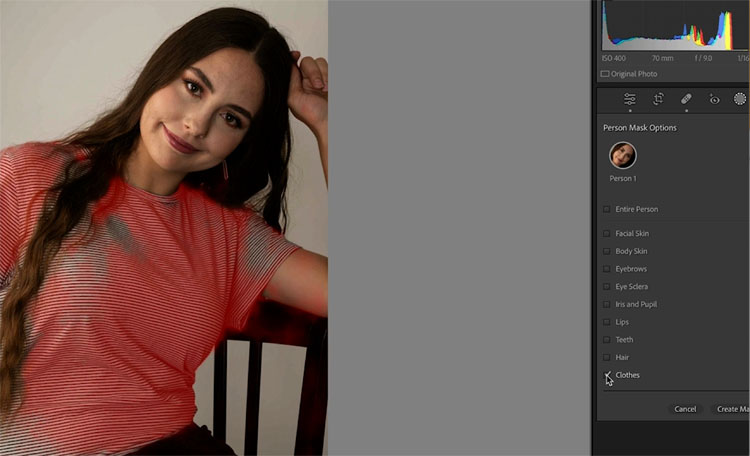
Click on Person and you will see Facial Hair ands Clothes are now added.
Let’s start with the Facial Hair.
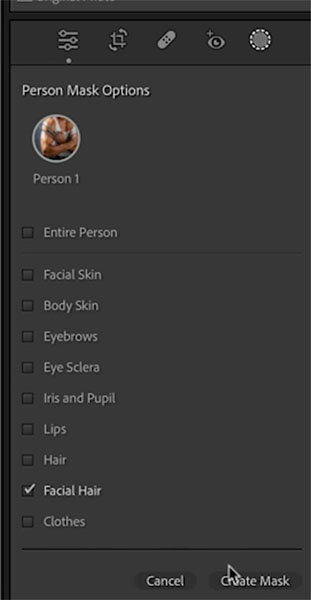
This will select beards and allow you adjust the beards. Usuallylighten/darken or change color.
The second option is Clothes.
At this time, the clothes setting doesn’t seem to work too well on my machine. I noticed it confuses different articles of clothing and mistakes arms for sleeves etc. How is it working for you? Drop a comment.
The good news is that, its really easy to fix the masks by using the add and subtract options with the brush.
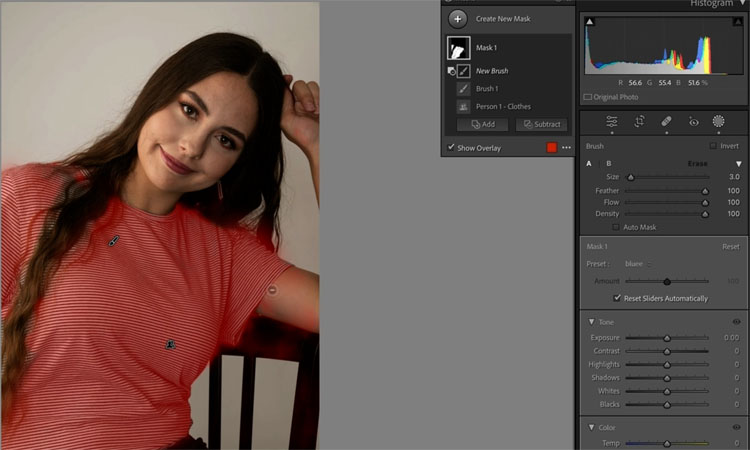
Now you can easily change color or make other adjustments.

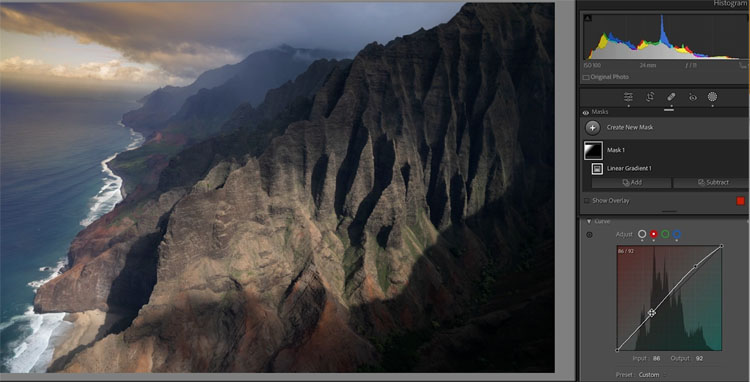
Curves on Masks
This is a huge one! Camera RAW already lets you use Curves on masks, but it was missing from Lightroom until now. Curves offer more precise color and tone adjustments than any other tool. Yes, I said color, curves secret Superpower. I made a whole course on curves here, they are THAT important.
Add a mask, in this case I used a Gradient.
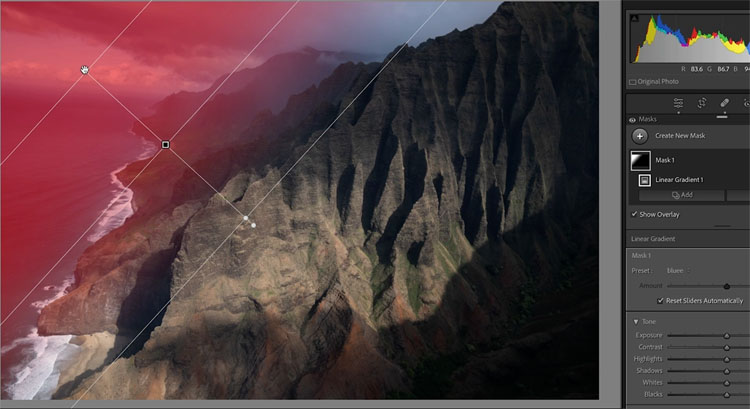
Make tone and color adjustments. Yay, my life is complete 🙂
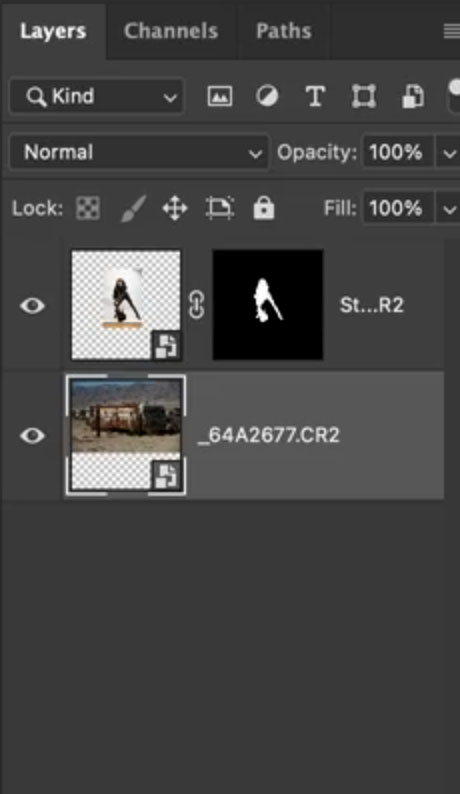
Open Multiple images as Smart Object Layers in Photoshop
If you work with multiple images, such as compositing, focus stacking, astro etc, you will love this feature.
Select multiple images.
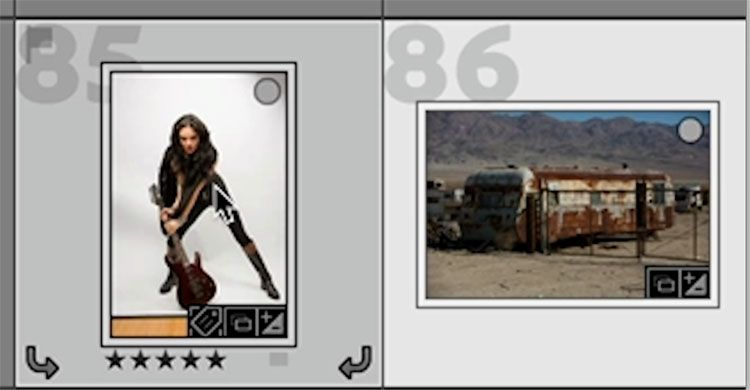
When you Right-Click and Choose Edit in> You now have the option to choose “Open as Smart Object Layers in Photoshop”
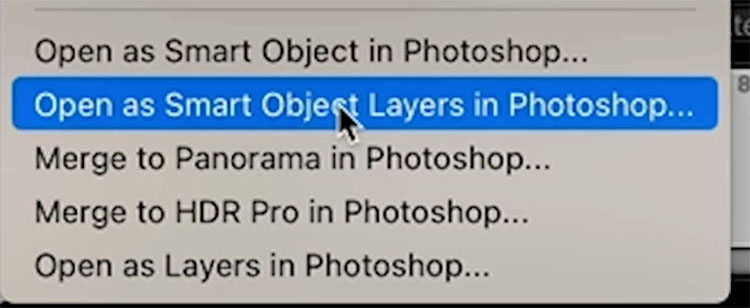
This will launch Photoshop and place each image on its own layer as a Smart Object.
The Smart objects, apart from being non-destructive, allow you direct access to your Lightroom Adjustments. Double click any of the Thumbnails and they will open the RAW file in Camera RAW with all adjustments intact.
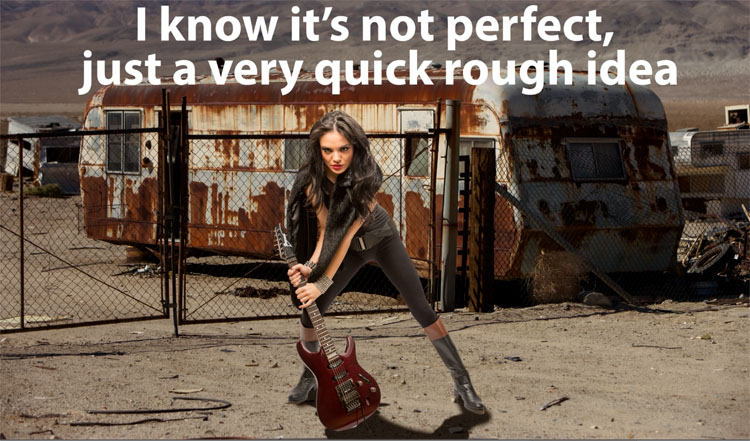
This makes it easy to do composites and such with much more control than in the past. Below is not supposed to be a masterpiece or perfect (I know, the lighting and shadow aren’t right. I didn’t take time to dodge and burn it. Please don’t bother pointing that out, as it doesn’t matter here — Yes, people can’t understand the difference between a tutorial and my real work, my pet peeve) , I just quickly wanted you to see that you can combine images together in a completely non destructive environment.
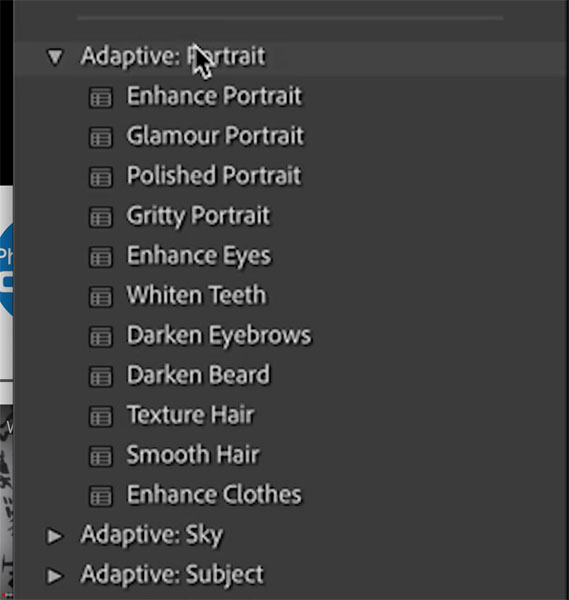
New Adaptive Presets
Lightroom and Camera RAW ship with more adaptive presets that take advantage of the ai masks
Panel indicators
On the panels you will see eyeballs that are lit up if there are any adjustments made. You will also notice the dots in the tools, if any of those tools are used. No change in Camera RAW, as this feature was already in there.
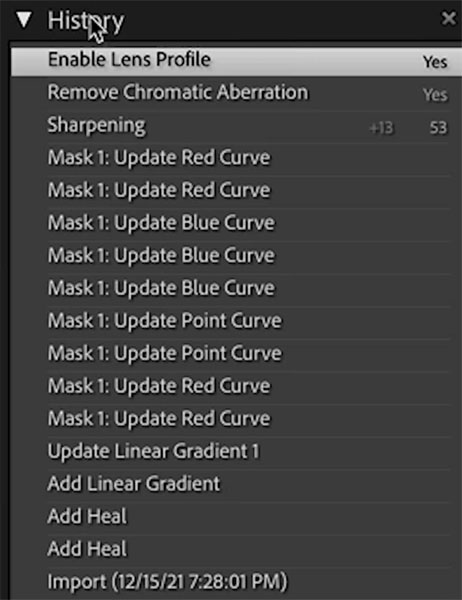
Mask History Steps
You will notice the mask adjustments are now added to the history panel, to help you backtrack and multi-undo.
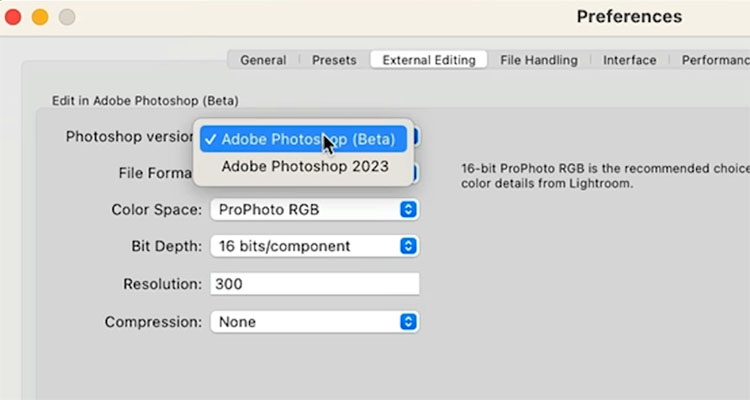
Choose Photoshop Versions
If you go to your Creative Cloud app, you can have multiple versions of Photoshop on your machine at once. Some people keep older versions for access to things like the 3D tools or compatibility with certain plugins. You can also Install the public beta of Photoshop from your CC app. If it’s not there, please contact Adobe as there is nothing I can do about that (I get asked daily and wish I could help more).
Under Preferences, you can choose the Photoshop version. When you choose Edit In, it will use your selected version of Photoshop to work with.
Alright, that rounds up the new features. Ill be adding more dedicated tutorial on some of these features. Make sure to check out my denoise tutorial here.

For a limited time, take 20% off these courses with code CC23NF (These courses are how I fund everything here at the CAFE, notice that there are no ads)
Thanks for checking out this tutorial and all the other tutorials here at the CAFE
Colin
The post Lightroom New Features April 2023 update v12.3 appeared first on PhotoshopCAFE.